
Finger Economy
The fewer fingers required for the chord, the more fingers you have available for building a melody around that position.
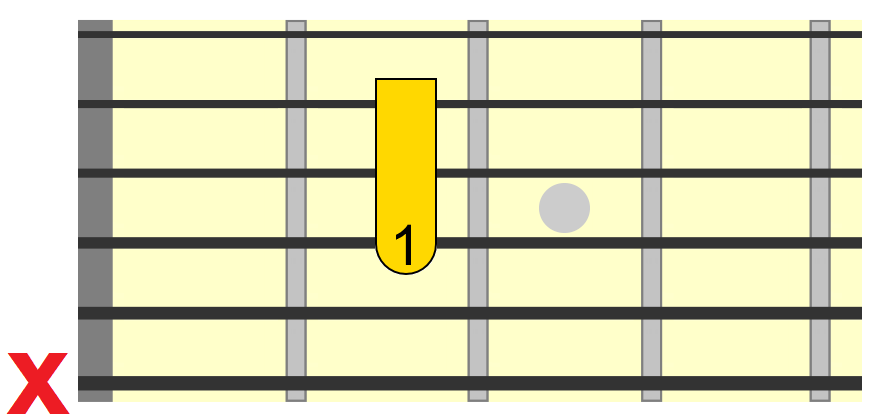
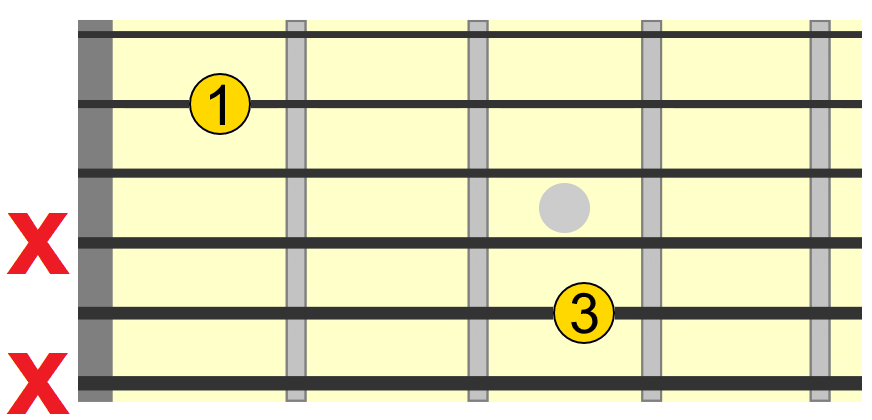
Using a barre can help with this, such as with A major, with a barred index finger...
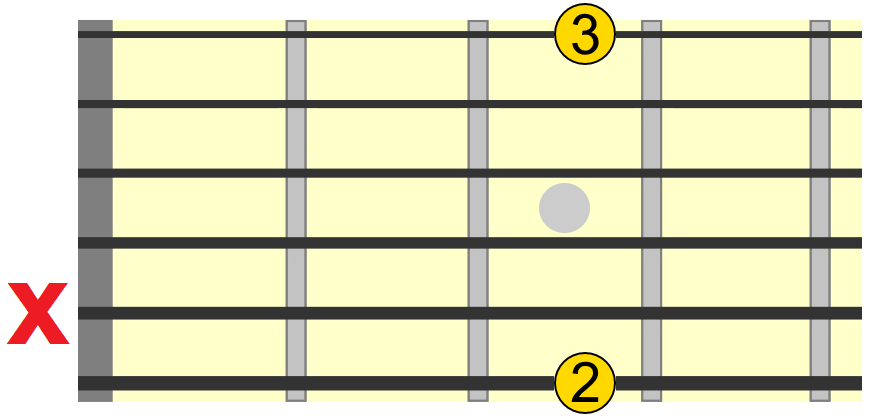
And D major (or Dmaj7 to be precise)...
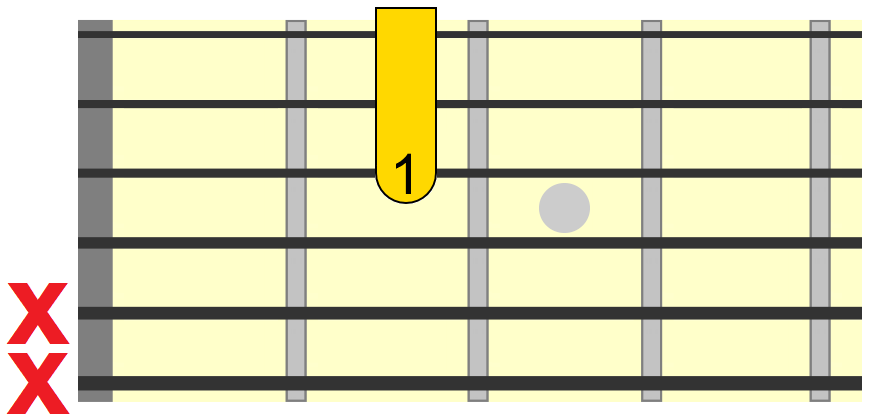
So in both these chords, your index finger becomes the "base" of the chord structure and you are free to build a melody on proceeding frets using your 2nd, 3rd and 4th fingers.
For chords with a 6th/low E string bass, some players find using their thumb to fret the 6th string bass is an effective way of freeing up an extra finger. However, depending on how you're built (or how fat the guitar neck is), you may find this even more restrictive, as the leverage in your fingers can be compromised from curling your thumb over the neck.
The thumb should be positioned around the back of the neck for maximum fret-hand leverage. But as always, find what's most comfortable/convenient for you!
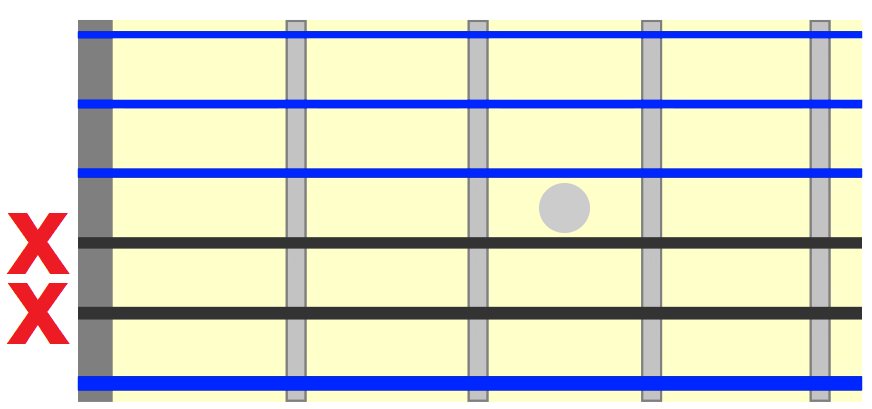
You should also be aware of how each chord you play can be reduced to its most important notes/strings. For example, E minor can be played without fretting any strings. Just leave out the 4th and 5th strings...
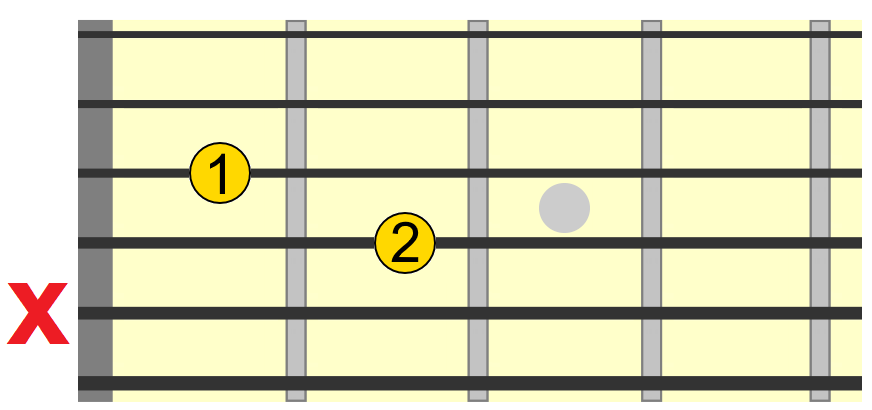
E major can be played with two fingers instead of the standard three by leaving out the 5th/A string...
C major can also be played using just two fingers by leaving out the 4th string...
Of course we can always add in the unused strings as part of the melody. But just knowing that you can free up your 2nd finger from the standard shape and not ruin the chord is useful.
A lot of the experimentation around this technique will involve economising your chord fingering to accommodate these melodic movements. In short, don't be afraid to change your fingering, even switch fingerings as you play, to allow you to reach new places on the fretboard.
Allow yourself some flexibility with which fingers you use to play certain frets/notes, depending on the situation at hand.
One String at a Time
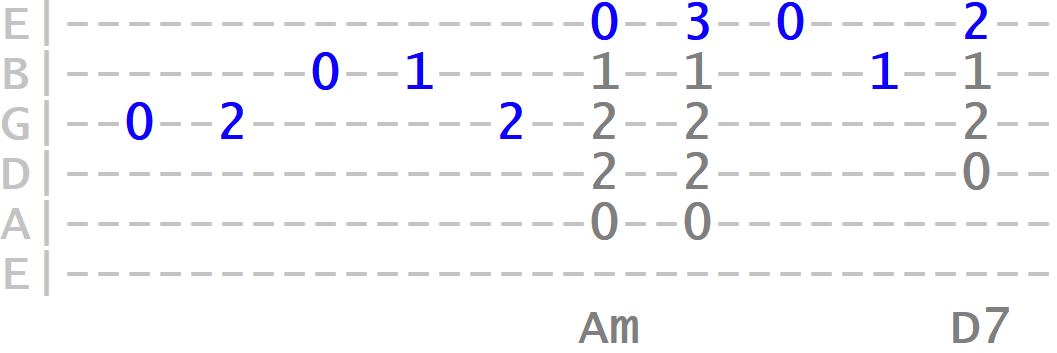
Let's begin with A minor, which I'm sure you're familiar with...

We could of course simply strum/pick this chord as normal. But to make it more interesting, we could choose a single string from the shape and create a simple movement using two or three notes.
In the below example, I'm using the 2nd/B string, alternating between its normal A minor position (1st fret) and its open (unfretted) position, creating a simple phrase around that A minor chord shape (melody notes marked in blue)...
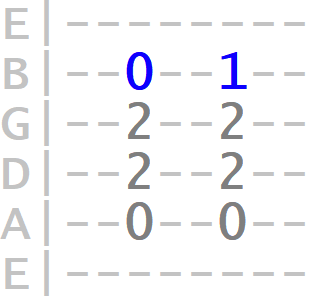
So all we're doing there is lifting and re-fretting that 1st/index finger on the 2nd string.
We could also add in another movement on the same string to the 3rd fret...

We're using our available 4th/pinky finger on the 3rd fret to help shape the melody line.
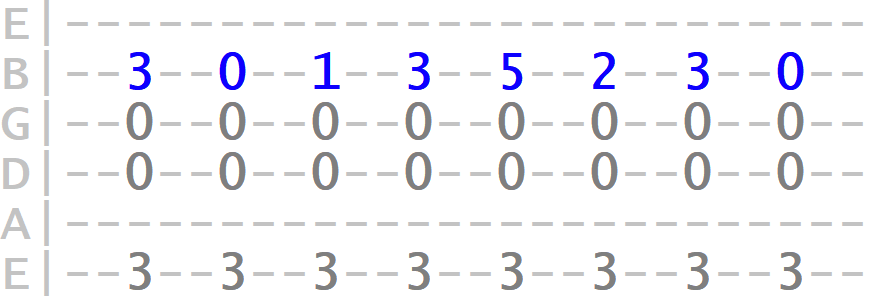
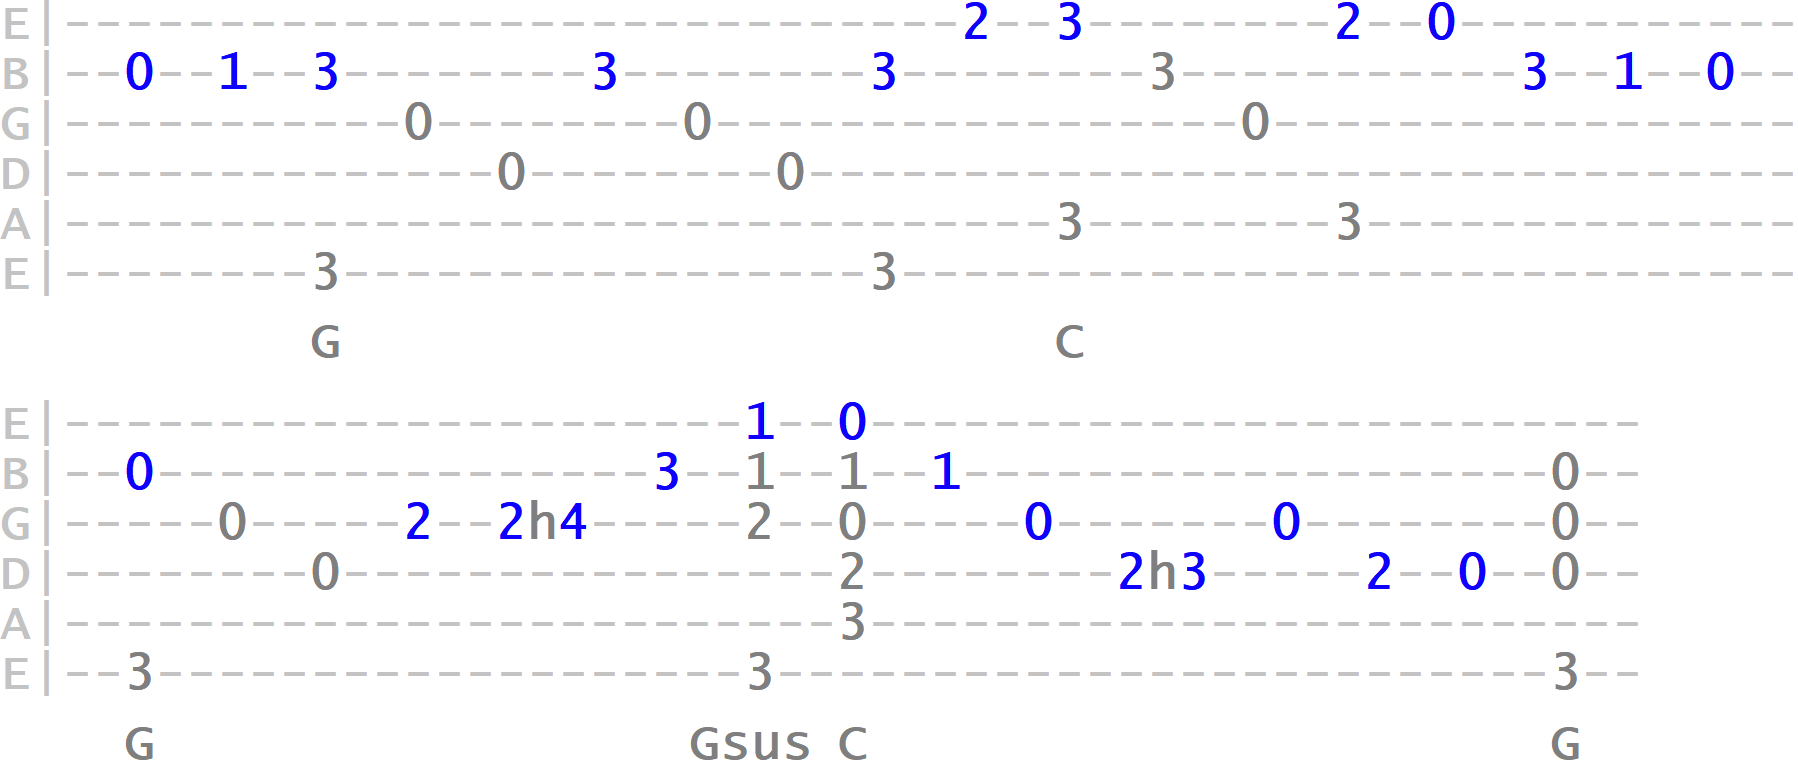
Now let's look at a two-finger variation of open G major...
Place your attention on the 1st (high E) string. We're going to try some simple melodic movements across that string while strumming or picking the chord...
There's a particular kind of muscle memory involved in moving your fingers around a fixed chord position like this. So it may feel a bit awkward at first. But like with anything, it'll get easier the more you practice and explore it.
Now let's try something similar using the 2nd string...
3rd string melody...
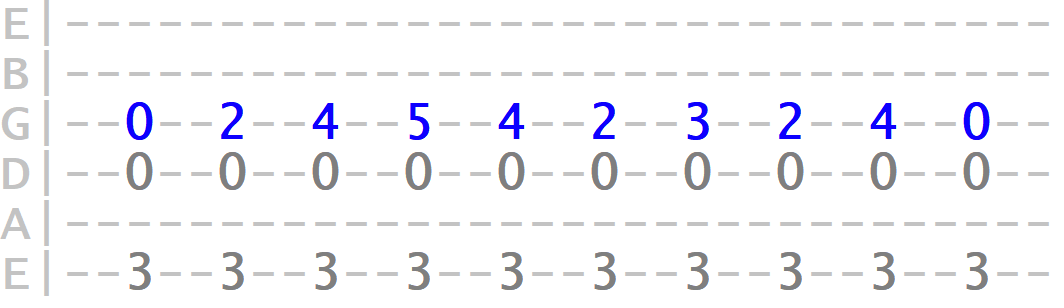
Not only is this a good exercise for developing finger dexterity, it also gets you thinking about combining your chord playing with melodic phrases, also known as harmonising the melody.
Melodic Phrasing Across Multiple Strings
Once you're confident with adding melody across single strings within a shape, try phrasing your melody across multiple strings...
In fact, this can be a good way of figuring out a suitable vocal melody for your chords.
Practice this technique with other open chords. Get comfortable with using any free fingers around the chord shape.
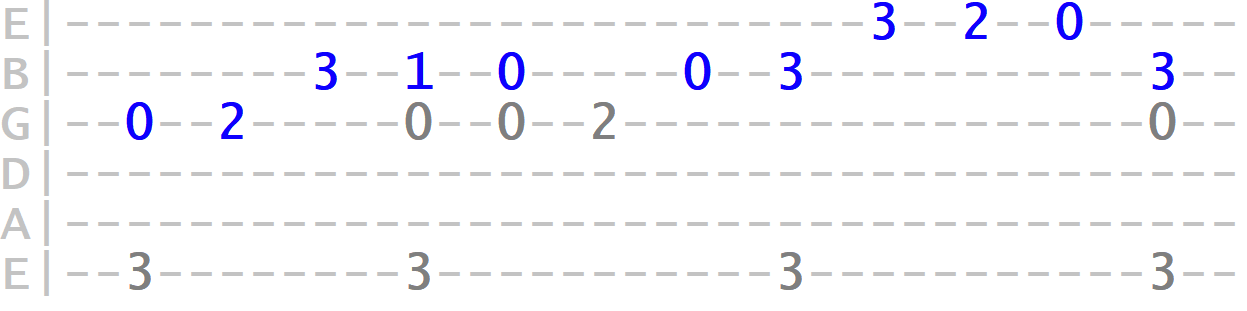
For example, here we're applying the same technique to the open A minor chord...
Tip: In that ending sequence, I made use of the A minor scale in the open position. Learning scale patterns around chord shapes is a great reference for building melodic phrases within and around your chord playing. We'll get more into that in a later part.
Legato Embellishment
We can also involve hammer-ons and pull-offs (two forms of legato or "non-picked" playing) to create more embellished chord phrases.
Below is a phrase built around the open C major chord. As shown in the video below, I'm simply hammering on the open 4th, 2nd and 1st strings to create some movement in the chord...
Faster example...
Now try adding in some pull-offs to the phrasing...
Faster example...
And just like with the lead/solo technique, we can use quick successions of hammer-pulls for more of a legato effect in our chord phrases...
Faster example...
Experiment with this technique using other open chord shapes you know and see how you can spice up those basic chords.
Once you're confident with adding melody to individual chords, it's time to work on forming melody through chord changes.
Melody Through Chord Changes
Every chord has the potential to be melodically embellished. Every melody has the potential to be harmonised.
The key thing to listen out for when trying out your ideas through chord changes is how the melody flows into the proceeding chord.
Most often, the more smoothly and seamlessly the melody flows through the changes, the better. This means in most cases, the melody will move stepwise (that is, in half and whole steps).
Many musicians like to first hum a melody while playing through various chord changes and then try to translate that melody on to the instrument.
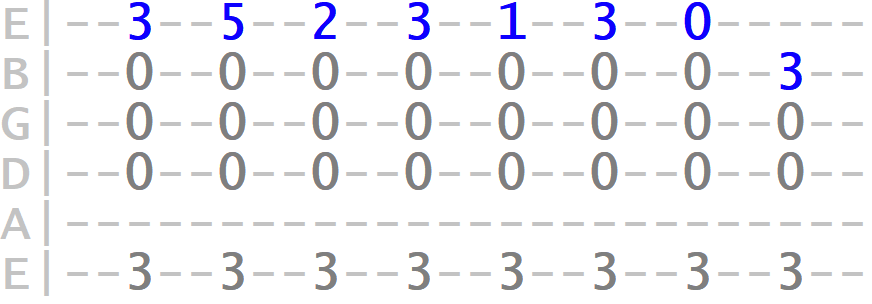
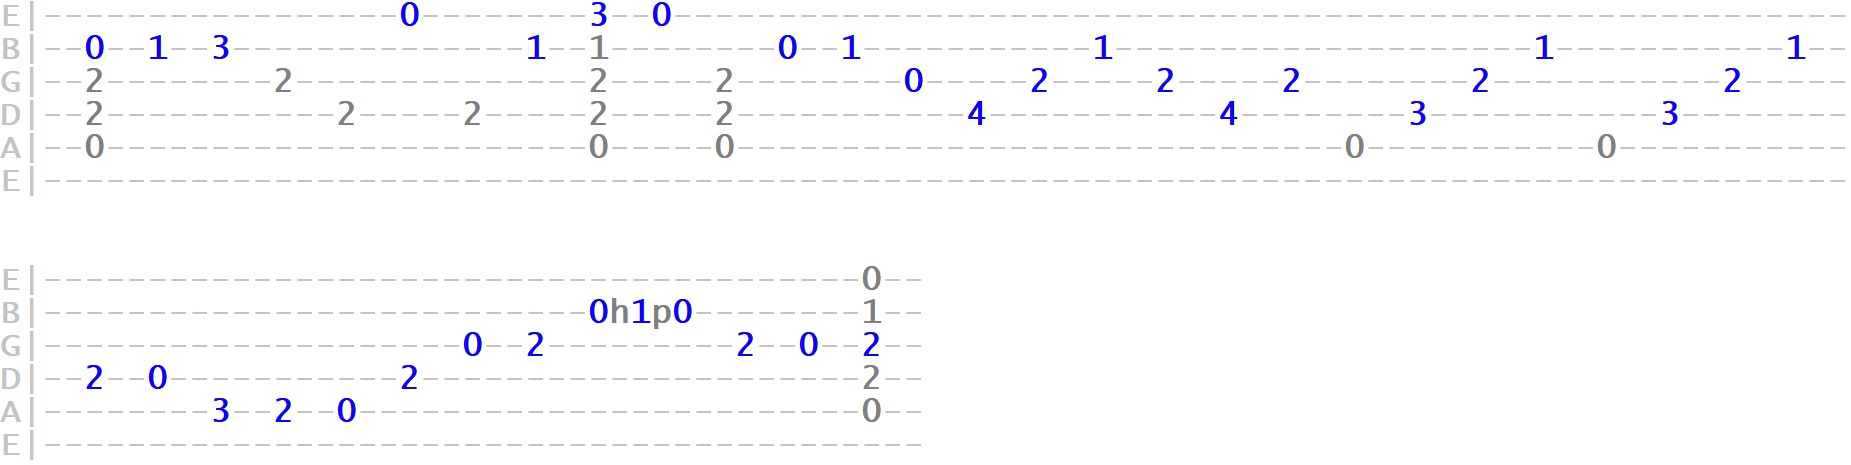
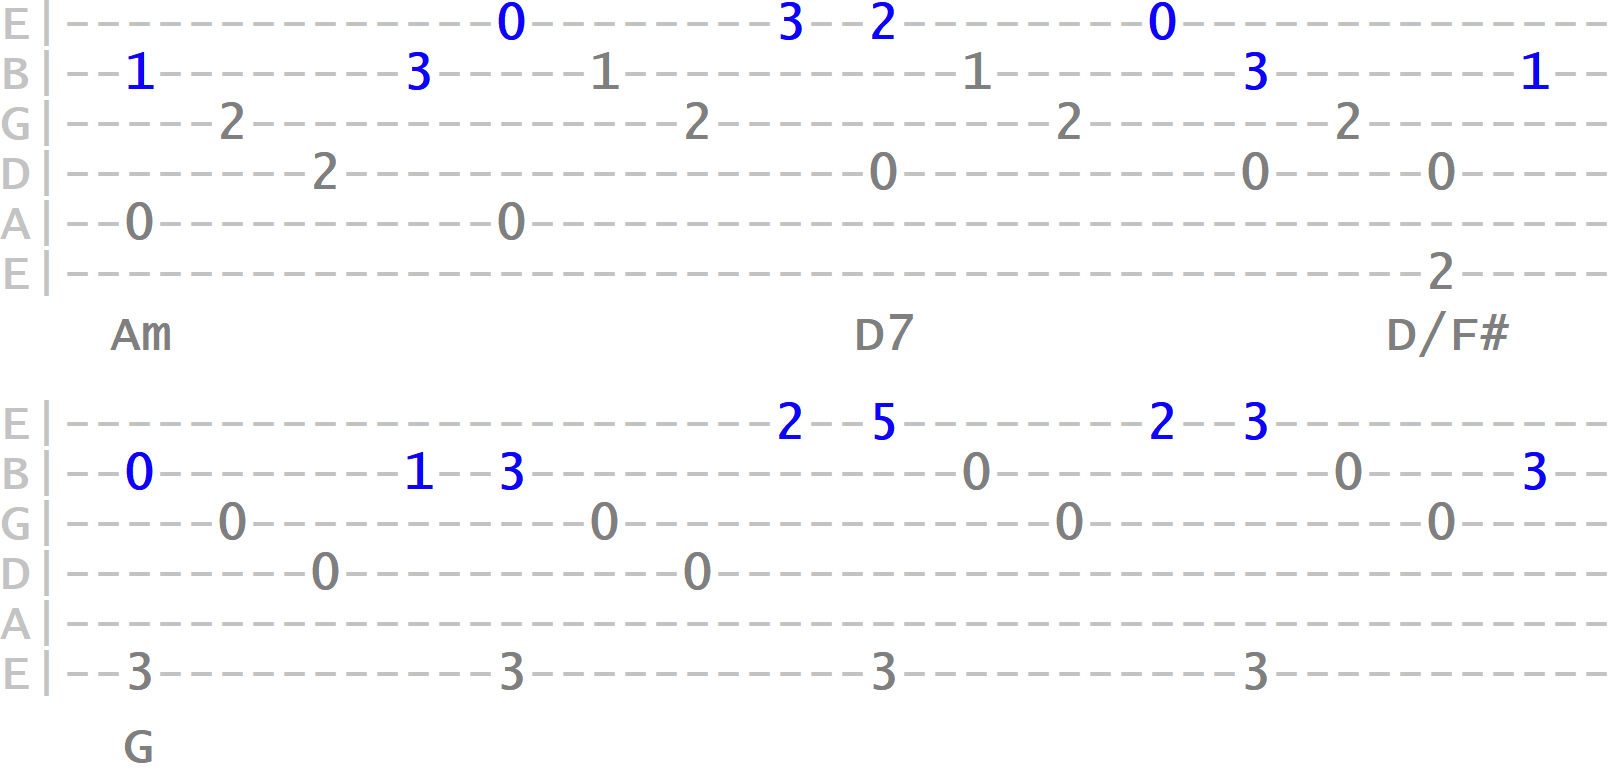
Start simple. Here I'm phrasing around A minor before changing to D major (D7 to be exact), where we strum as normal...
Remember, not every chord needs to include melodic phrasing. It's your creative decision as to when and where you apply this technique.
Here's an example of a movement between G and C major...
Moving from Am to D7 to G...
You could even start with just the single melody line, on the top three strings for example, and then experiment with linking it up with different chords. The same melody can often be connected to several chord options.
However you approach it, the longer you spend playing through chords in this way, the more naturally it will become a part of your songwriting.
Take The Next Step (When You're Ready)...
In the next part (see further below), we'll be expanding on this concept, moving our chord melody up the neck using movable forms.
By using both open and movable forms, we'll have access to numerous "harmonic destinations" we need to harmonise our melody in different ways.
Please also don't forget to check out my Patreon, as I'll be expanding further on this concept (and others) with exclusive content.
