Jump to...
Two Approaches | Finger Positions | Chord Shapes | Chord Changes | Block Melody
Chord Melody - Two Approaches
Chord melody, also known as chord soloing, can be thought of as playing the melody and harmony parts of a piece of music simultaneously, on the same instrument.
On guitar, it tends to be approached in two fundamental ways.
Here we have a single part melody line...

We could harmonise this melody around familiar chord shapes as follows, with the same melody notes marked in blue...

In that example the melody moved around fixed chord shapes, with multiple melody notes per chord. So the chords act like "harmonic destination points" for the melody line.
Alternatively, we could harmonise each note of the melody in multiple, moving parts, such as this three-part harmony...

In that example, the harmony part more closely followed each melodic note and each part effectively created its own melodic line.
In both examples, the way the melody moves smoothly and mostly stepwise through the changes is specifically referred to as voice leading - an intrinsic function of chord melody playing.
While both these examples primarily serve the melody, they each offer a different harmonic treatment of that melody.
Basic Finger Positioning For Adding Melody
The easiest place to begin with developing our chord melody skills is to first give ourselves an open bass note. For example, the open 5th string, giving us an A bass note in standard tuning.
We'll see why this is useful shortly. But remember you can also apply the process we're about to follow to different bass notes (which we will later on!).
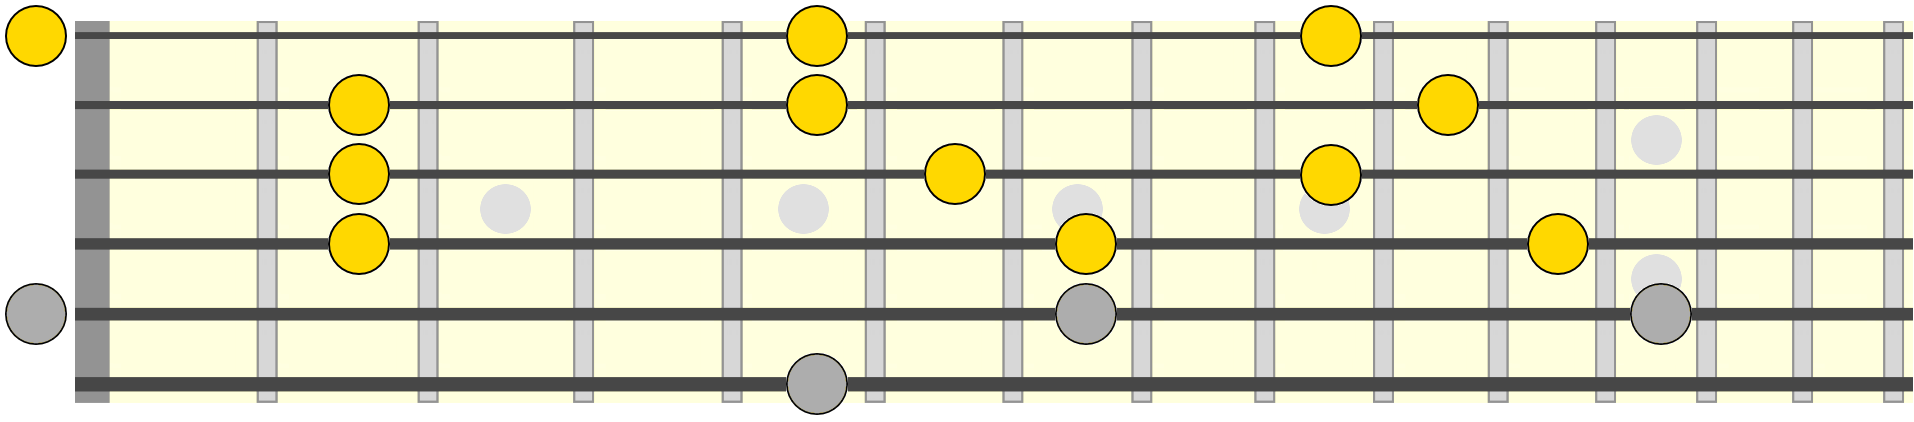
Let's give ourselves a starting position. Below we're matching the root of A on the 4th string. Around this position we have three main areas to add in melody on the higher strings, with each area requiring different finger positions. We're keeping it to just three strings for now to help compartmentalise things...
Note that these finger positions/areas will be used in other positions as we progress. We're just using the A root position as a starting point.
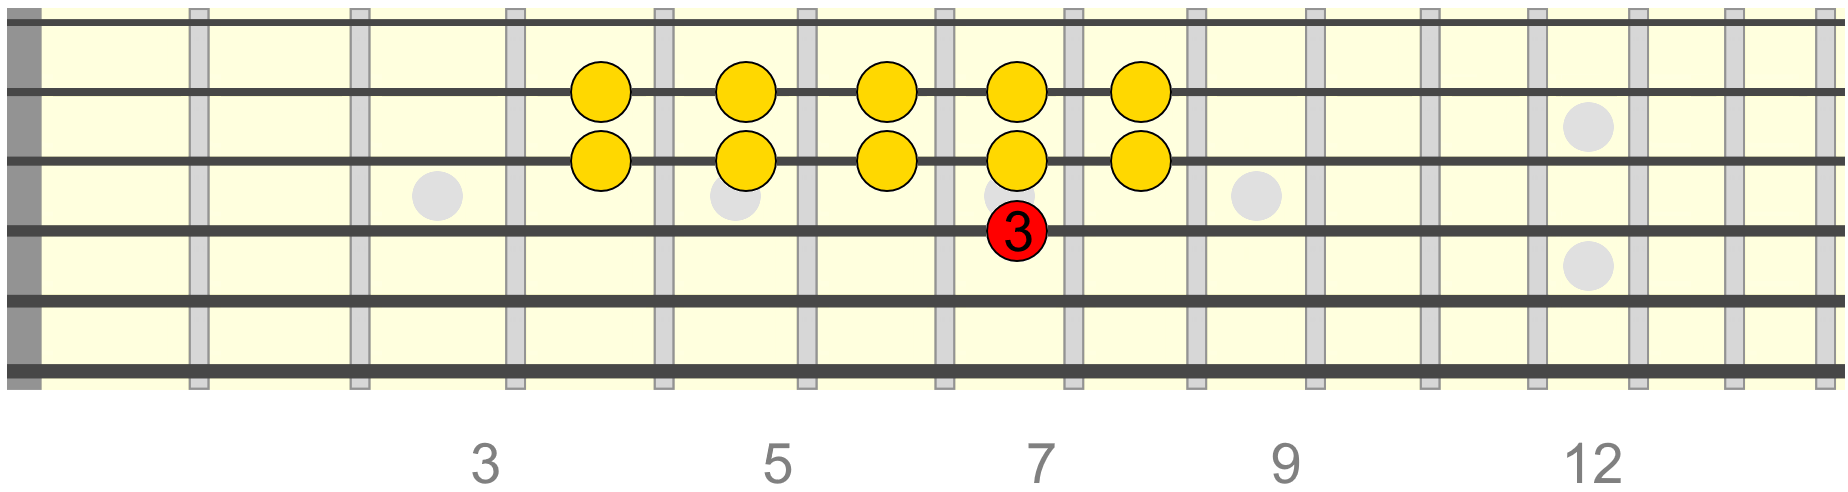
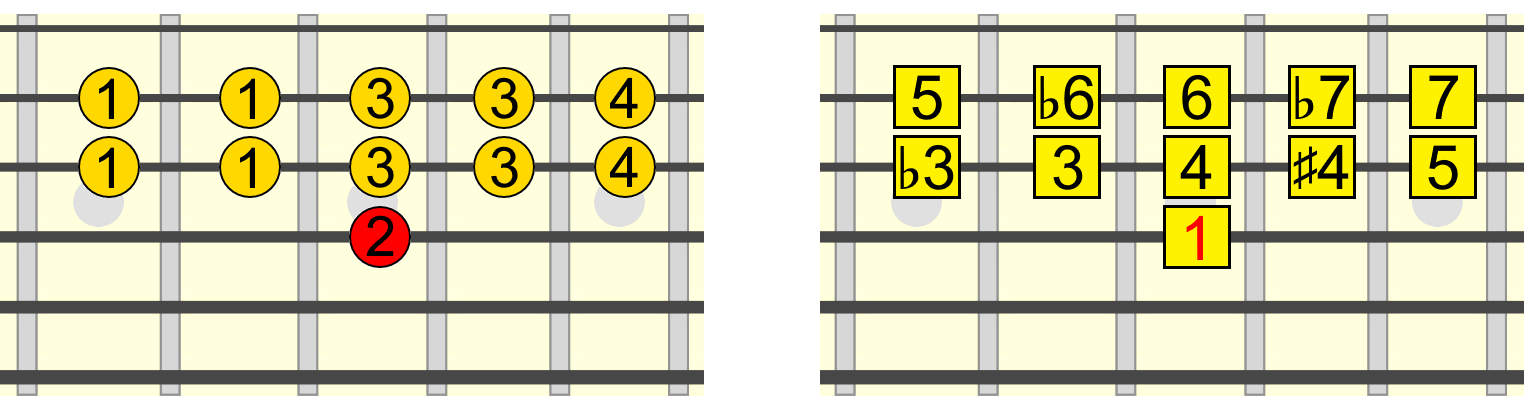
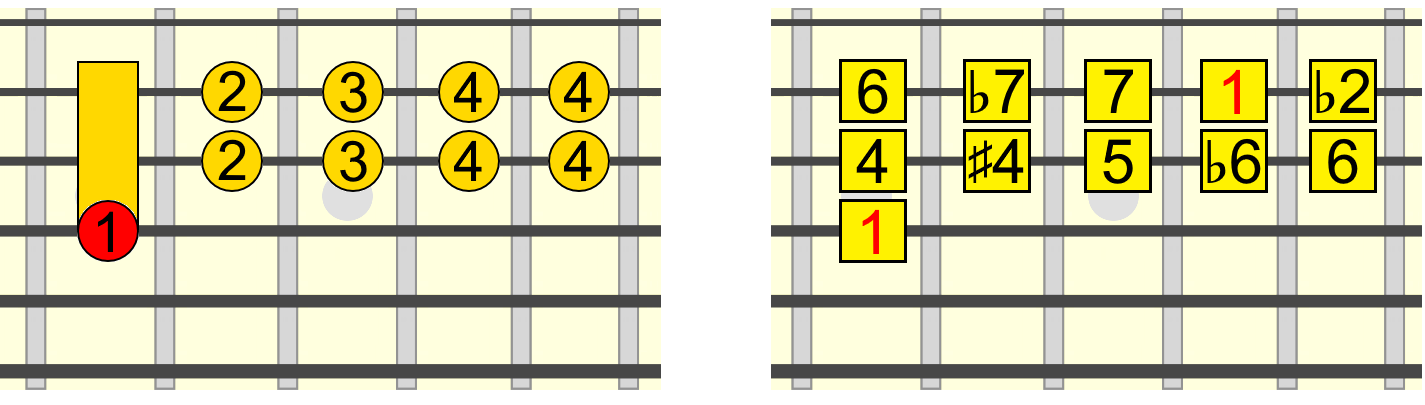
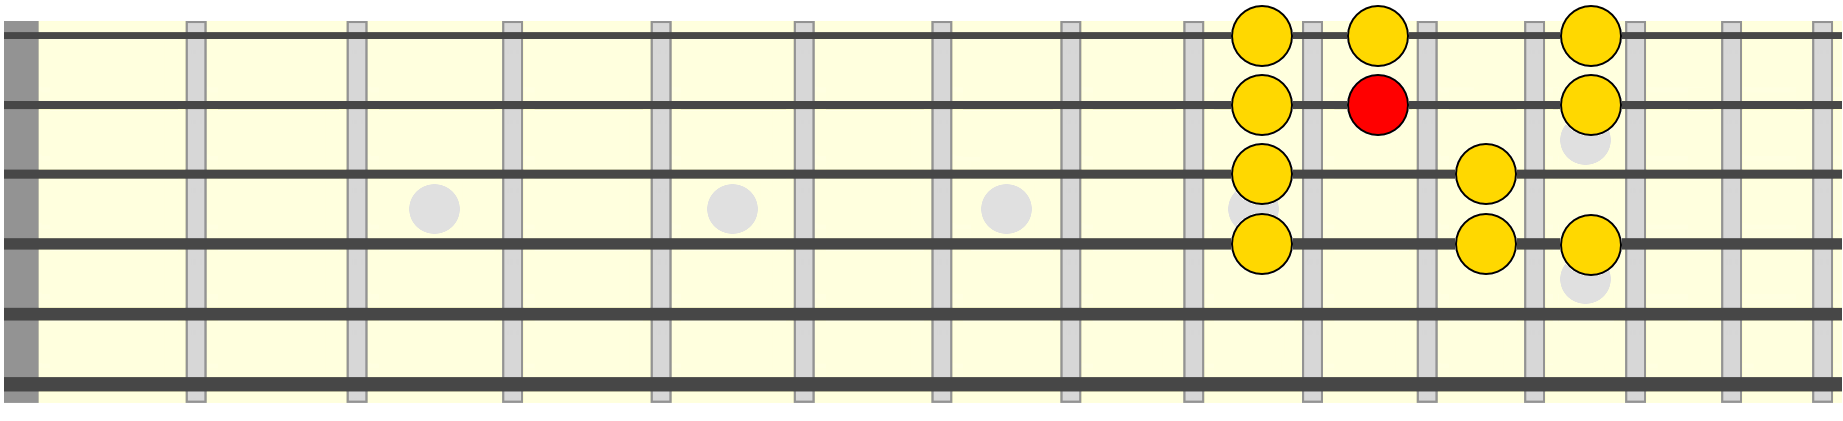
Within the first area, we can place our 3rd finger on the 4th string and identify the following intervals, displayed on the right (fingering on the left)...

This fingering is only a guide and you may need to alter it depending on how you sequence your melodies around the position. As you progress you'll need to allow some flexibility with that.
Knowing the interval names isn't crucial, but it is a good way to train your eyes and ears to note relationships in a fixed position...
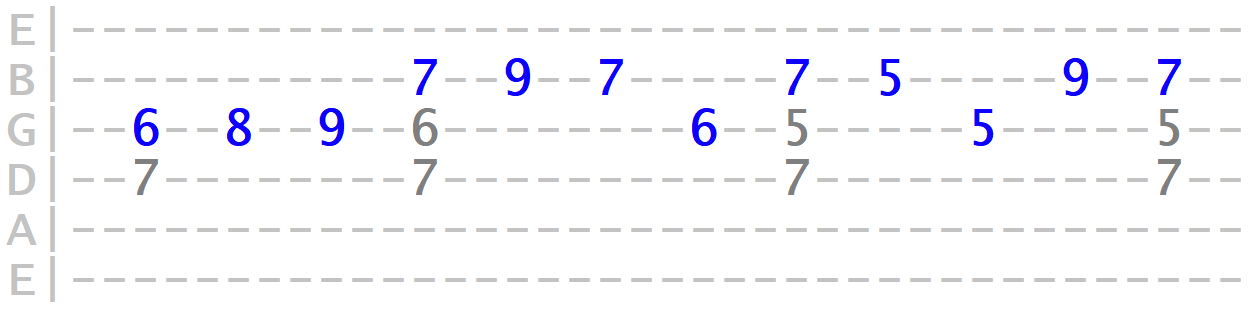
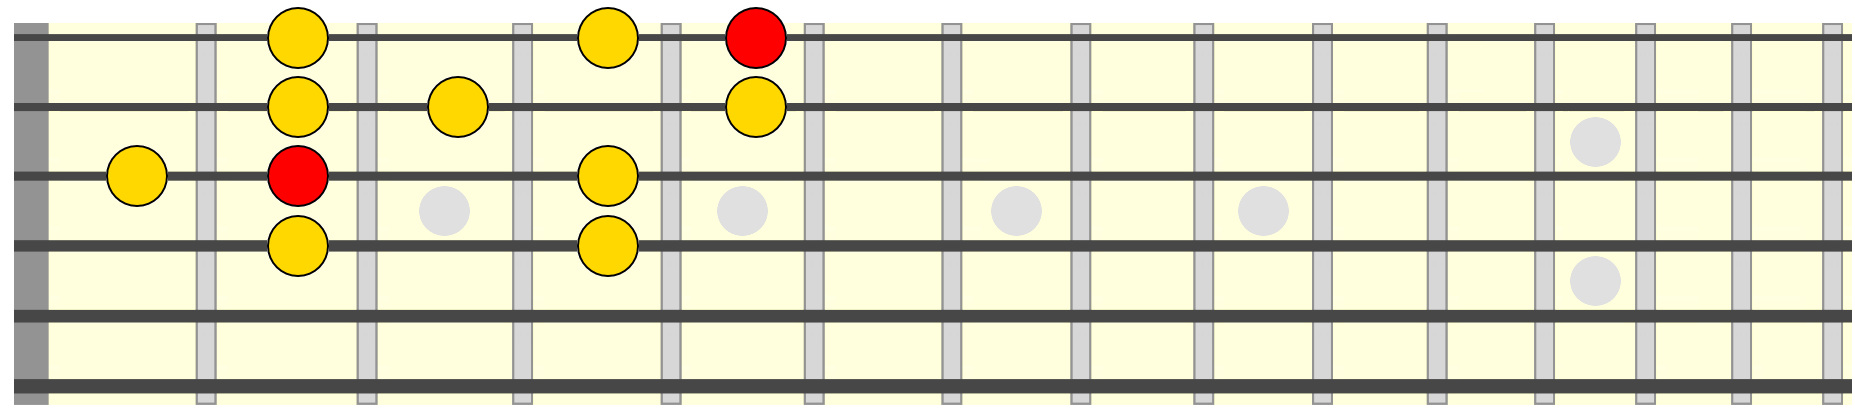
We can try forming a simple major melody in this position, involving the major 3rd (3). You can add the open A bass if you like...
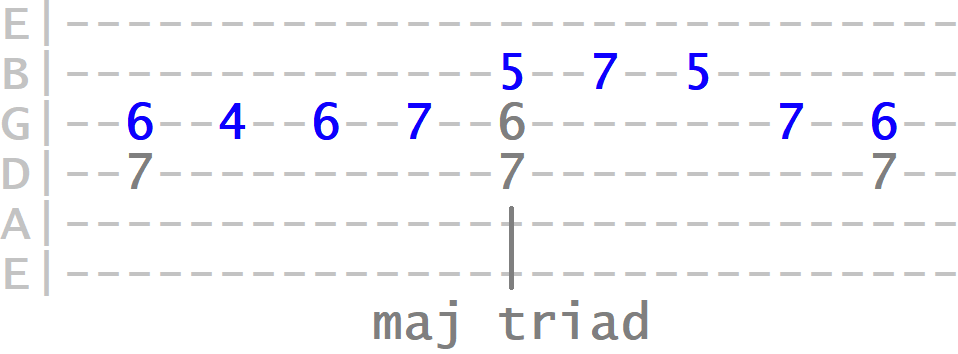
The key thing is to hold on to and let ring the lower string(s) as you play through the melody on higher strings. Notice how when we moved up to the 2nd string, we held on to the major 3rd on the 3rd string, which serves to fill out the voicing.
This particular shape you might recognise as a familiar major triad shape, in this example, A major. This is just one reference shape we can use to get into position for major chords in a progression. We'll come back to these shortly.
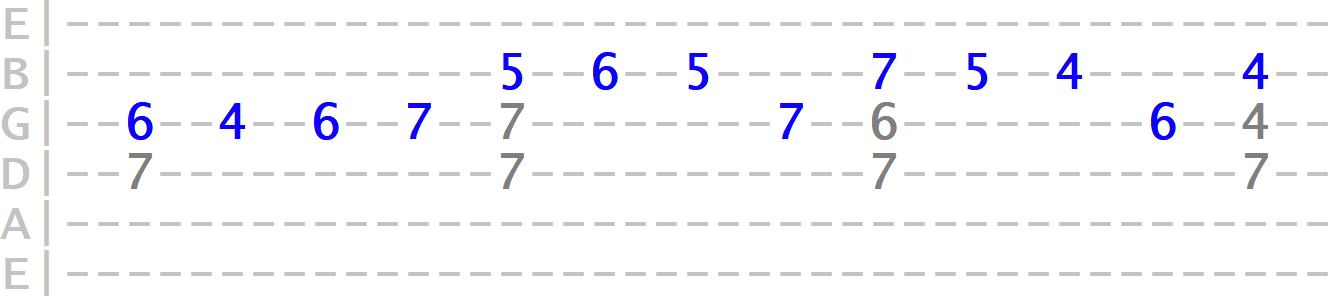
For different colours, we can also hold on to other tones as we move up the strings...
So this is initially where you can experiment with harmonising a melody around one position.
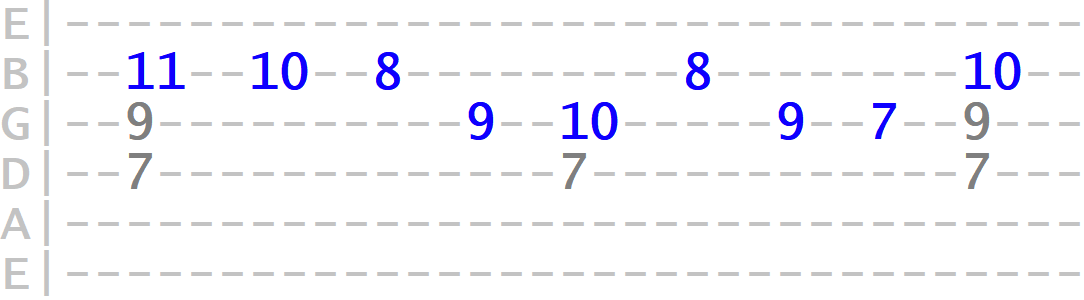
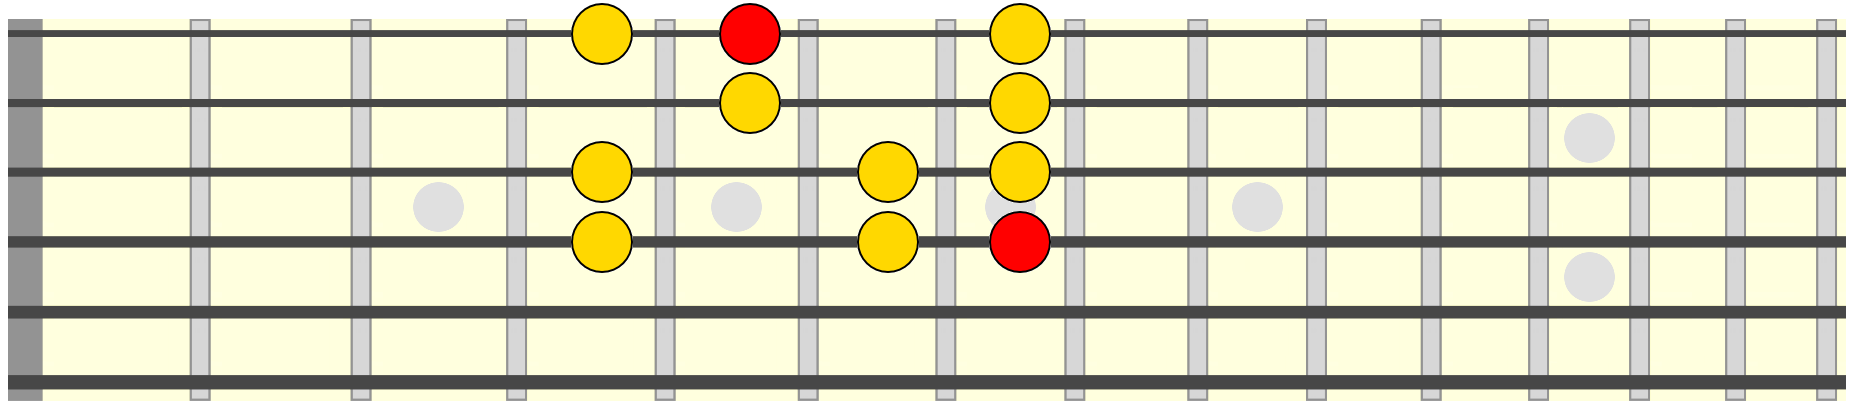
Let's now try a minor based melody involving the minor 3rd (♭3). This time we hold on to the minor 3rd as we move to the 2nd string...
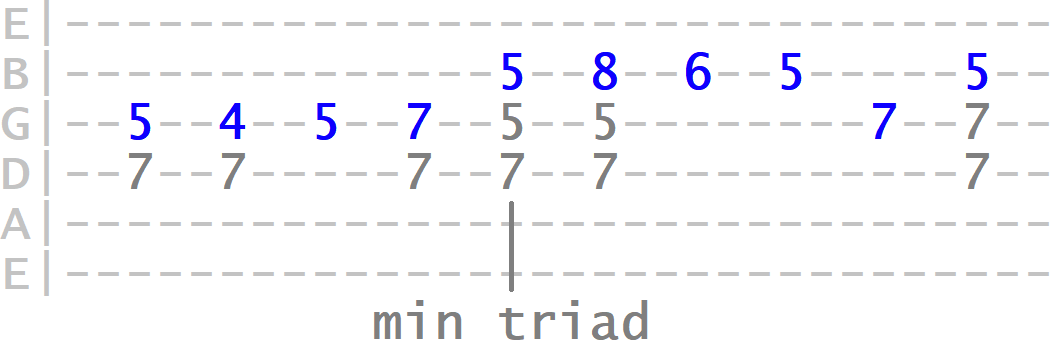
Again we can reference this as just one minor triad shape for positioning our minor chords.
What this simple exercise does is get your fingers used to forming a melody around a fixed chord position. You can also use it to train your eyes and ears to interval movements and scales.
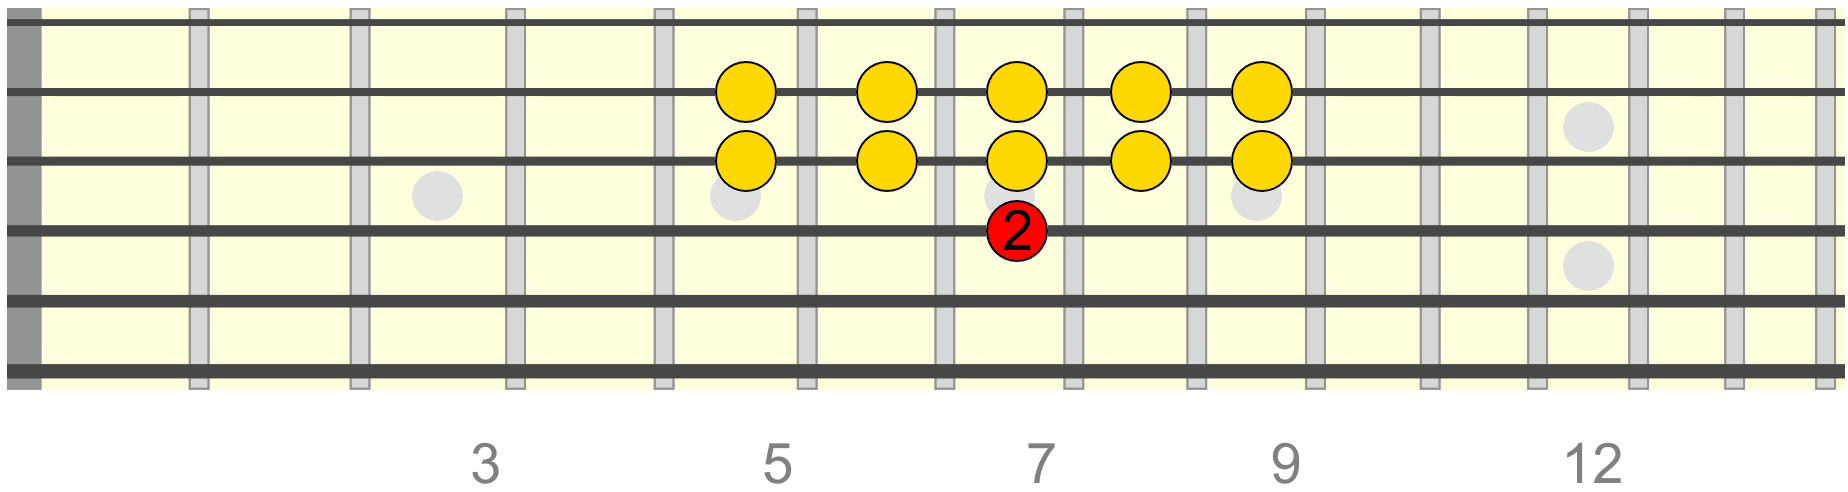
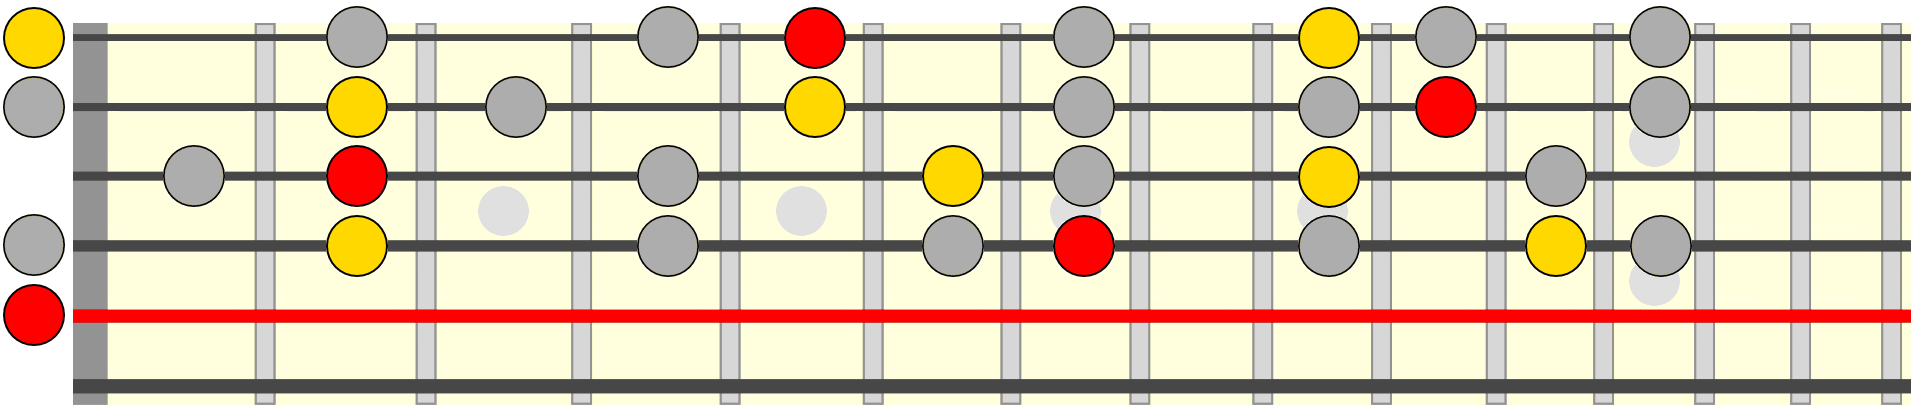
On to our next area, more central to our root position. Here we change to our 2nd finger on the fixed root. Don't worry if you can't quite stretch to some of these positions, though do make a repeated effort as they'll be useful for forming melodies around various chord shapes...
Again, try forming a simple major and/or minor melody to get moving around this position...
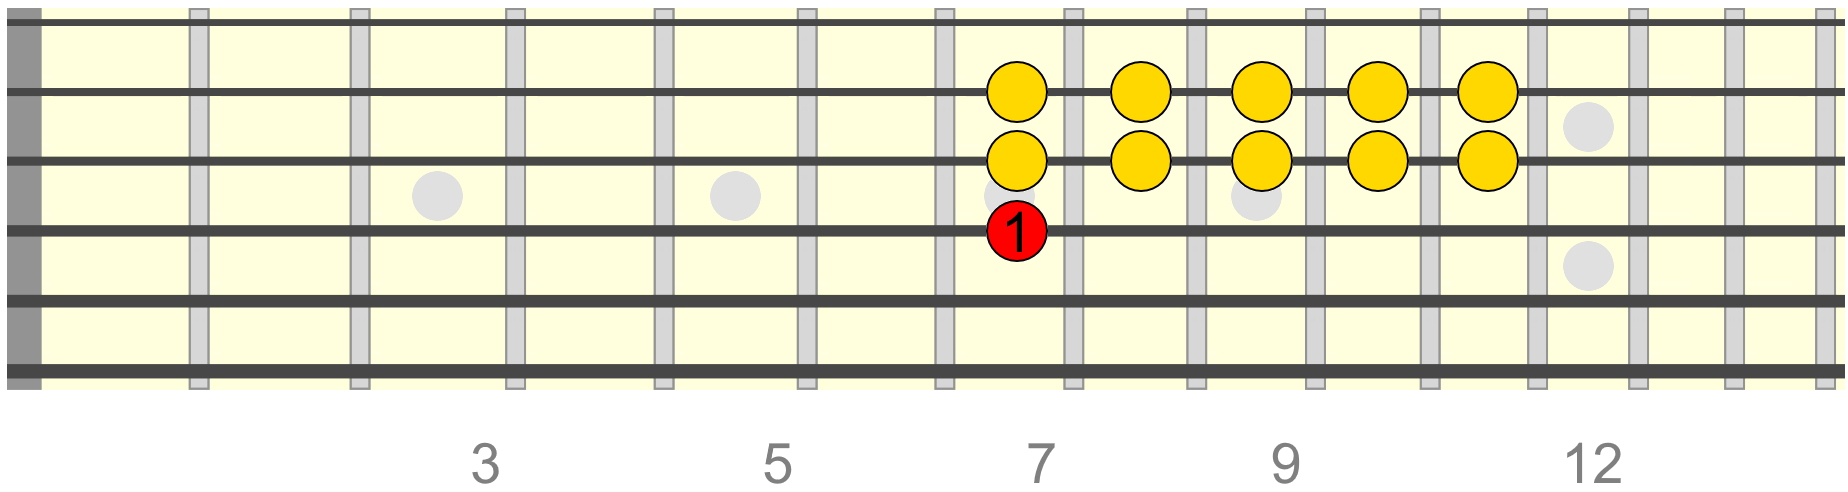
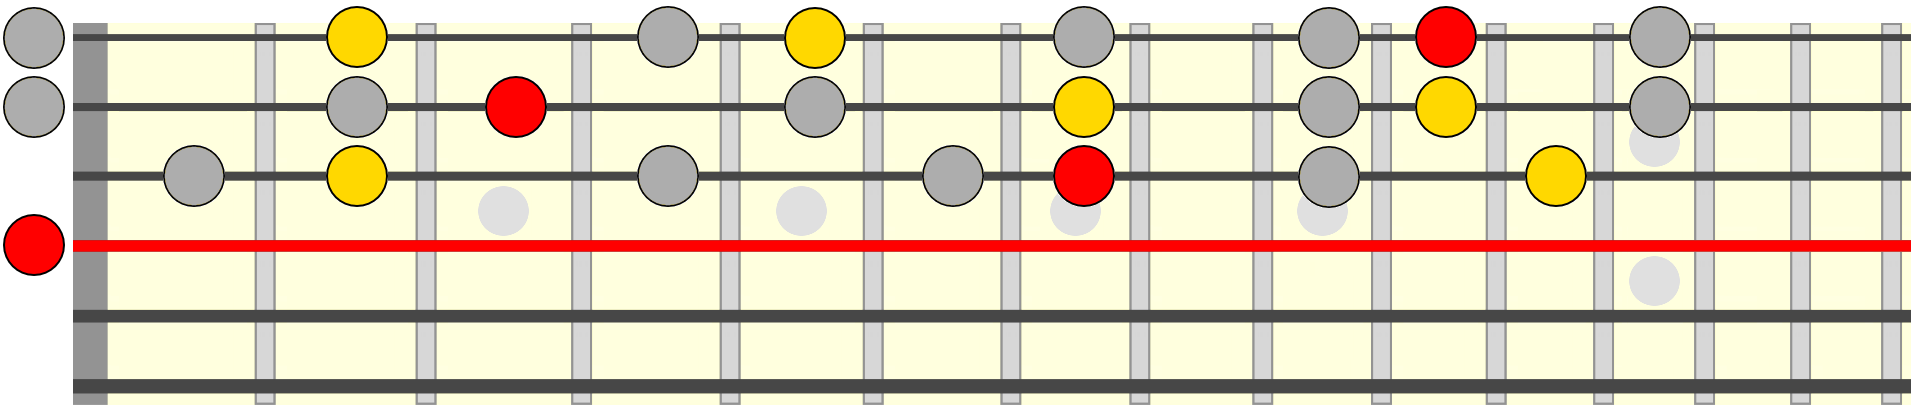
And our final area, this time using our index finger on the root position, allowing us to stretch further up the neck. Again we have a range of intervals and fingerings to form a melody around this position. And again we should be flexible with which fingers we use depending on the situation.
Here, you can simply barre your index finger over the root position fret...
These three areas give us the finger positions and dexterity development we need to play melodic sequences across the neck, and not just in a root position. For example...
You'll see how it all pieces together as we progress.
Forming Melody Around Chord Shapes
We're now going to make use of these finger positions to melodically link up simple chord shapes. Starting with triads. These will become the primary references we can use to link up chords in a progression with a melody.
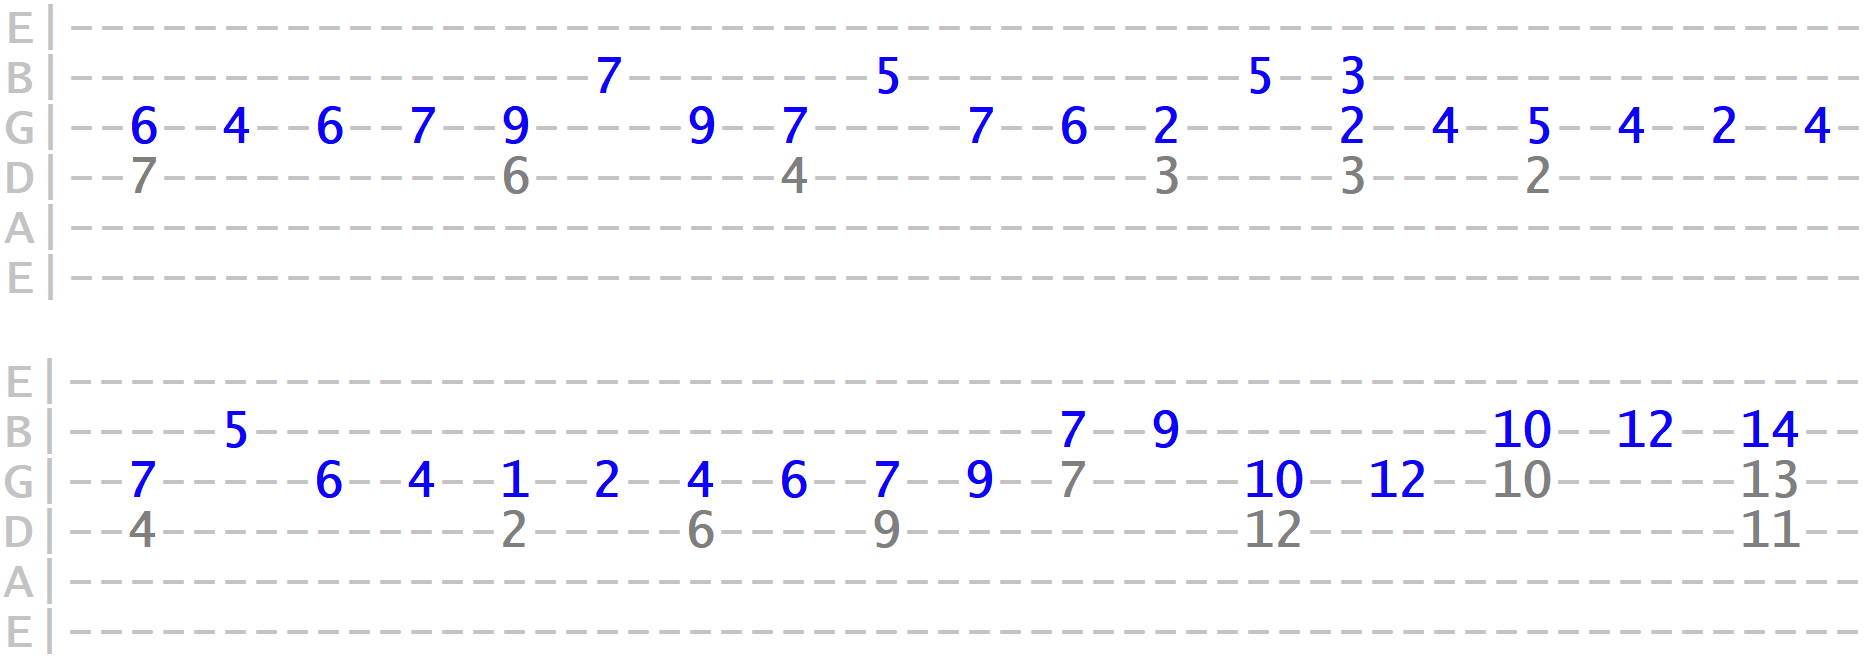
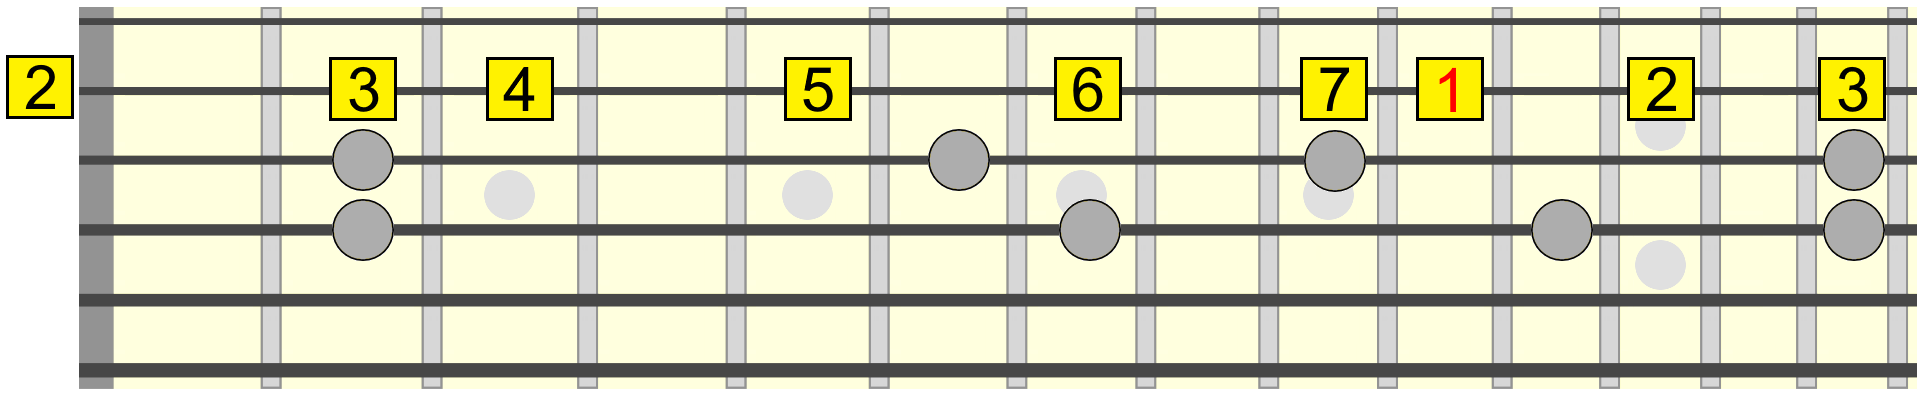
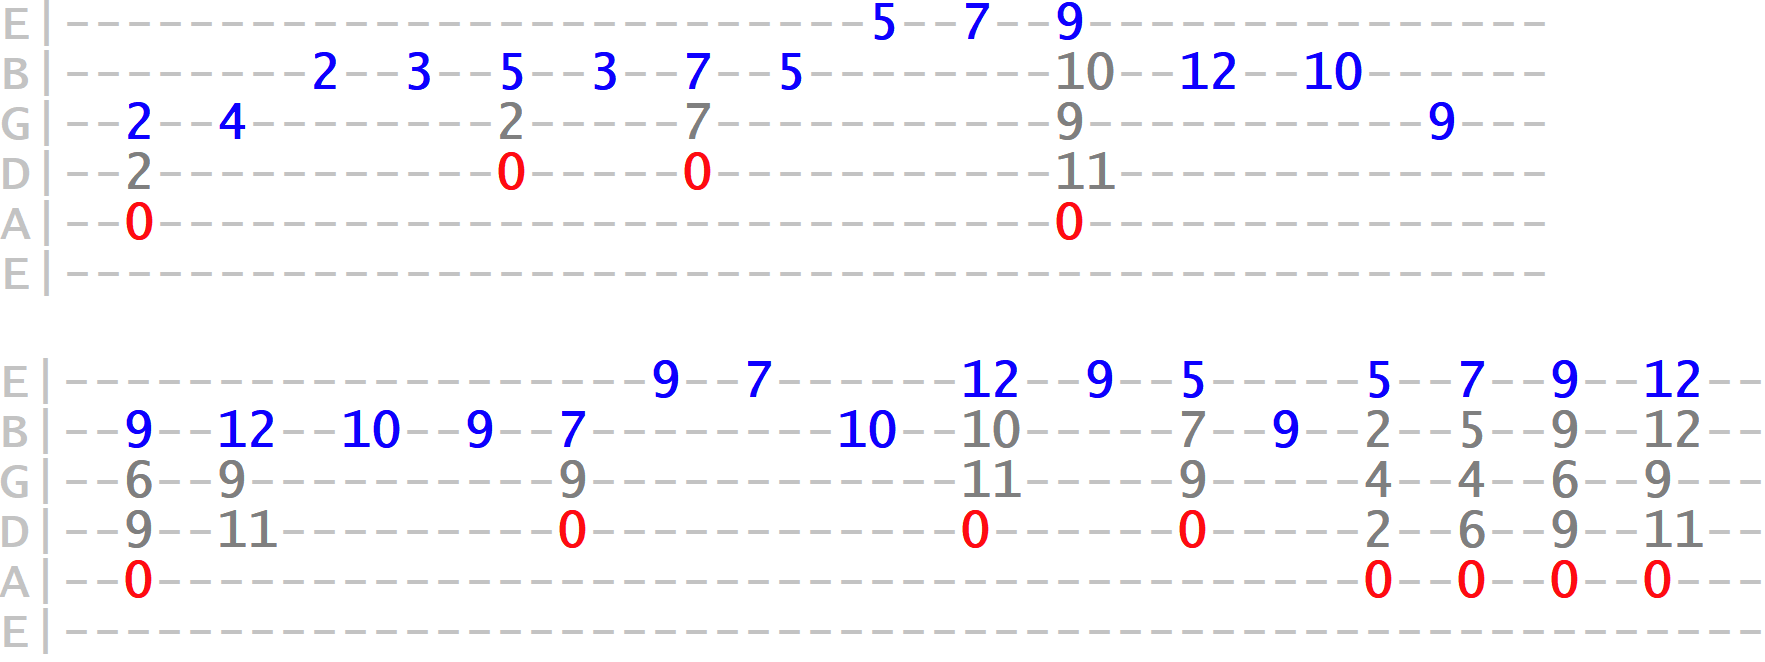
For example, here is the A major triad across the 2nd, 3rd and 4th strings, played in three positions or inversions, with the first repeated at the octave...
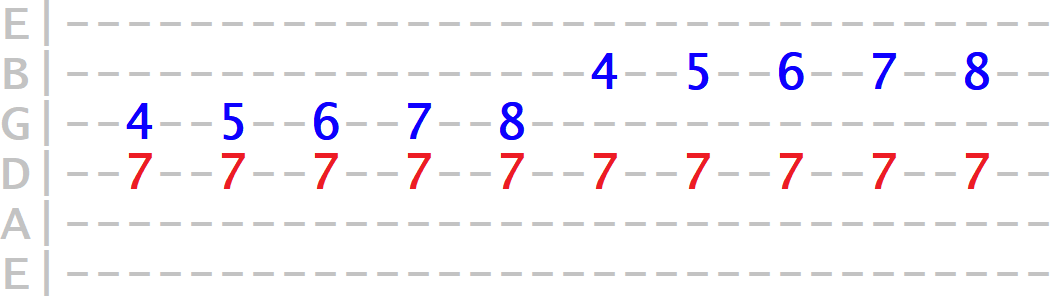
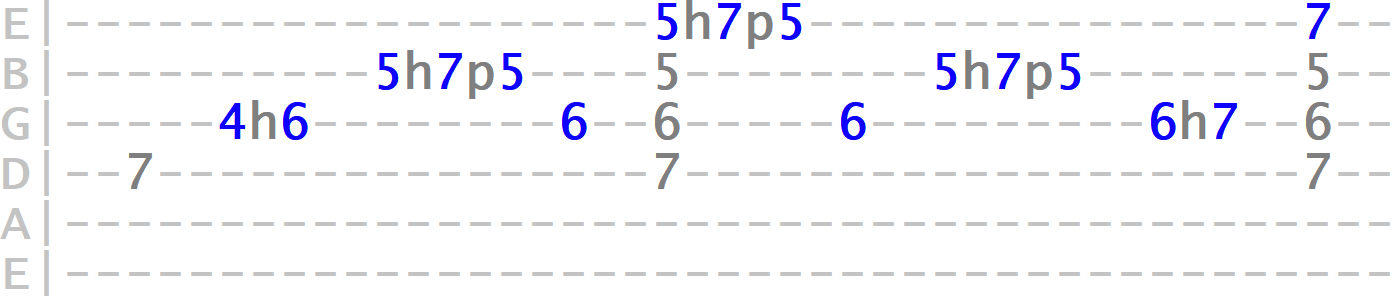
Referencing the A major scale across the 2nd string, we can link these triad shapes together melodically as follows...
We could also involve the 3rd string in forming a more embellished melody, involving hammer-ons and pull-offs for example...

When we come to forming melodies through chord changes, these triad positions will prove a helpful initial reference.
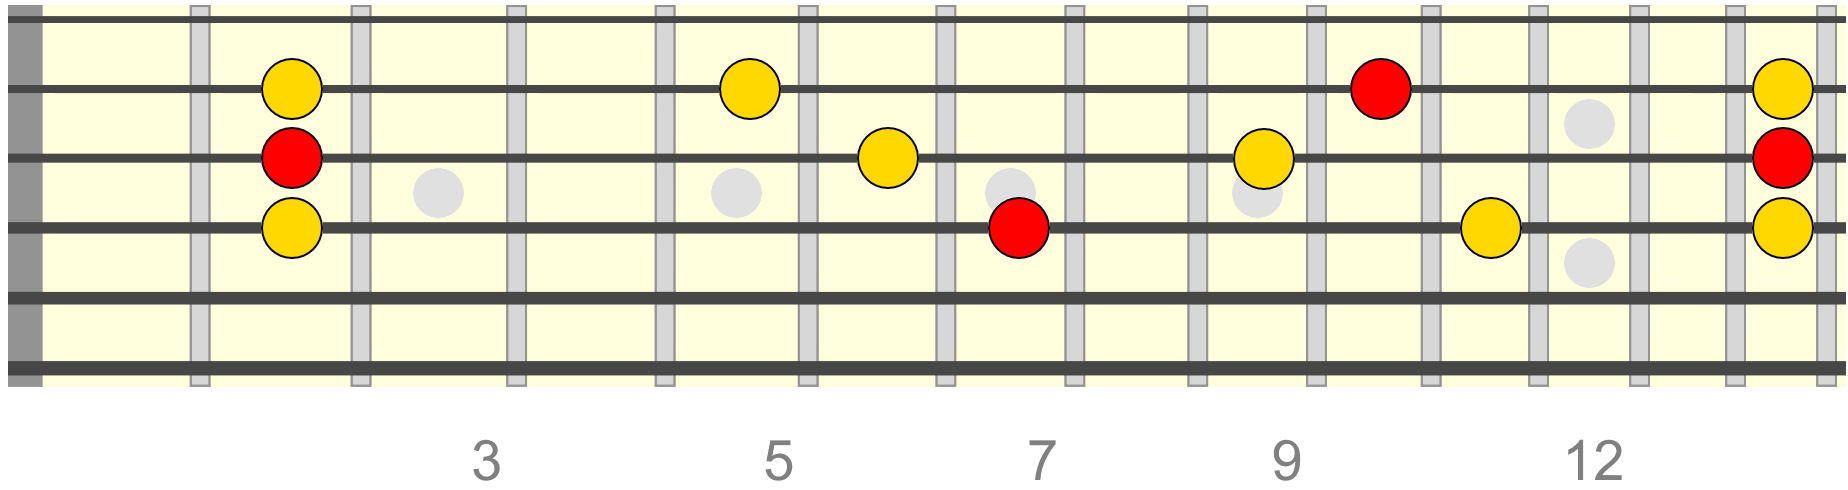
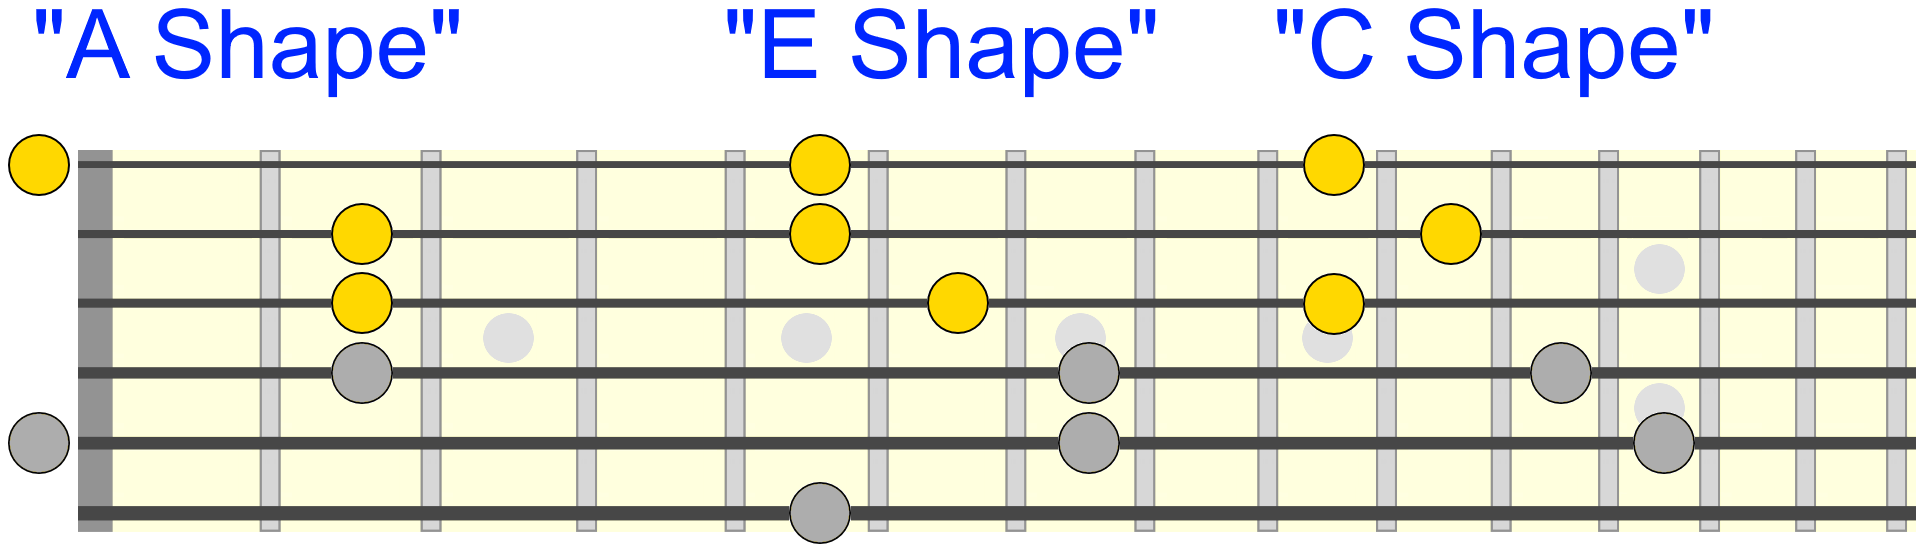
Now, each of these triad shapes can be seen as part of a fuller chord shape, namely the A, E and C shapes. So we can also use the top three strings to form triad shapes and use the same process as before to get our fingers used to forming a melody around them...

And we can do the same with the fuller, four string shapes...

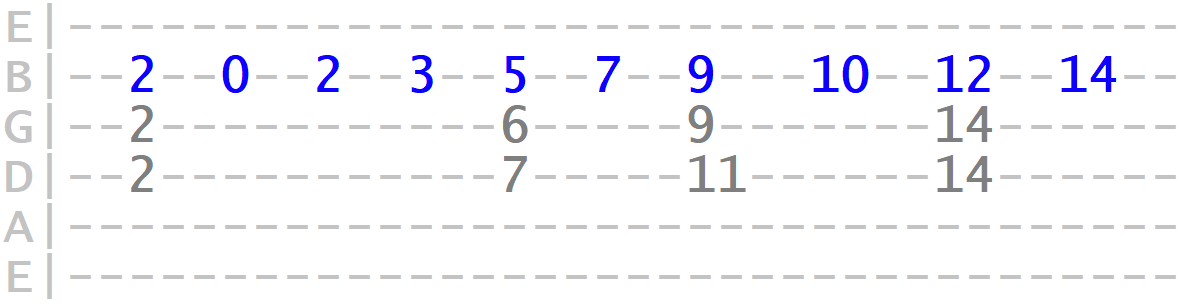
That particular example can be seen as formed around a familiar scale pattern (namely, the A major scale). So we can effectively combine our knowledge of chord positions and scale patterns to aid our melodic treatment...
Another position and related pattern...
And a final position and its related pattern...

Once you're physically comfortable with forming melodies around these individual chord positions, you'll be able to apply them more confidently through chord changes.
Basic Chord Changes
On that point, let's try a simple chord change exercise between A major and D major, or the I and IV chords in the key of A major.
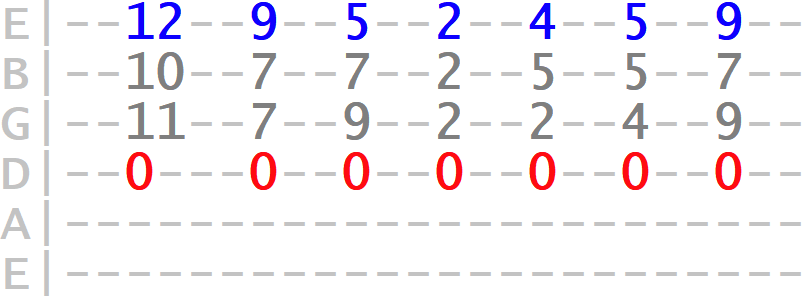
Over A major, we can reference the three or four string shapes as we covered, over the open A string bass. For D major, I'm using the open D string as the bass and referencing D major triads on the top three strings...
Over both chords, and if it helps, we can reference the A major scale as a guide. Whether you come up with the melody first, or improvise it as you're playing through the changes, isn't so important right now.
This exercise is mostly about becoming confident with linking up chord positions with a melody. So make it as simple as you need. Here's an example to get you started...
Block Chord Melody
That climbing four-part sequence at the end demonstrated how melody can be harmonised in blocks rather than the melody moving around a fixed chord shape.
Another example of that (play the blue melody notes first and then hear how the chord shapes harmonise and colour each melody note)...
We'll look more at this kind of block chord melody in a later part.
Final Words...
The key concept here is that the chord shapes are like harmonic destinations, connected through our melody line, allowing us to access different neck areas for colouring our melody.
In other words the chord shapes allow us to harmonise and contextualise the melody as it flows.
See if you can apply the same process to minor shapes. I'll be providing further help with this, and many other concepts on my Patreon. There you can get access to exclusive content, including song analysis, voting on future lessons and further help with existing lessons.
Thank you for your time and support!
