The Basic Pattern
Here we have an extended B minor pentatonic pattern. Remember that this pattern is movable and can be positioned on any root, but we'll stick with B for these examples...
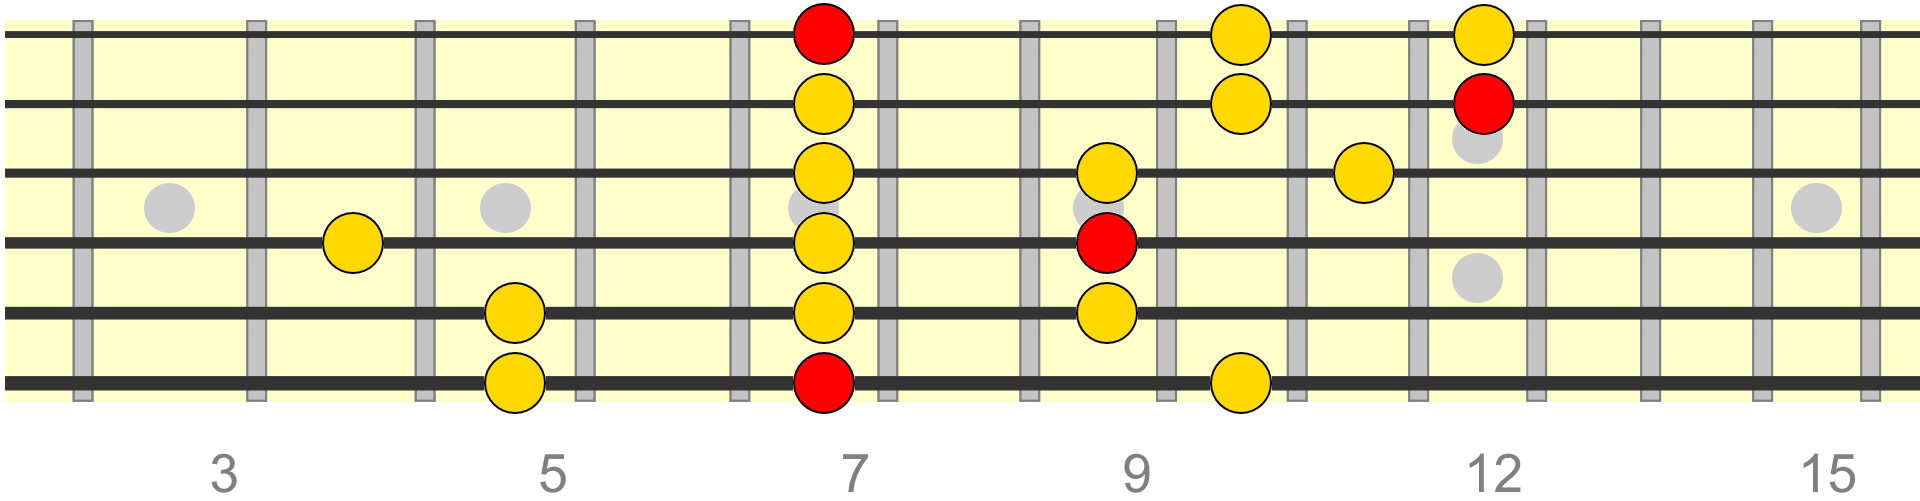
You could see this pattern as divided into three overlapping segments. We have a lower left box, a central box and an upper right box...

As we'll discover, by using this extended pattern, we can easily access bend points to and from any tone in the scale.
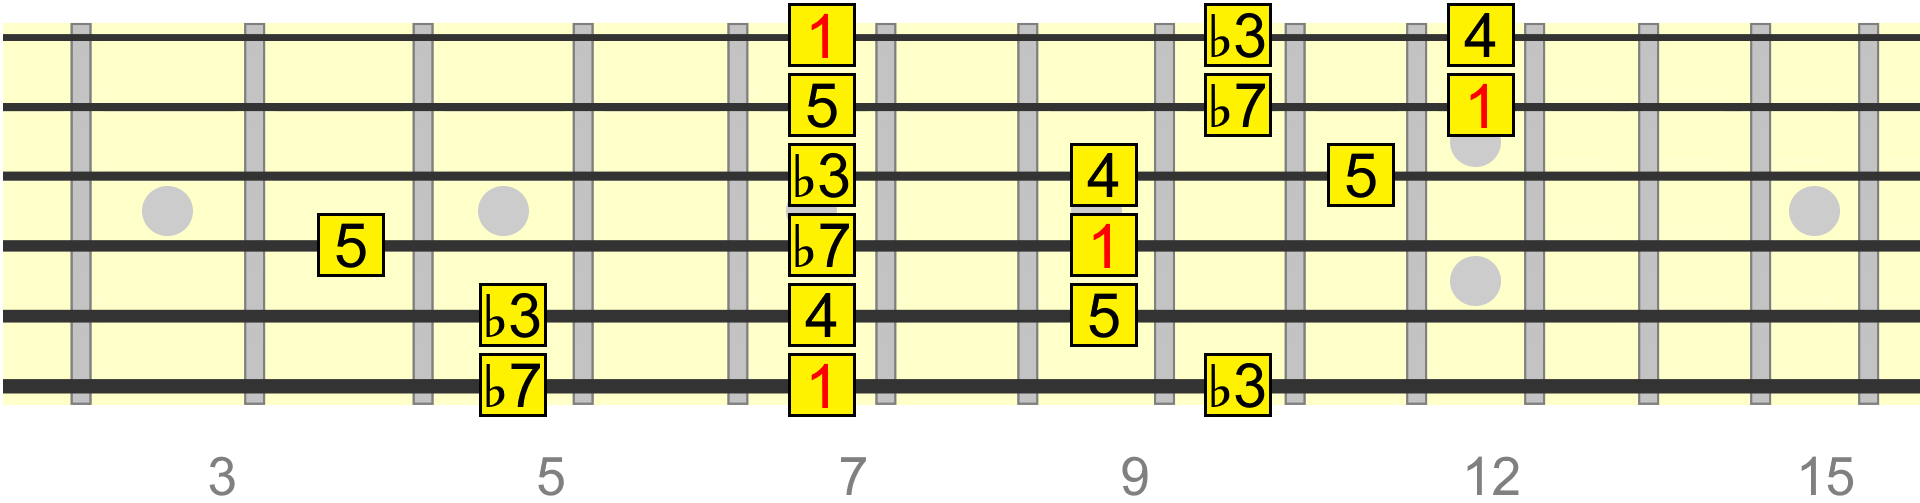
First we're going to label our tones. It's not so important what you name them. This is more about being able to identify related positions within the pattern.
Here I'm labelling the positions with the scale's interval numbers. We have a root (1), minor 3rd (♭3), 4th (4), 5th (5) and minor 7th (♭7).
Each tone occurs in several positions within the pattern...
Whole Step Bend Points
A whole step (or whole tone) bend involves bending a note the equivalent of two frets up (if you were picking it as normal). Minor pentatonic has three whole step bend points...
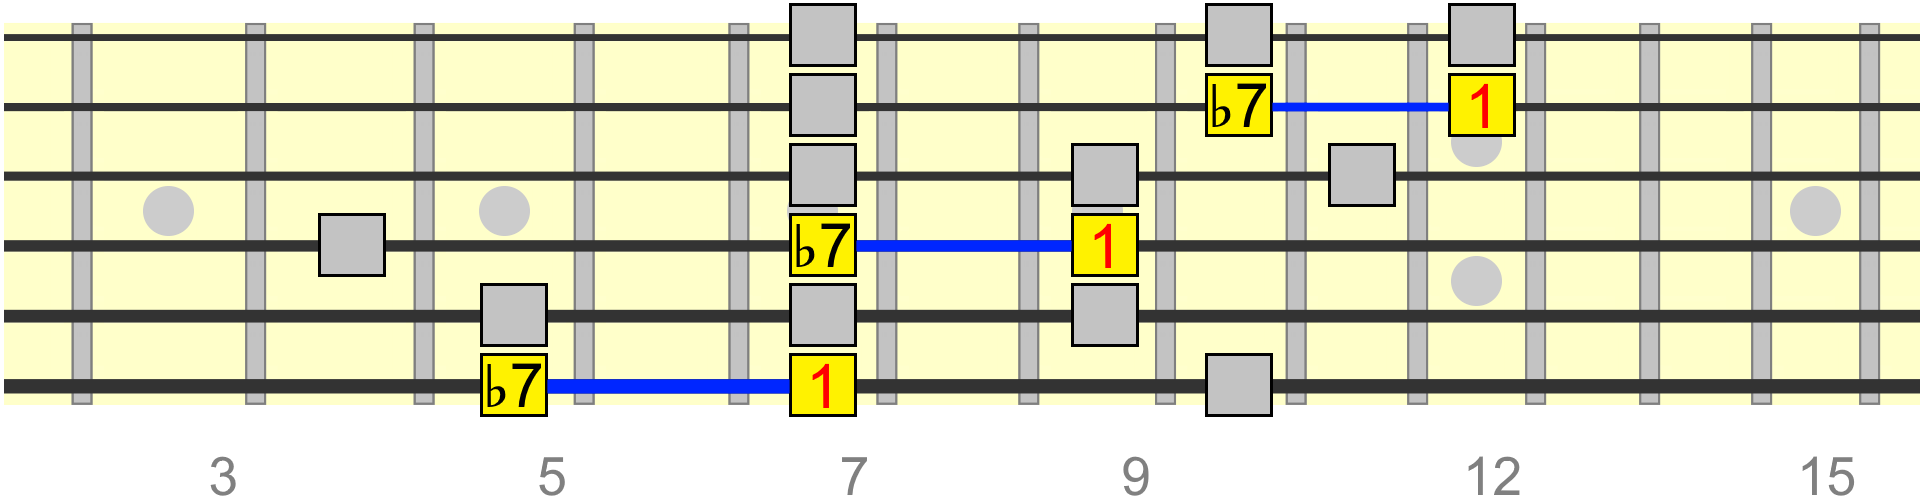
♭7 to 1
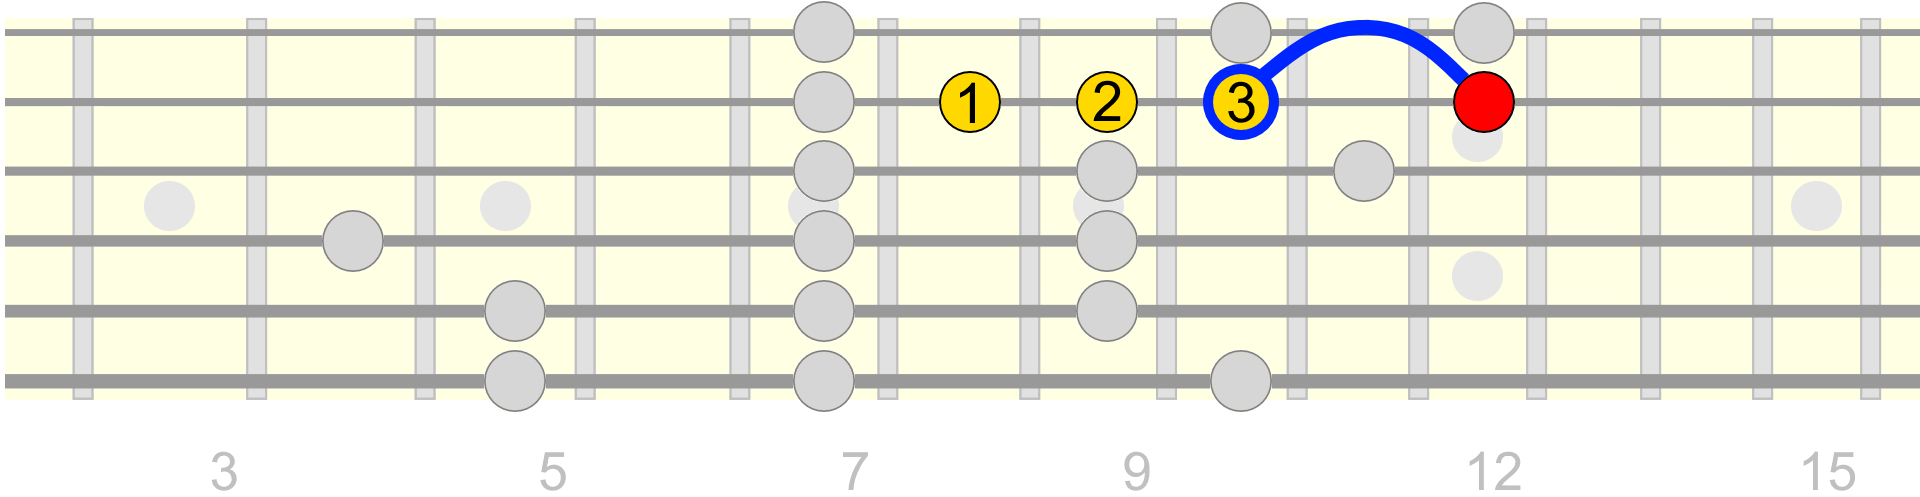
Our first bend will be a whole step bend from the ♭7 to the 1.
So the root will be our target pitch for the bend. As you can see below, there are three occurrences of this same-string pairing in the pattern...
Start by playing through them as a picked sequence, resting on the 1 each time, ensuring you can jump between positions without hesitation.
Now we're gonna play the same sequence, but using bends. Starting with the 2nd string...
First, to make sure you're hitting the target pitch accurately, you can pick the target before you bend to it so your ears have a reference pitch for the bend. This is obviously just for practice as you'll eventually want to be able to bend to pitch without this reference.
Place your 3rd finger on the ♭7 and bend up to the 1. As always, you should support your 3rd finger bend with your 2nd and 1st finger behind it, kind of like 3 people lifting a heavy object instead of 1...
Try both slow and quick bends...
Now try exactly the same on the 4th string...
And finally the 6th string. This time we can just use our index finger as there's less resistance in the string...
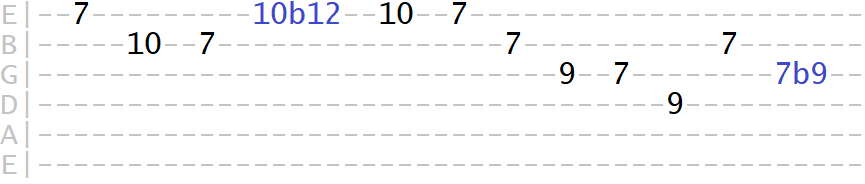
Now we're going to incorporate these bends into a simple phrase. Pick any three or four tones close to the bend point and use them as an approaching sequence. For example...

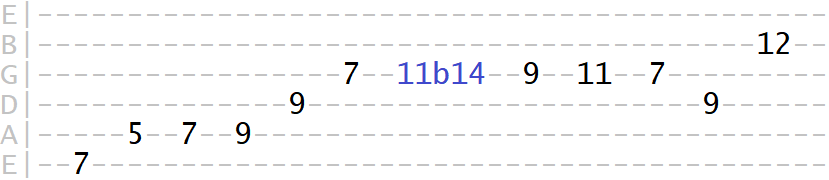
Side note: In tab form, a bend is typically written as "b" followed by the equivalent fret of the target pitch. So 10b12 means "bend from the 10th fret to the equivalent pitch of the 12th fret".
Next try stringing the bend points together into a connected sequence, for example...

These are all good exercises for both building finger strength and targeting bend pitches accurately within a larger sequence.
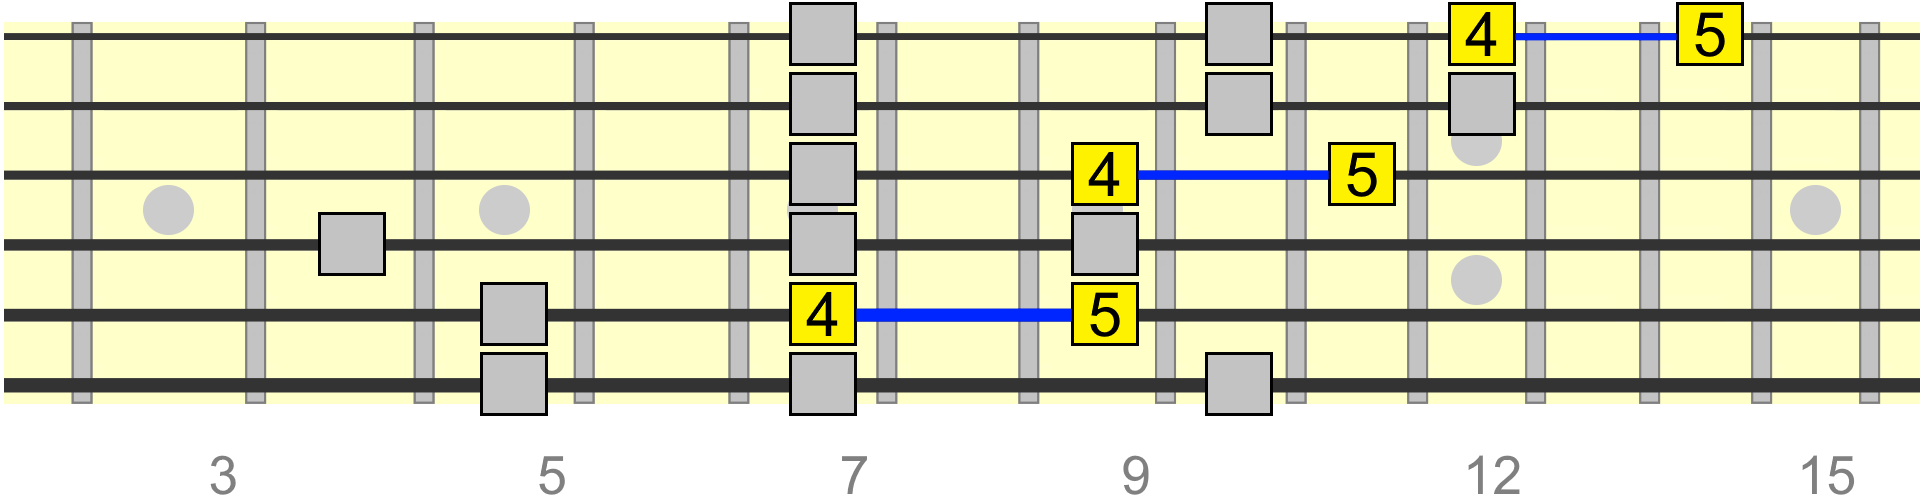
4 to 5
We can use exactly the same process for targeting the 5th of the scale. This time we play a whole step bend from the 4...

♭3 to 4
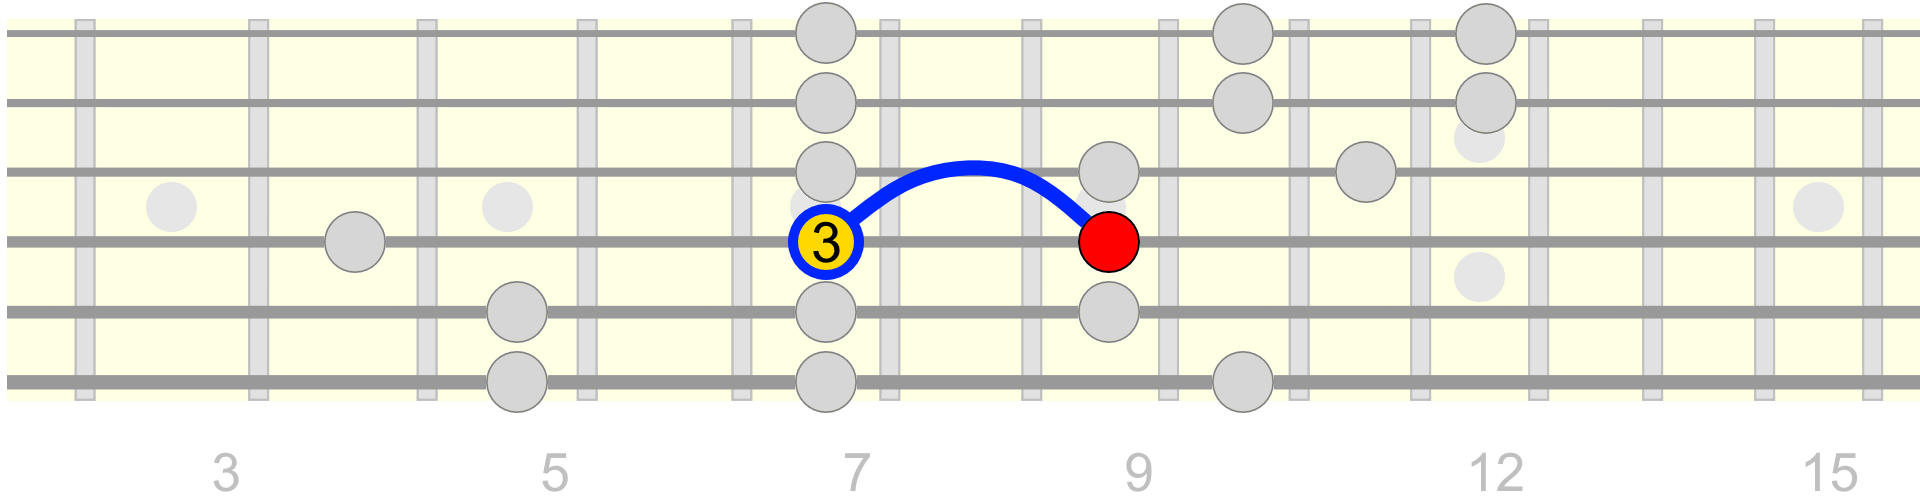
Another whole step bend accommodated by the scale is from ♭3 to 4...
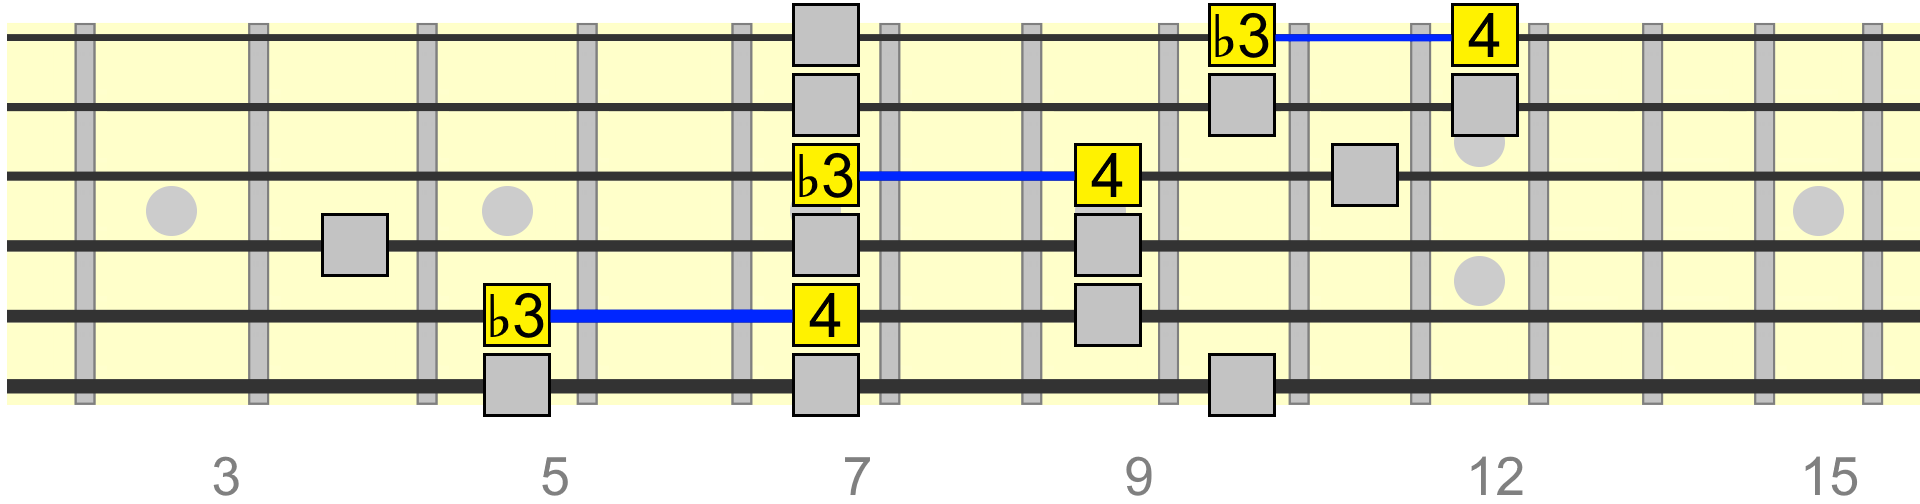
Again, practice moving to these bend points within larger phrases. You'll want to experiment with using different fingers for the bend depending on how you approach these positions...
These three whole step bend points are a good place to start with creating expressive, improvised licks from the minor pentatonic scale. They're versatile enough to work over most minor key chord changes and conveniently touch on various natural colour tones within a minor key progression.
1 to 2
There's another whole step bend that effectively takes us outside the pentatonic scale. This can be seen as targeting the major 2nd (2) interval, which has a very powerful quality in minor keys. We'd typically bend to it from the root...
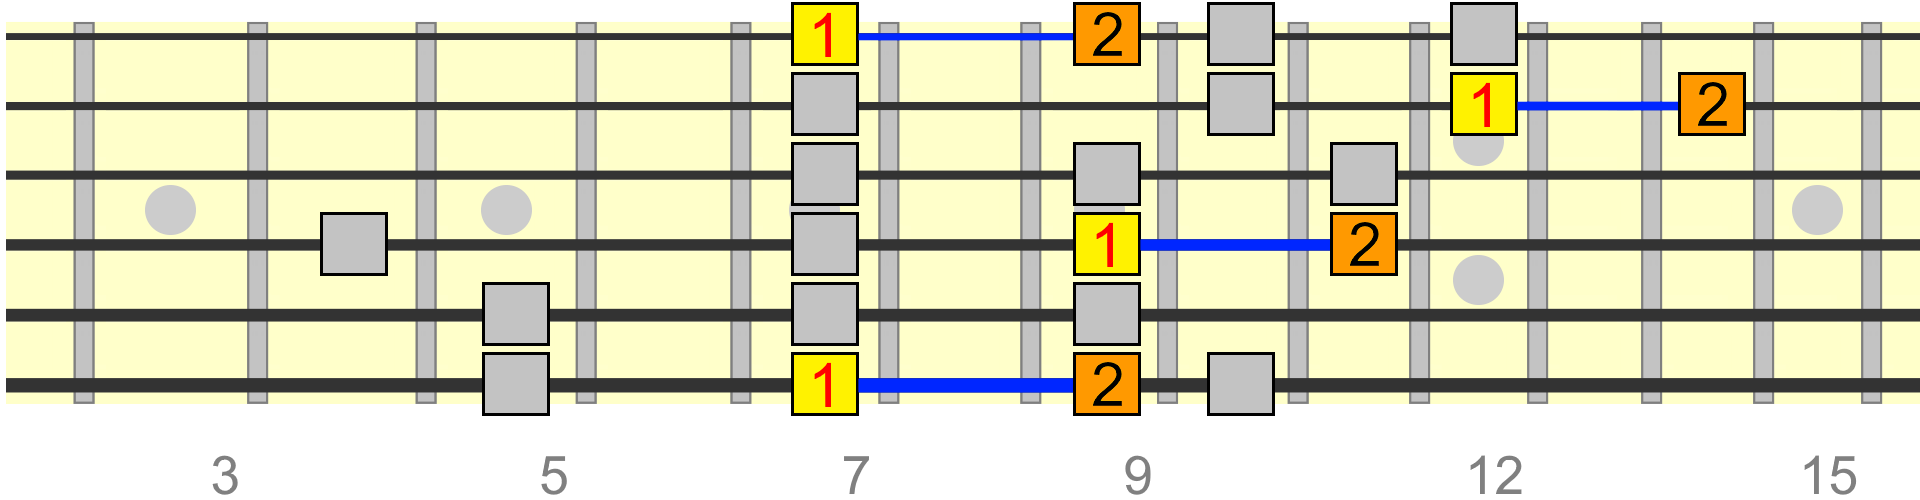

So even though we're using minor pentatonic as our core scale, occasionally touching on these outside tones can give your pentatonic licks more colour.
Half Step Bend Points
Let's now take a look at some half step bends, which are a bit more subtle, but can still add more expression to our licks.
Bending a half step (or semitone) is the equivalent of one fret.
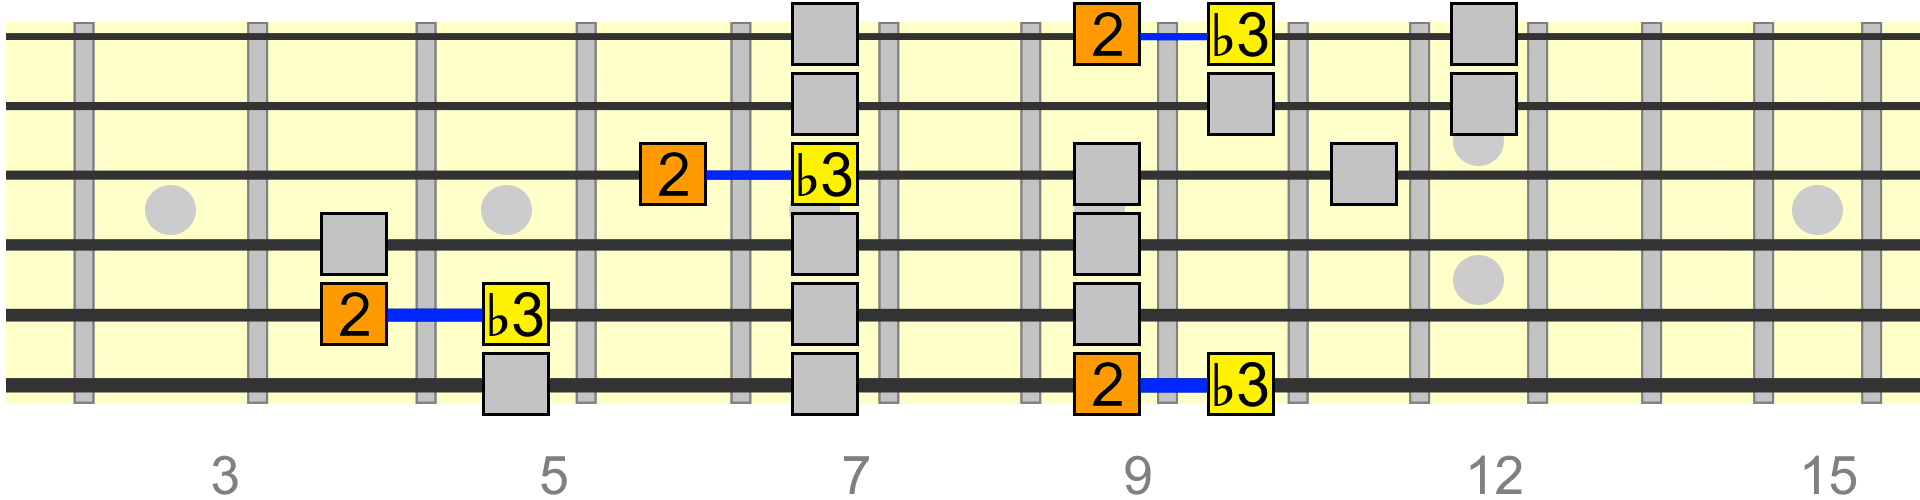
2 to ♭3
Here I'm bending from the 2nd to the minor 3rd - a strong target tone that sits naturally over most chords in a minor key.

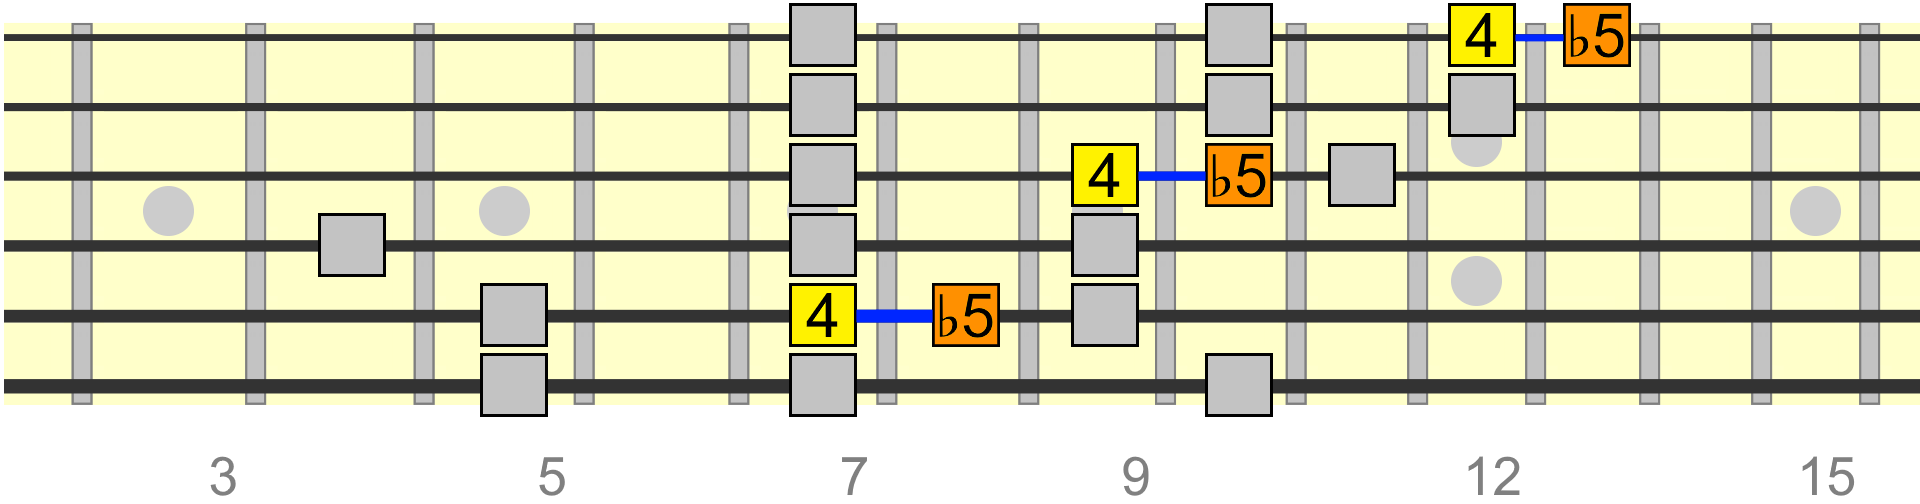
4 to ♭5
A half step bend from the 4 to the ♭5. The ♭5 is commonly seen as part of the blues scale, a six tone variation of minor pentatonic. You can use the ♭5, also known as the "blue note", to add, unsurprisingly, a bluesy touch to your licks...

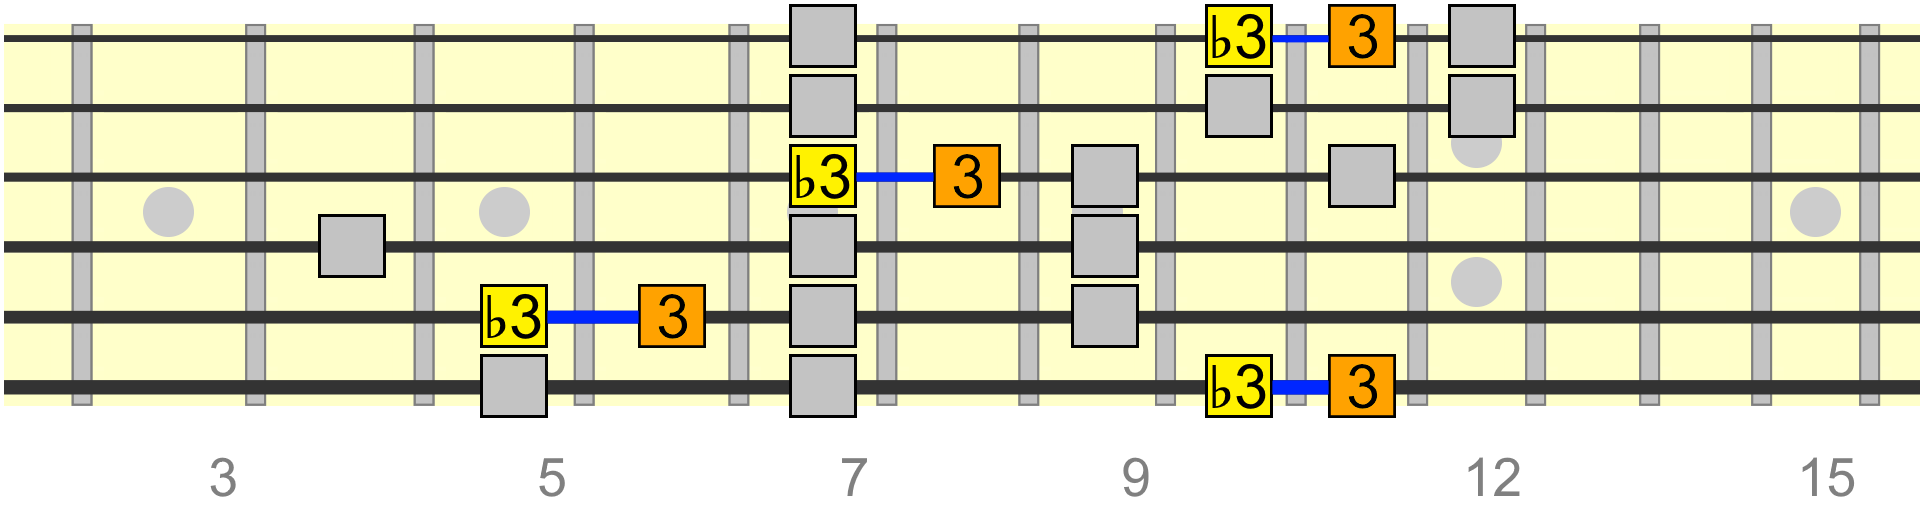
♭3 to 3
On the subject of blues, often minor pentatonic is played over a sequence of dominant 7th chords.
So on the tonic of a typical blues progression we'd have a major 3rd (3) voiced in the chord. We can complement this by bending the ♭3 up a half step to the 3.
What this does is aid a stronger resolution to phrases over the dominant 7th tonic chord, since the major 3rd is a strong chord tone...

Larger Bends
Finally, let's look at a couple of larger bends - the equivalent of one and a half steps or a minor 3rd interval.
Now, these bends will take a bit more practice, as they require more strength to reach the target pitch. However, used sparingly, they can give your licks that extra level of expression. They're also a good way to stretch out new strings!
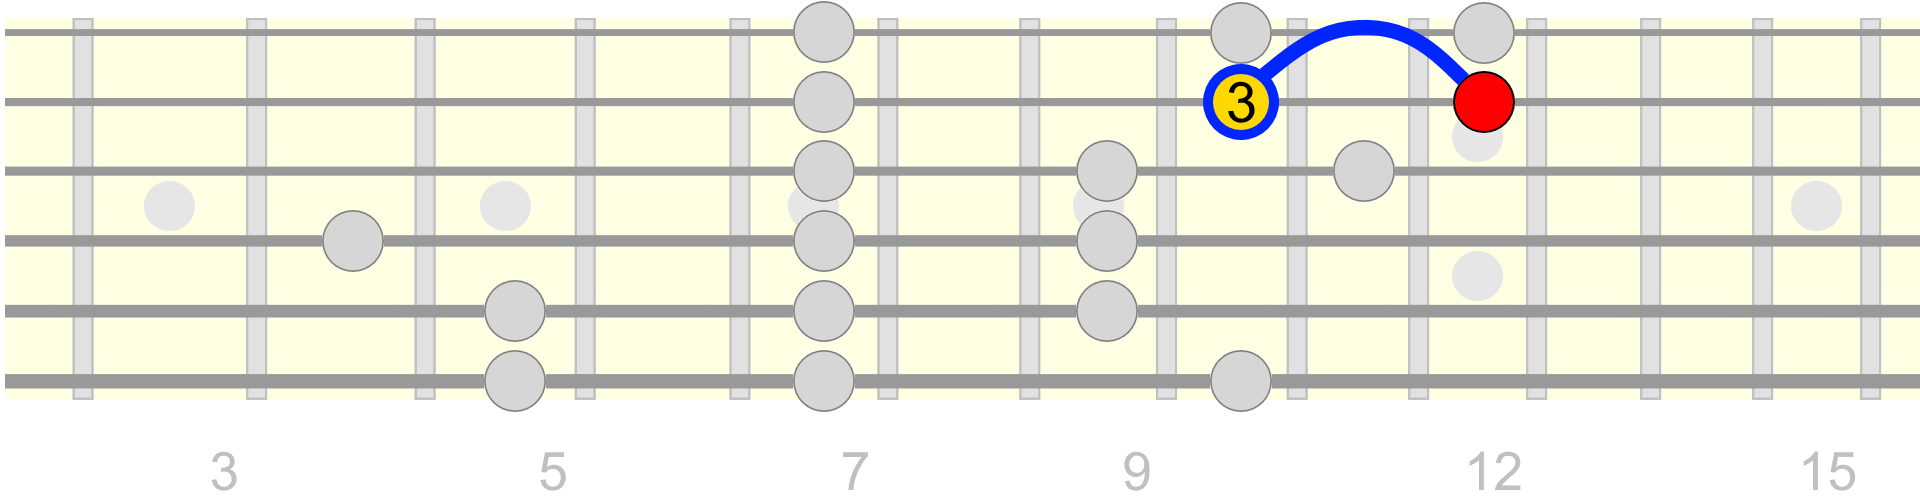
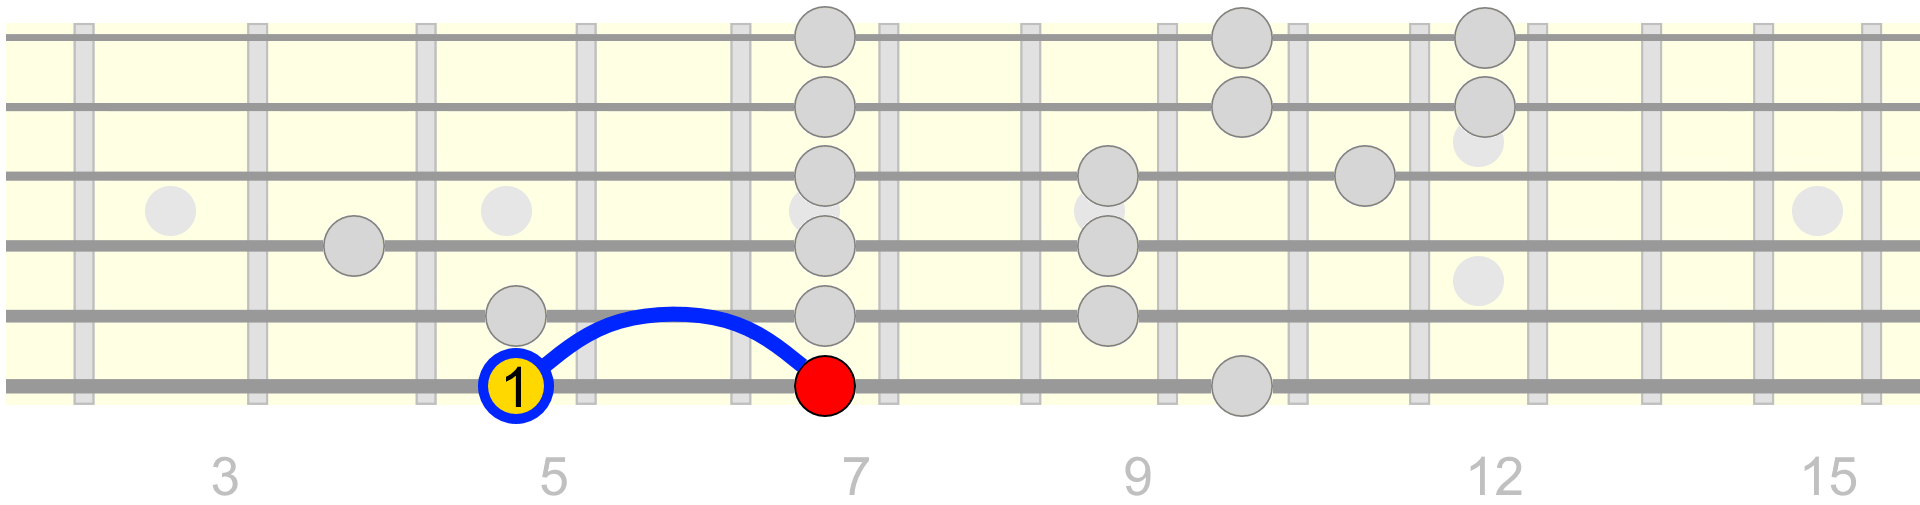
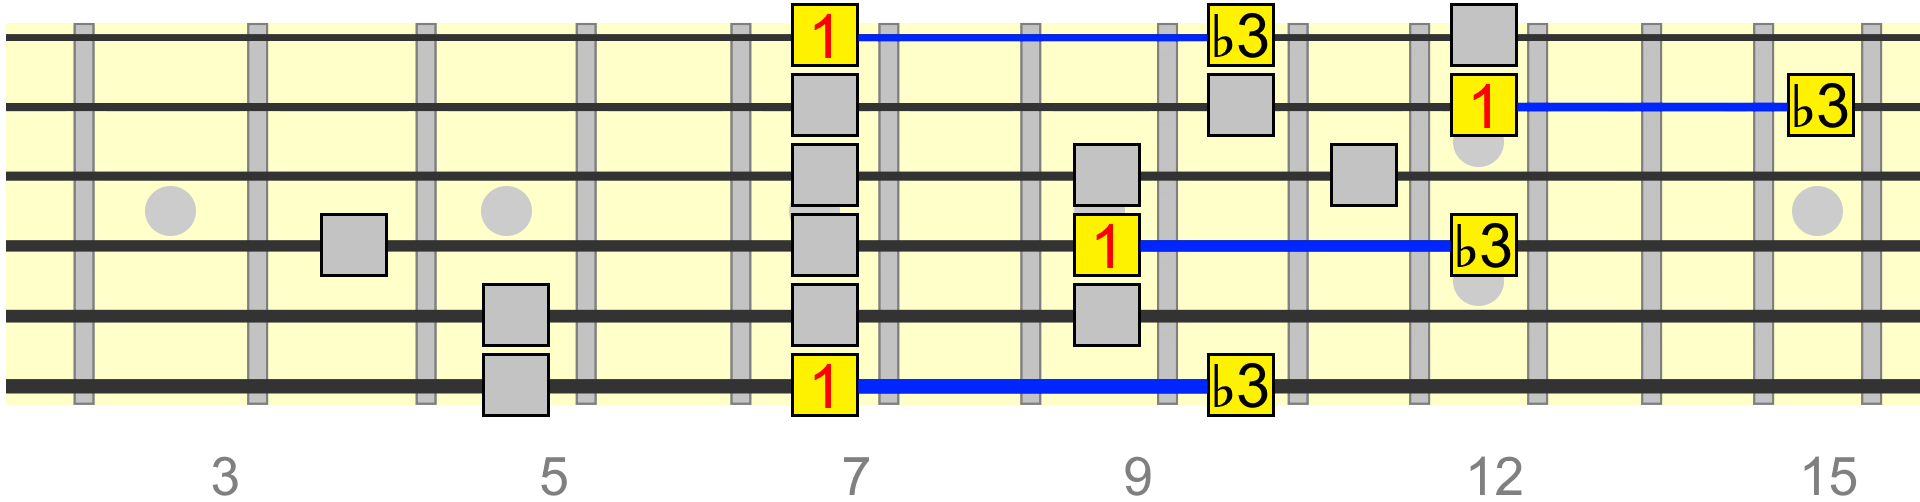
1 to ♭3
For the bend between 1 and ♭3, we'd typically only use the 4th and 2nd string positions...

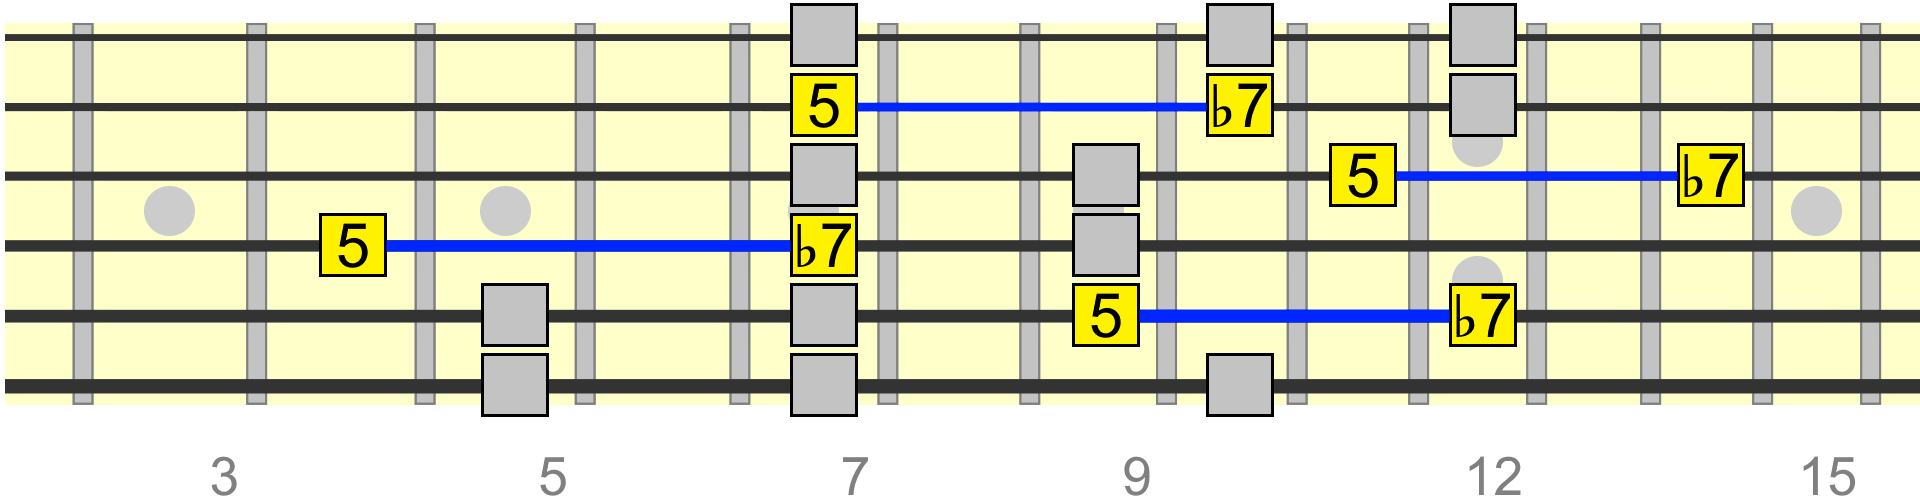
5 to ♭7
A similar minor 3rd bend can be made between the 5 and ♭7. Typically we'd use the 3rd string position...
How to Practice
Practice these bend points individually to start with and then gradually start to combine them in your licks. The more you play around with different combinations and approaches, the more quickly your eyes and ears will connect where your fingers are in the pattern with what you want to express in your lead.
In general it's useful to think of lead phrasing in terms of target pitches. You can then try different ways of approaching these targets, whether using a bend, slide, hammer-on or a straight picked sequence.
By becoming more aware of these targets, and anticipating them as you play your licks, you'll find it's not so important where you start your bend, rather hitting the target pitch accurately and with purpose.
However, the bend points we've looked at can be thought of as familiar reference positions around the scale pattern for approaching your target pitch.
I hope you continue to find this lesson valuable as your string bending develops and you incorporate it more naturally into your lead playing over the coming weeks, months and years.
