What Is A Unison?
In music, a unison is created when the same pitch is played in two or more musical parts, either simultaneously or in succession.
For example, an E note immediately followed by the same E note, or two E notes played together, creates a unison...
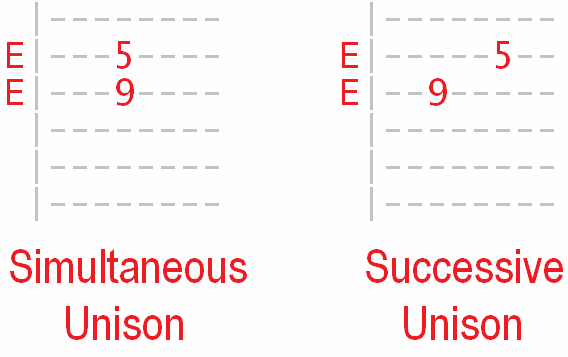
In the context of string bending, a unison is created when we bend to a note either preceding or proceeding that same note on the same or (more typically) another string.
For example, we might pick a "static" E note and then bend to that same E note on another string...
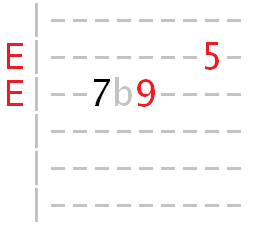
In simple tab form, "b" means "bend to the equivalent of...". So we bend from the 7th fret to the equivalent target note at the 9th fret and then pick the same note at the 5th fret on the other string.
Or, we could play the static E note at the same time as bending to the same E on a different string...
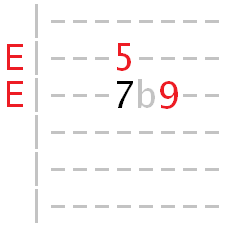
Here, the bend to the target note would start at the same time as picking the static note. They ring out together.
The result is additional emphasis on a given target note.
Practice just these two examples for now, ensuring your bent note matches the static note as closely as possible.
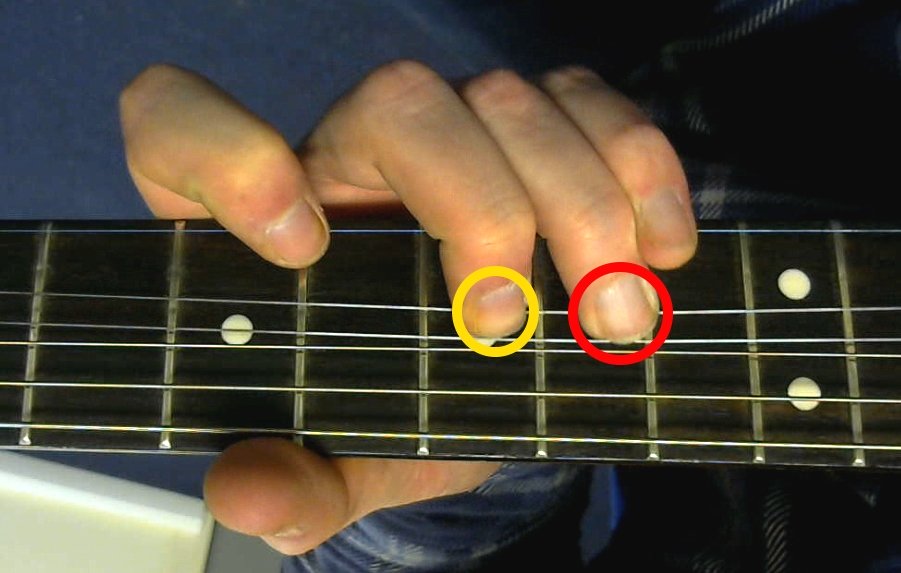
Tip: You can use two fingers to give you more strength for bending. In this photo, I'm using the ring (3rd) finger to bend the actual note, and my middle (2nd) finger to support it.
Kind of like two people lifting a piece of furniture!
Think Target Notes
When bending, you need to think about which notes you want to emphasise within your phrases. We can call these our target notes.
The strongest target note is the root of the chord you're playing over.
For example, if we were playing over E major or E minor, E would be our root. We might bend to that note in order to emphasise that root note.
With unison bends, we "double up" that emphasis by combining a bend to that note and picking the note as normal (static), either together or in succession.
Unison Bends On Different Strings
In the video, we focused on minor pentatonic as our scale. But you can apply unison bends in any scale and to any target note.
Rather than go through every single scale individually, all you need to know are the main unison string relationships that apply to ANY target note on ANY string.
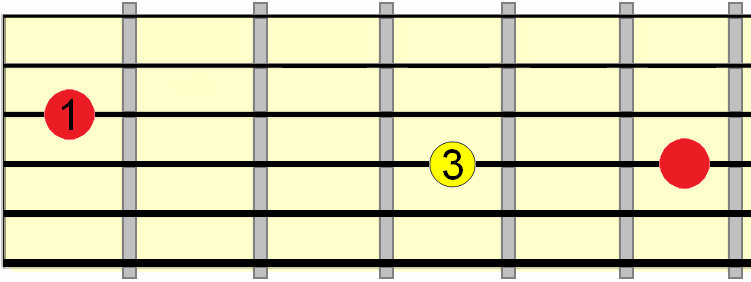
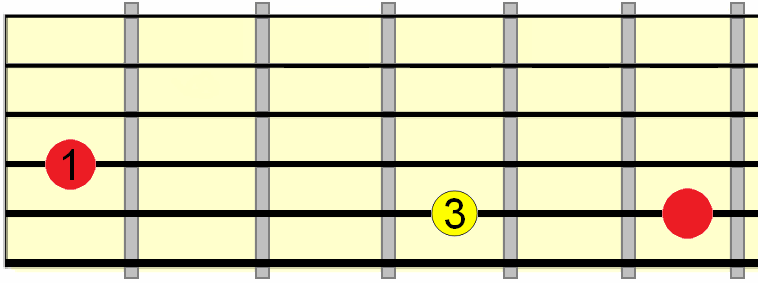
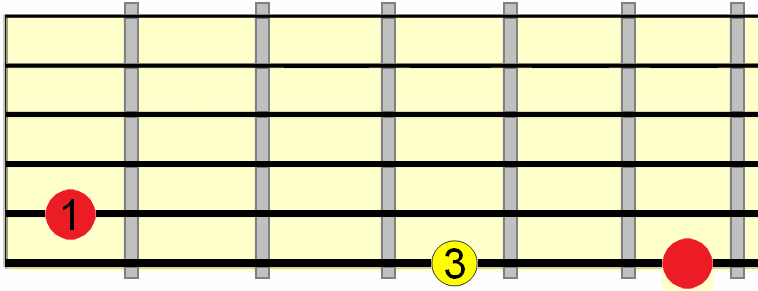
In the below diagrams, I've marked on some movable relationships that work for any target note. The target notes are marked in red, and the "starting" position for the bend (the fret you bend at to get to the target note) is marked in yellow.
1st and 2nd String Unison Bend
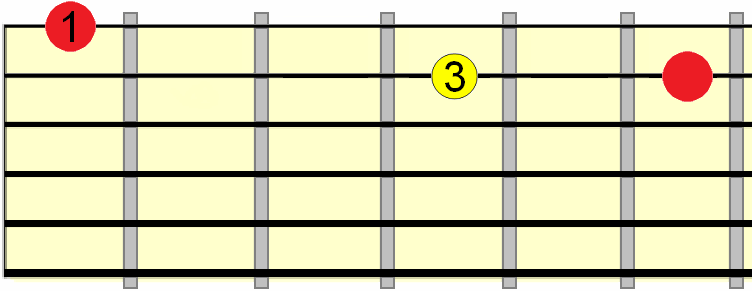
So here, we use our 3rd finger to bend up a whole step (the equivalent of 2 frets) to get the same note as marked on the 1st string.
For example, if we were targeting the note C in a scale or lick (any scale or lick)...

As long as the bend is immediate, it doesn't matter so much if it starts on a note that isn't a part of the scale you're playing. It's the target note that puts the bend it into context. So this 1st-2nd string unison relationship can be used in any situation.
2nd and 3rd String Unison Bend
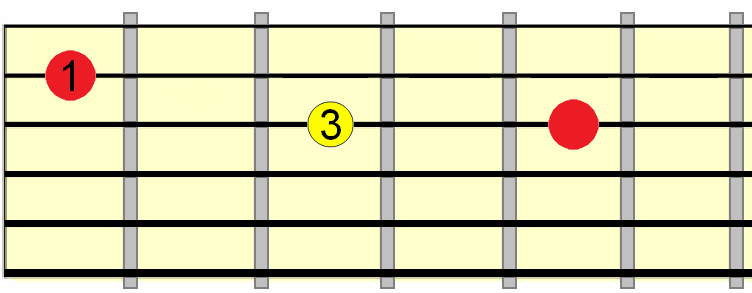
Again, this relationship will work for any note you want to target up the neck.
3rd and 4th String Unison Bend
With the lower strings (4, 5, 6), it's easier to pull-bend them in a downward direction (towards the floor). You won't be able to play a simultaneous unison bend if you do this, but it's a reasonable trade off!
4th and 5th String Unison Bend
5th and 6th String Unison Bend
Practice Adding Unison Bends To Your Licks & Phrases
As always, it's down to you to give unison bends some time and experimentation in your practice schedule. The more you practice them in different situations, the more naturally they'll become a form of expression in your playing. You'll be able to pull them out the bag when the feeling takes you.
What I often do is work out a lick/phrase first using straight picked notes, and then gradually add in different phrasing techniques (such as bends), building it up in layers. You'll soon realise that you can squeeze a lot of life and colour out of even the simplest two/three note phrases by using techniques such as unison bends.
