This lesson on guitar fret intervals follows on nicely from learning the notes on the fretboard and note relationships.
Now we're going to look at how intervals work on your guitar's fretboard.
Intervals can be seen as the space or distance between two pitches/notes. The larger the distance between the pitches, the larger the interval.
So, for example, the interval between the notes A and C is larger than the interval between A and B.
A bunch of intervals from the same starting note creates a chord (when they're played together) or scale (when played one after the other). So intervals can be seen as the building blocks of music. We'll look more at this in a coming part. But first...
Half Steps & Whole Steps
As you delve into guitar theory, you'll hear people talk about whole steps (also called whole tones, abbreviated as W or T) and half steps (also called semitones, abbreviated as H or S).
Well, what they're referring to are intervals - the distance between two notes.
Half and whole steps are the smallest intervals/movements on the fretboard.
See the diagrams below for how these interval "steps" would appear on the neck...
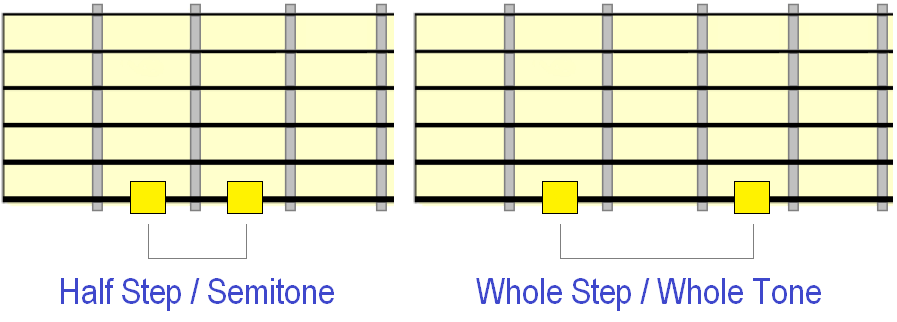
That's how half step and whole step intervals would appear on one string. It's the same spacing whichever string you're on:
- Half steps are the equivalent of one fret between the starting note and destination note.
- Whole steps are the equivalent of two frets between the starting note and destination note.
So if we were to move from the 3rd fret up a whole step we would end up at the 5th fret.
If we were to move from the 5th fret down a half step we would end up on the 4th fret.
If you see a scale written like this...
...you'll know what the W's and H's mean and you should at least be able to visualize the scale across one string, using the whole and half step fret intervals.
You may also see scales written using a series of 1's and 2's. That's 1 for a half step and 2 for a whole step (as 2 half steps make a whole!).
For example, the above sequence might be written as: 2 2 1 2 2 2 1
Or as: W W H W W W H
Or as: T T S T T T S (T = whole tone, S = semitone)
Now, we'll
want to use these intervals across more than one string, so we need to
know how these intervals appear vertically, from string to string, as well as
horizontally.
Half/Whole Steps Across More Than One String
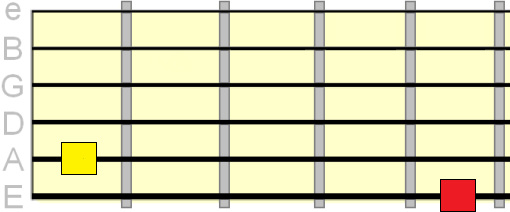
Let's look at a few diagrams to see how these same whole and half step intervals appear between two adjacent strings.
Grab your guitar and play these positions so you can hear the sound of the interval, moving both up and down.
Count how many frets wide the interval appears. Why is this necessary? Because knowing where intervals appear in several places on the fretboard will make scale and chord improvisation easier.
Half Step Between 6th and 5th String
Whole Step Between 6th and 5th String
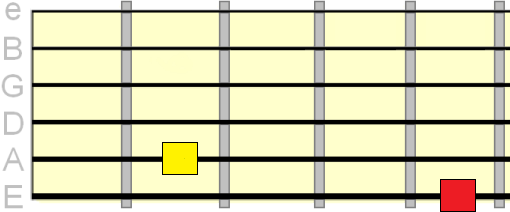
Both these relationships are the same for the bottom four strings: E-A, A-D and D-G.
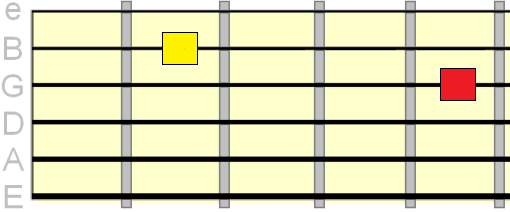
However, because the B string is tuned differently in relation to the G
string, we have to compensate by adjusting the relationship on the
fretboard:
Half Step Between 3rd and 2nd String
Whole Step Between 3rd and 2nd String
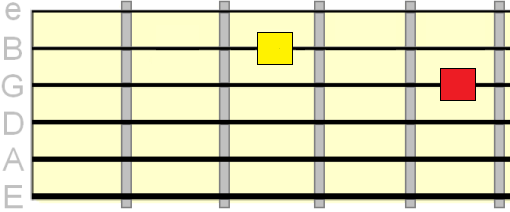
Then it's back to
the same fret spacing as before between the B and high E string...
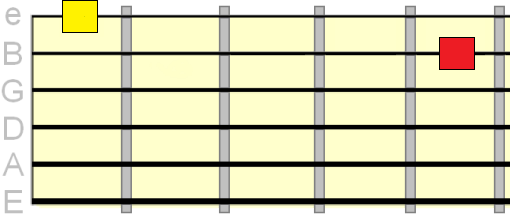
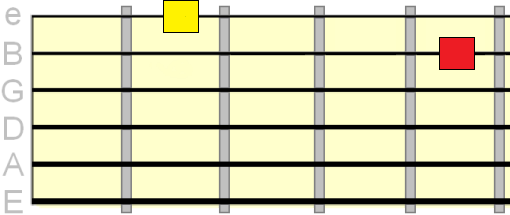
Whole and half step intervals are the building blocks of scales and movements between chords, so being able to see these relationships across all six strings is hugely beneficial, even if it doesn't seem that big a deal right now. These are the kind of visual references that will help you navigate the fretboard musically and without hesitation.
Along with the note patterns you learned in the previous lesson, you'll be able to jump between note positions based on the interval relationships you map out on the fretboard. This in turn means there'll be less time spent on trial and error and more interconnectivity between the different concepts we'll explore in future lessons.
