These quick tips will offer a "next level push" towards what could be considered more advanced theoretical skills.
Perfect for if you're at the intermediate stage, have a basic understanding of the fretboard, and just need some fresh ideas.
So we're trying to balance intuitive application with more advanced musical outcomes. The following skills should be pretty simple to grasp and, at the same time, produce reliable and great sounding wins that will serve you well.
Let's see how we go. Feel free to ask any questions at the bottom of this page...
1. Spice Up Your Dominants
One "secret weapon" for giving a dominant 7th chord more tension is to simply raise its root by one fret (or semitone).
This creates a diminished 7th shape which acts as an altered inversion of the dominant we're on...
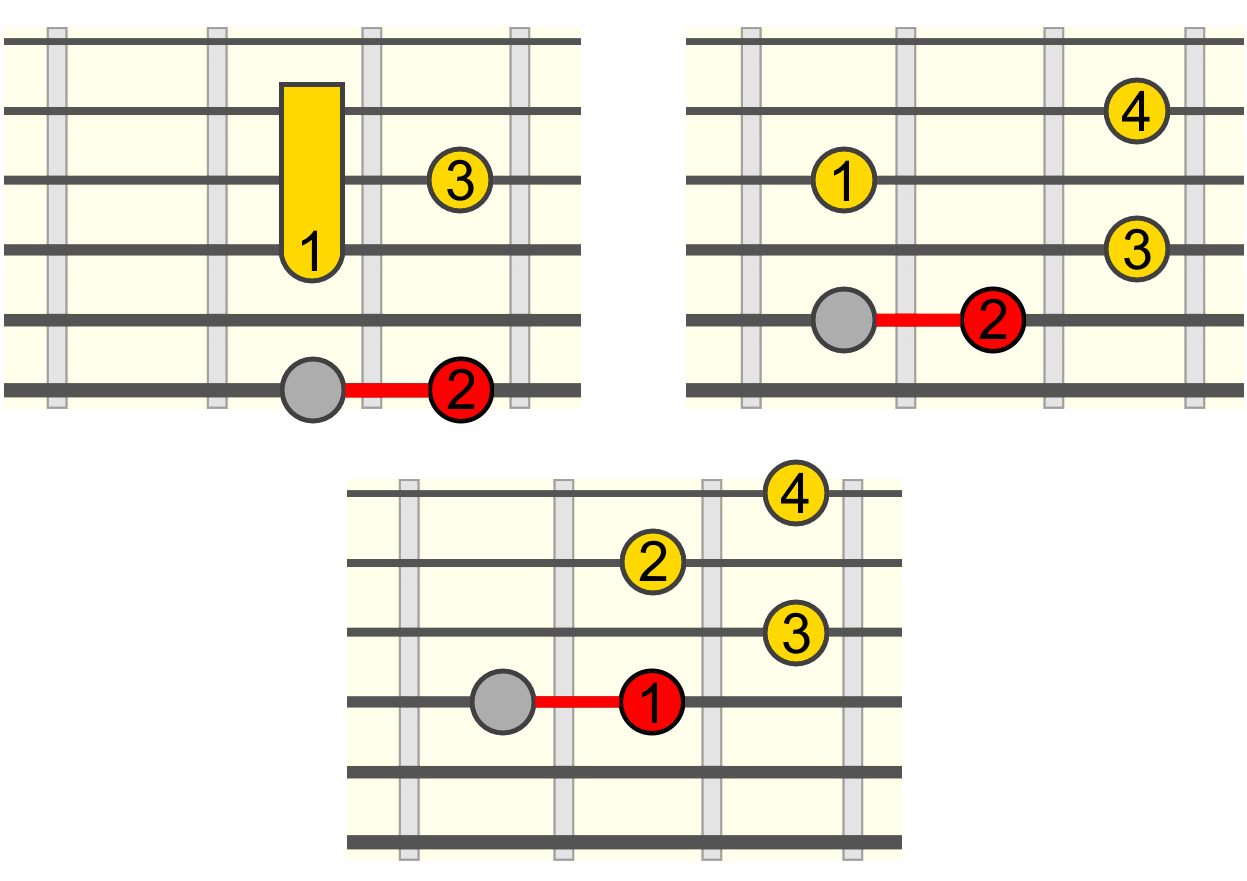
For example, let's take a standard 2 5 1 (or ii V I) progression in G major...
Am / D7 / G
Try raising the low D root of that D7 dominant by one fret, here shown in two positions...
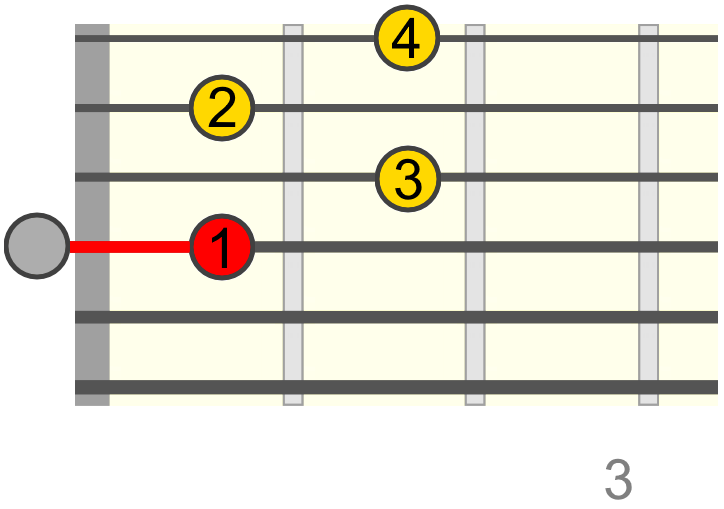
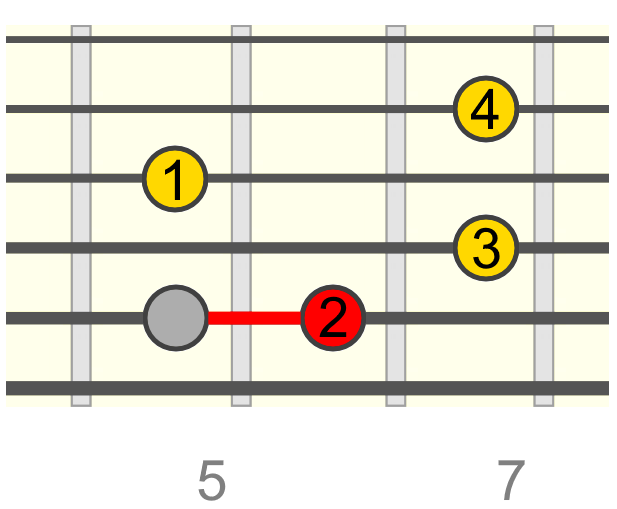
Am / E♭dim7 / G
Gives the dominant a more dramatic feel in my opinion.
This technically gives us an E♭ diminished 7th (E♭dim7) shape. But it works as a D7 substitute because the raised root of the dom7 shape creates an especially tense inversion of that chord.
It essentially creates a "♭9" quality (e.g. D7♭9), by raising the root of the dominant 7th (e.g. D to E♭).
Tip: Because of the symmetry of the dim7 chord structure (which you can deep dive into here), we could also place a dim7 shape on the 3rd or 5th of the dominant chord, effectively giving us two additional positions to colour the dominant harmony with that ♭9 tension note.
Sure, it won't always be the sound we want in place of every dominant 7th chord. But it is a more evocative option for many occurrences of a dom7, especially when chord playing solo.
And remember, where there's a chord, there's an arpeggio. You can also arpeggiate a dim7 chord over a dom7 in the same way - by starting it a fret higher than the dom7 root. Again, if the dominant was D7, we could form an E♭dim7 arpeggio pattern over it...

Really effective for adding a quick spark of lead tension!
2. Resolve Into a Different Mood
Whether you're playing in a major or minor key, you can switch either of these tonic chords (e.g. C or Am) from major to minor or vice versa. In other words, we can make our "home" darker or brighter at any given moment.
Take this example in the key of A minor...
Am / Em / F / G / Am
Am is our "home" or tonic in that example. But we could make our homecoming brighter and less predictable by resolving on A (major or maj7) instead...
Am / Em / F / G / A
This is known as parallel modulation (a type of key change) because we're now resolving around a major chord on the same root as the original minor tonic (A in this case). We could effectively treat this parallel switch as the new home of an A major key.
Another example in the key of C major...
C / Am / F / G / C
When we come back around to C again, we could instead play Cm, shifting the mood (and key) from the more brightly expected major to a moodier minor. Catches the listener off guard...
C / Am / F / G / Cm
3. Tweak Your Pentatonics
I'm sure you're familiar with the standard major and minor pentatonic scales. They're the first scales we typically learn. But we can make simple adjustments to these basic patterns for some more nuanced lead sounds.
For example, we could lower the 6th tone of major pentatonic to give us a little sprinkle of tension over an otherwise light and restful major tonic (here shown in C)...
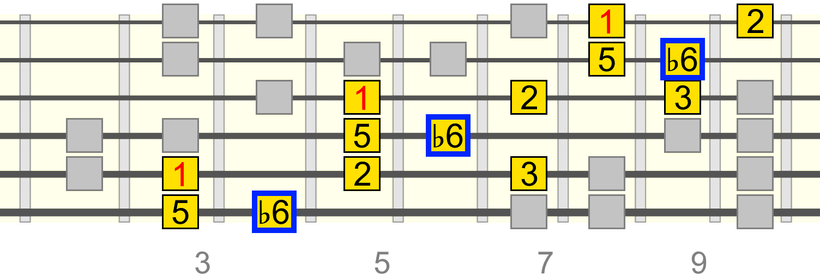

Just be sure to use this altered 6th as a passing tone. That means we don't emphasise/hold on to it over the major chord it's connected to. Rather, we move through it as part of a larger sequence.
What's great about this altered tonic pattern is it will also work effectively over a minor iv (e.g. Fm in the key of C), the V (e.g. G7) or the ♭VII (e.g. B♭7). This is because of how the altered tone interacts with these chords.
For minor pentatonic, we can create bluesier melodic pathways by raising the 4th (♯4)...

That larger interval distance between the 3rd and raised 4th tones has a really gnarly blues quality.
Tip: try bending that raised 4th up slightly, almost touching the 5th just above it, for additional character.
4. Enrich the Harmony With Superimposition
Superimposition might sound complicated, but really all it means is using a familiar shape or pattern on a position other than the root.
It's used as an accompanying device to add colourful, complementary layers to the existing harmony.
For example, we could play an Em7 shape (or arpeggio pattern) over C (positioning on its 3rd), giving us a rich sounding Cmaj9...
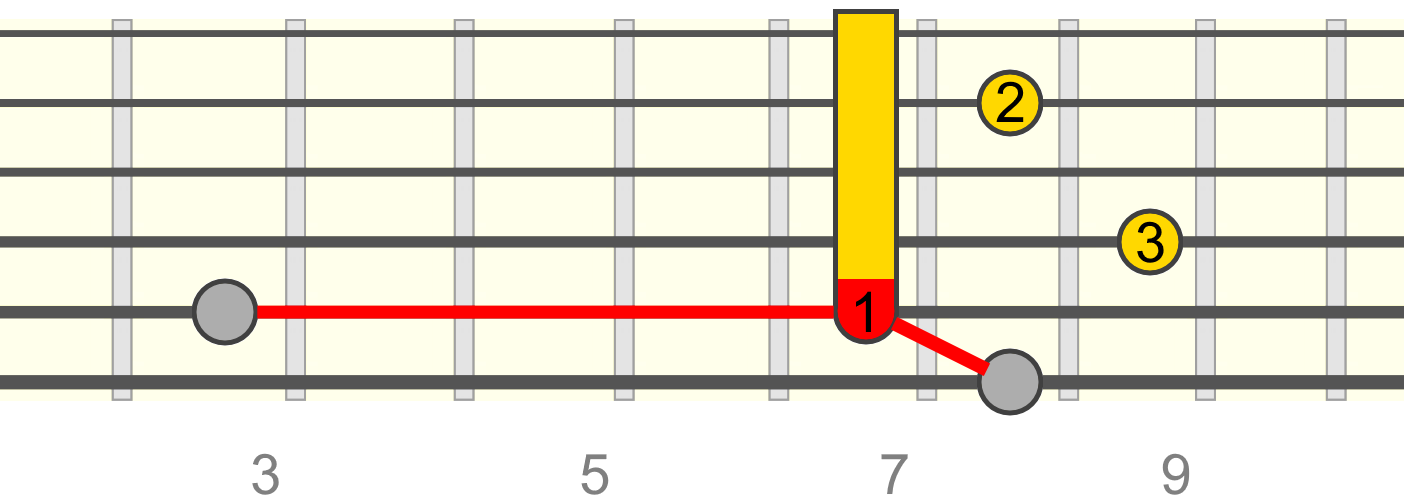
In the below audio clip I play over C and F using the relative shapes/patterns of Em7 and Am7 respectively. We start with just the backing instruments, then the guitar does it's thing...
Backing Track Chord changes: C / F (C major key)...
Similarly, we could play a Cmaj7 shape (or arp pattern) over Am (positioning on its minor 3rd), giving us a more intricate Am9...
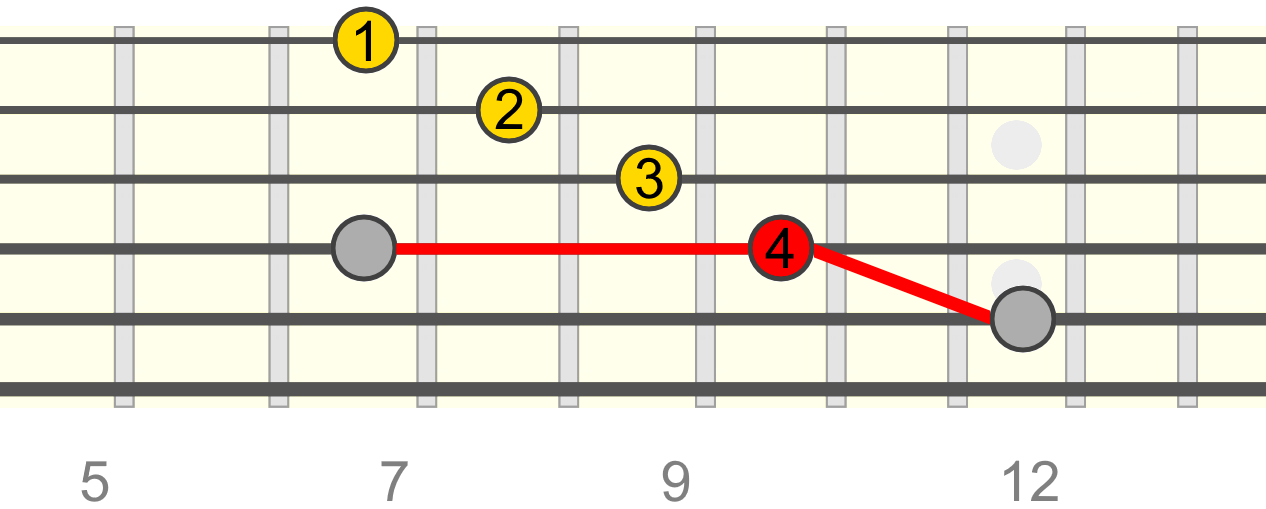
This time I'm playing over Dm and Am using the relative shapes/patterns of Fmaj7 and Cmaj7...
Backing Track Chord changes: Dm / Am (A minor key)...
There are many more examples of this kind of superimposed placement, and we'll be sure to dive deeper into this. But if you're playing/recording alongside other instruments, you can extend the harmony by re-using shapes and patterns you know in a related neck position.
Far more interesting than simply "doubling up" on the existing harmony when creating multiple instrumental layers, and it gives you more neck positions to explore as an accompanist.
5. Shift the Groove: Start Licks Off the Beat
This trick seems so obvious once you know it, but you may have gone years without thinking about it.
Let's say we have a simple sequence that's timed in a 4/4 measure as follows...

As you can see, the first note of the lick is placed on the 1st beat. It's common to begin a phrase on the 1st beat as it's the strongest beat in the measure.
But if we shift that entire lick back or forward by an eighth note (effectively between two beats), we can experiment with some variation without changing the overall form of the lick itself.
The first example involves starting the lick an eighth note before the 1st beat (so between beats 4 and 1)...

The second example involves starting the lick an eighth note after the 1st beat (so between beats 1 and 2)...

Backing Track In A minor...
Try this off-beat shifting technique with any licks you know. You'll be surprised at how it can turn even simple licks/phrases into something that works with the groove in a more dynamic way. Gives your licks more mileage in different situations.

