Using Diminished 7th Chords for Substitution
Diminished 7th chords (dim7 for short) are a versatile form of harmonic tension we can inject into our chord progressions.
When considering them as a form of chord substitution (that is, replacing a more standard chord with a dim7), our eyes and ears open up to their potential as an alternate harmonic device. Similar to other forms of dominant substitution, we can primarily use dim7 as an alternate voicing for pretty much any dominant 7th chord that may occur in a progression.
This lesson will expand on the introductory diminished 7th chords lesson and take us through their various functions in a way that is focused more on specific chord placement and substitution.
The Dominant 7th / Diminished 7th Connection
Diminished 7th chords are closely connected to dominant 7th chords in structure and function.
If we take the three common dominant 7th shapes below, we can see how they become a dim7 by simply raising the bass root by a semitone/one fret (use the tabs to switch between dom7 and dim7)...
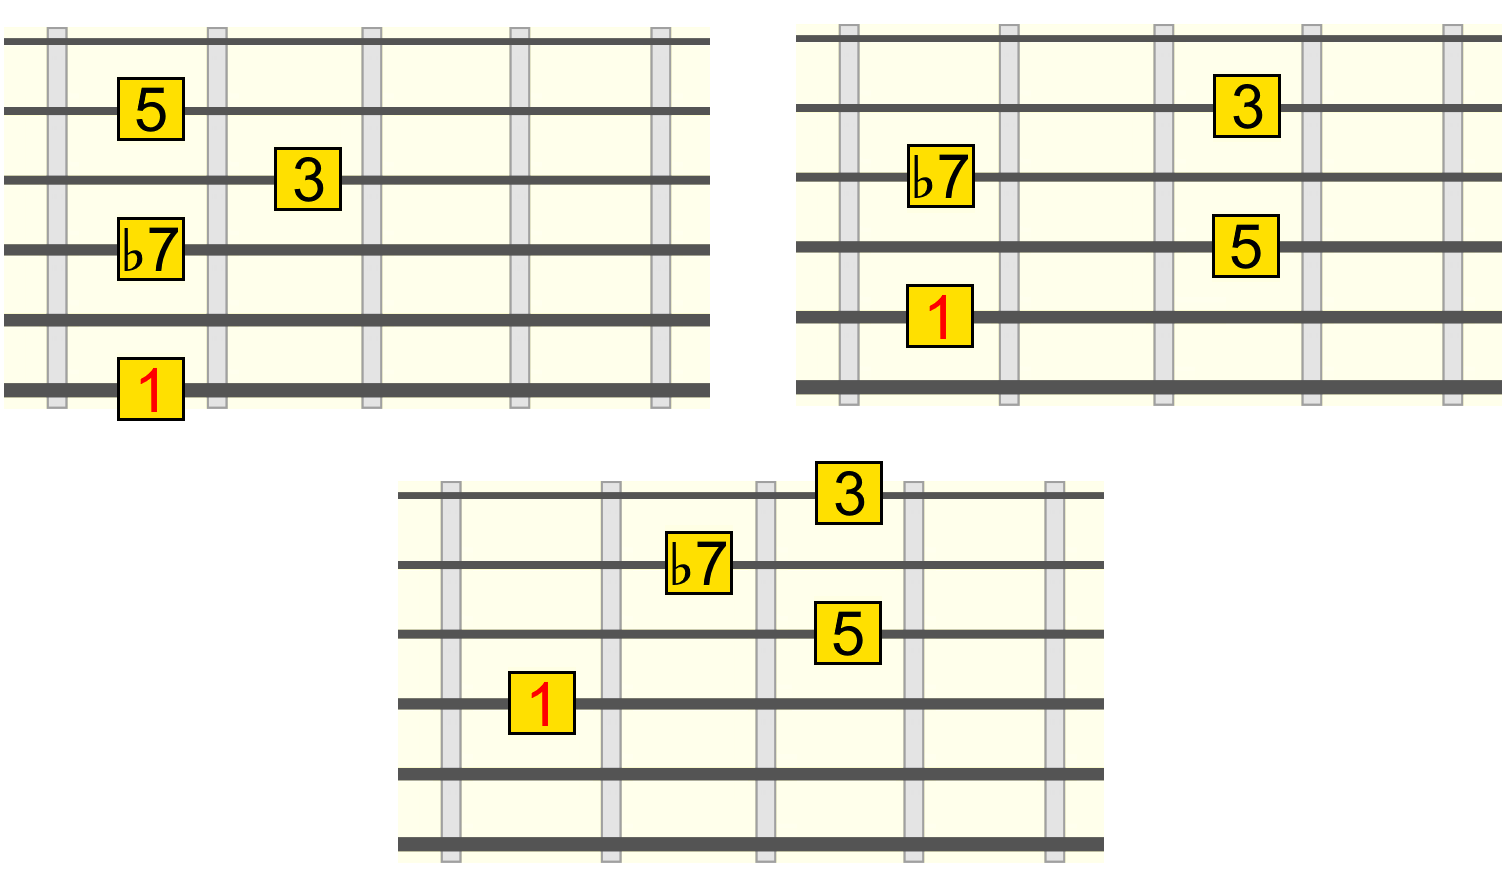
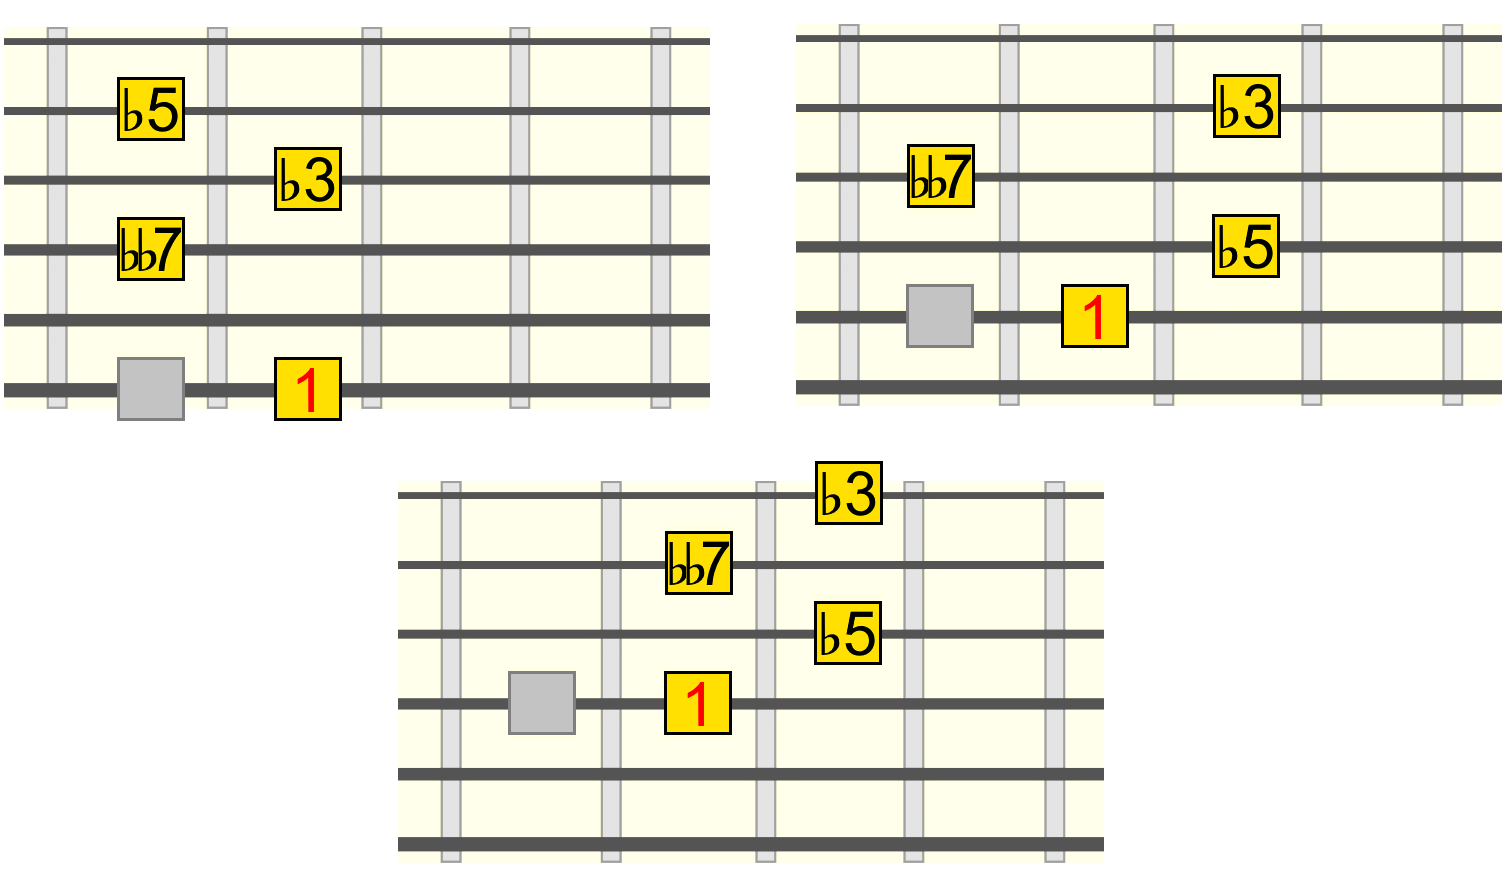
We can consider these dim7 shapes as creating a rootless inversion of a dominant 7th, flat 9th (e.g. G7♭9) chord, with the bass on the ♭9...
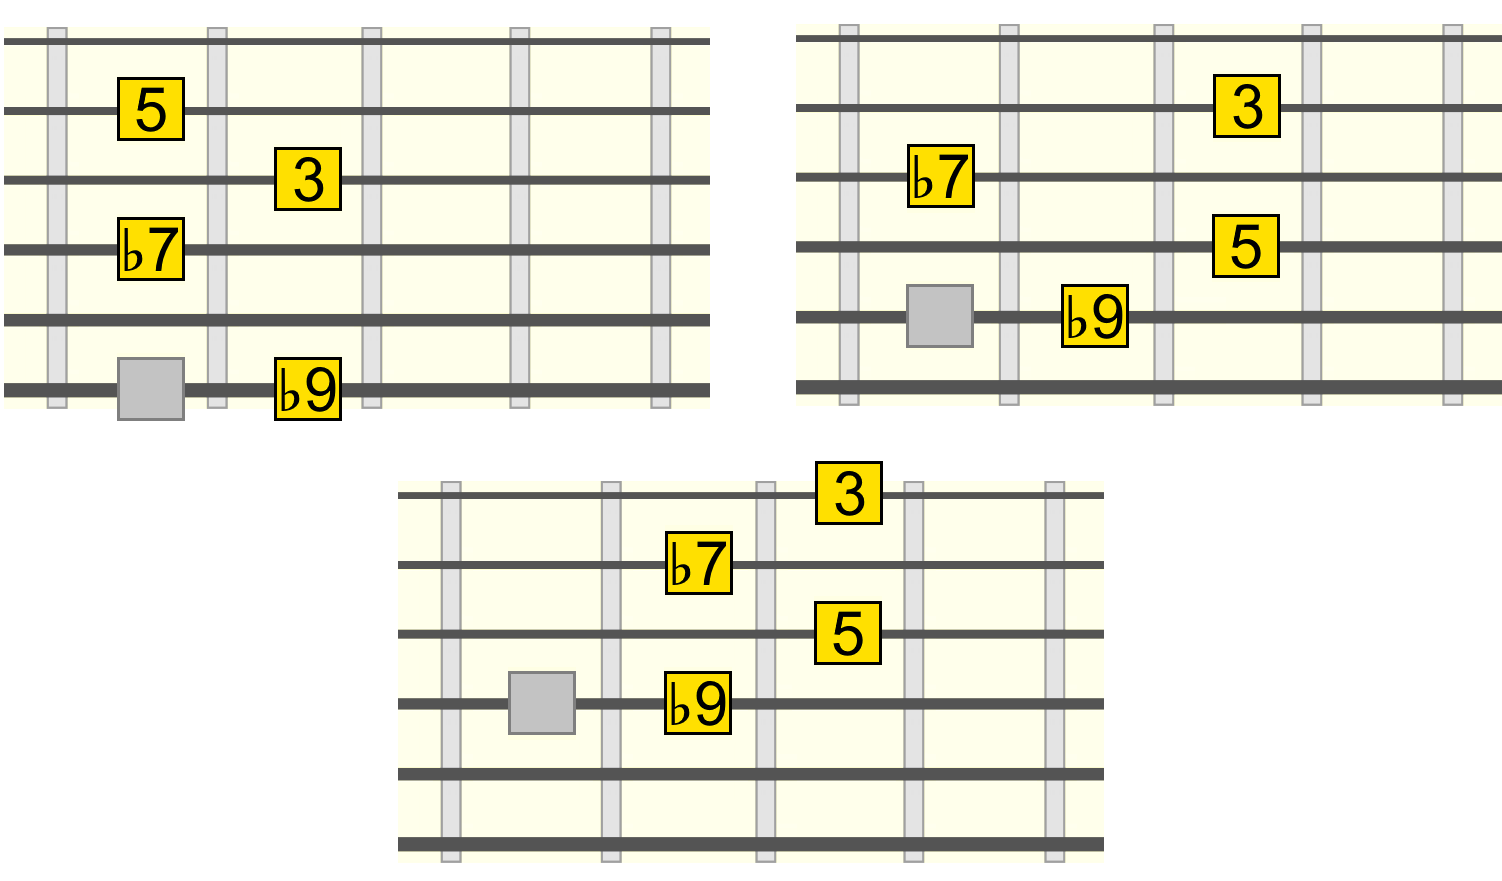
Because of the symmetry of diminished 7th chords (which was explained in a previous part), we can see how any of those shapes can be positioned in three additional positions, effectively giving us inversions of the 7♭9 chord with the bass on each of its tones (♭9, 3, 5, ♭7). Remember, each one is a minor 3rd apart.
For example, here we can see inversions of E7♭9 using related dim7 positions (Bdim7, Ddim7, Fdim7 and G♯dim7) on the 6th, 5th and 4th strings...


Tip: you can of course use this broader dim7 pattern to arpeggiate a 7♭9 chord in a lead context.
So the first thing to understand is that we can add the tension of a ♭9 to any dominant 7th chord by placing a dim7 shape on any of its tones above the root (again, ♭9, 3, 5, ♭7).
Visually though, it's perhaps easiest to think of substituting any potential dominant 7th chord with a dim7 positioned one semitone/fret up from the dominant's root. This is our easiest reference position, which we can then take up or down the neck (if we so wish) using that dim7's inversion positions.
Let's now look some common uses for this kind of dim7 substitution within a progression.
The V (major keys)
Because the ♭9 acts as a natural tension on the V (e.g. G7♭9 - C), its related dim7 shapes will function as inversions of this tension. So we can technically substitute the standard V dominant with a dim7. We can also play this dim7 over an existing V, for example if another instrument is playing the standard V7.
To demonstrate this, let's start in the key of C major. Therefore G (or G7) would be our standard V or dominant, facilitating a resolution to the tonic. Below, we approach this resolution in the form of a ii - V - I cadence (Dm / G7 / C). Fret number below the diagrams...
Dm7
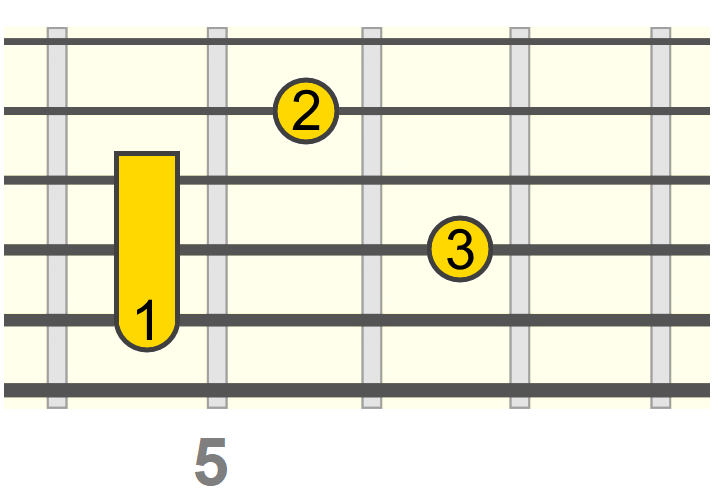
G7
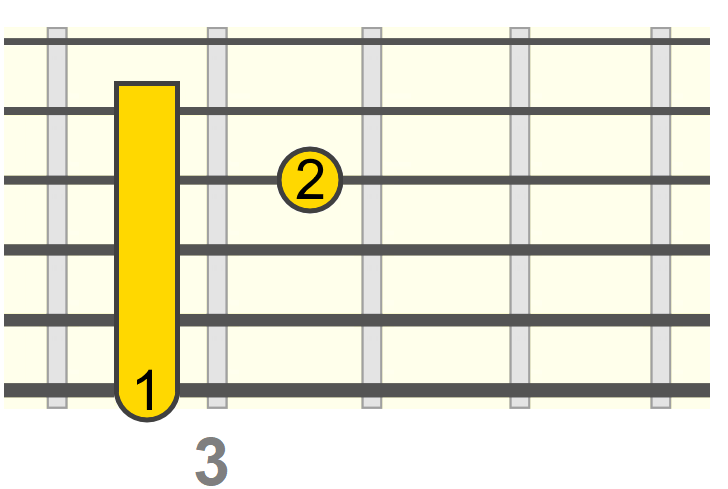
Cmaj7
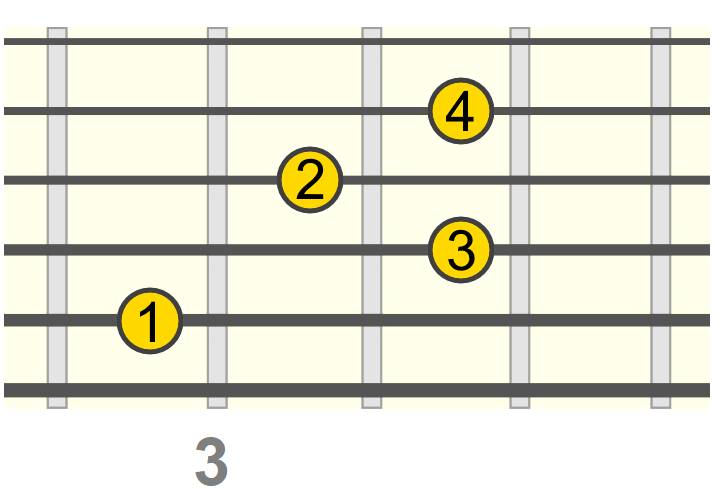
Now we're going to substitute that G7 dominant with G♯dim7...
Dm7

G♯dim7
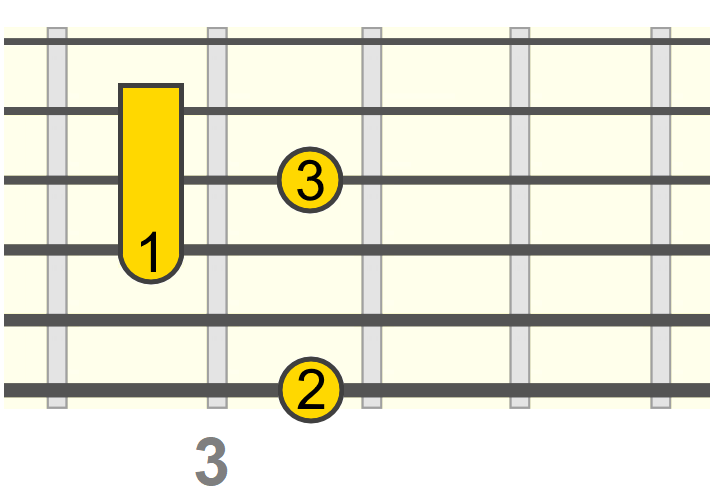
Cmaj7
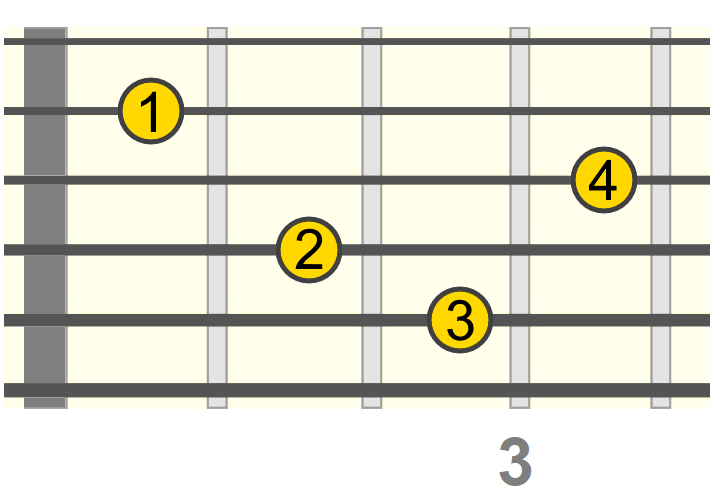
So all we're doing is placing a dim7 shape one fret above where the standard dominant root would be.
Given the dim7 symmetry, we could also use the following dim7 shape/position in place of G7, or even move between them.
In this example, the dim7 is rooted one fret below the tonic...
Dm9
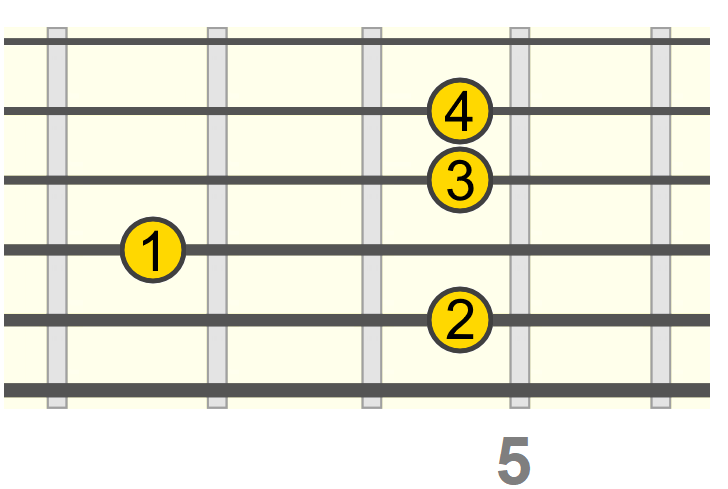
Bdim7
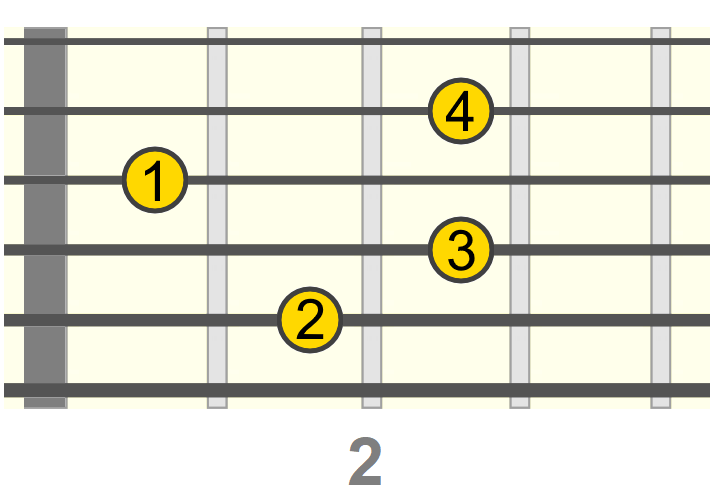
Cmaj7

In this example, the dim7 conveniently sits on the same root as the ii...
Dm7

Ddim7
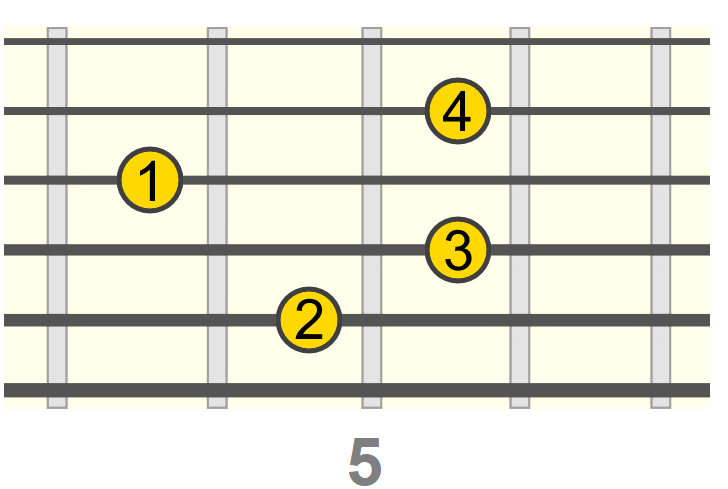
Cmaj7

Higher up the neck, using the next dim7 inversion position, which happens to fall on the IV. This gives us a descending leading tone (the movement of the highest tone between chord changes)...
Dm7
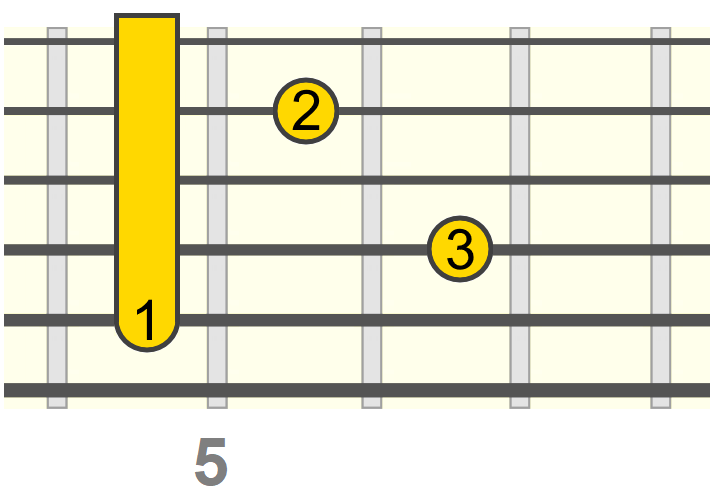
Fdim7
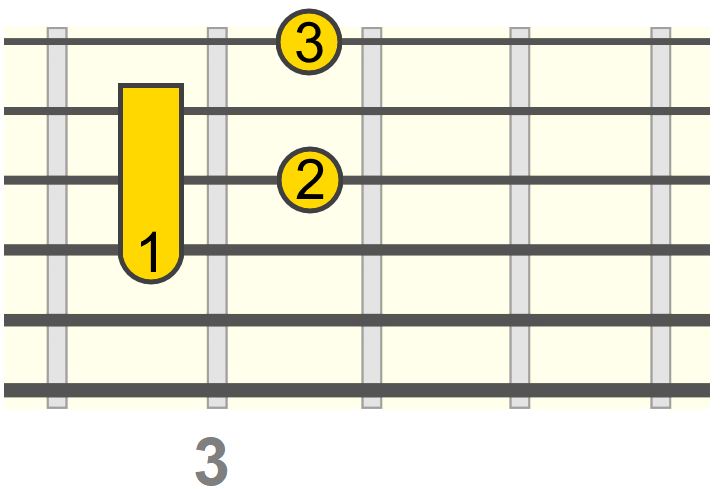
Cmaj7
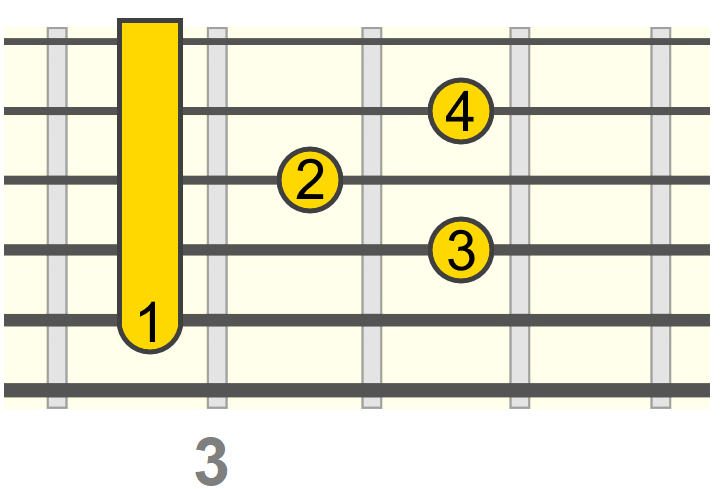
If you're not playing solo, and another instrument is playing a standard dominant (e.g. G7), just know that you have the option to embellish it by playing any of these related dim7 positions.
The more you play around with that combination (dim7 over dom7), the more intuitively your judgement of when is appropriate to use it will become.
The V (minor keys)
Same concept as above, but this time we're resolving to the relative minor tonic.
The dim7 chord naturally occurs on the 7th degree of harmonic minor, which is the primary harmonic system used when treating the dominant as a 7♭9 chord (e.g. E7♭9 - Am = A harmonic minor).
An example in the key of Am, where we approach the tonic from the ♭VII degree (G), bridged using a dim7 shape...
Dm7

G13
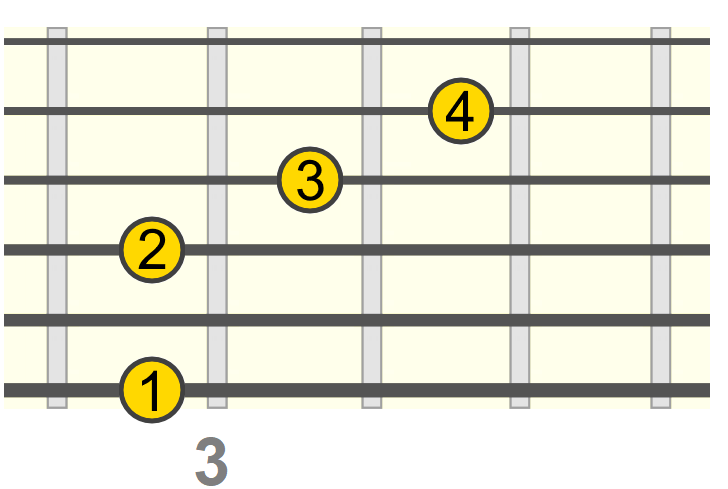
G♯dim7

Am
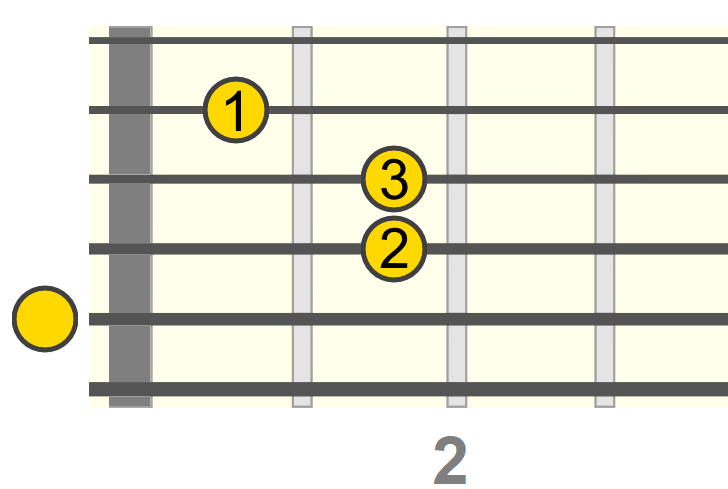
So even though we're playing a dim7 on the 7th degree, it still acts as the dominant because it's essentially an inversion of E7♭9.
Continuing, below we're using another inversion of that dim7 dominant substitution, a whole step up from the tonic...
Am

Fmaj7
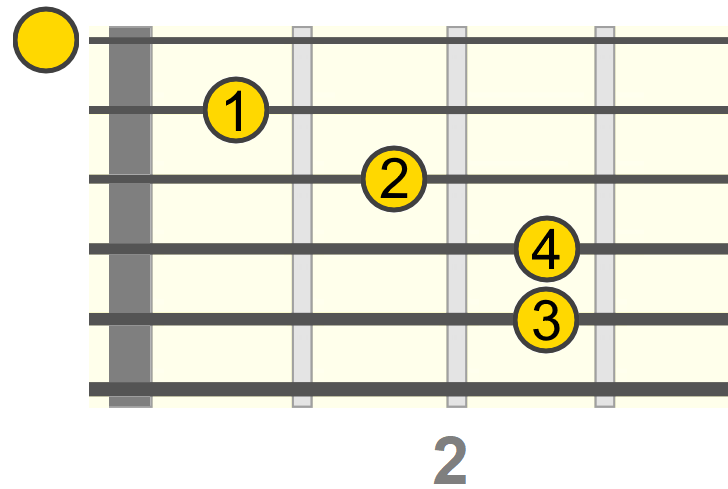
Dm7
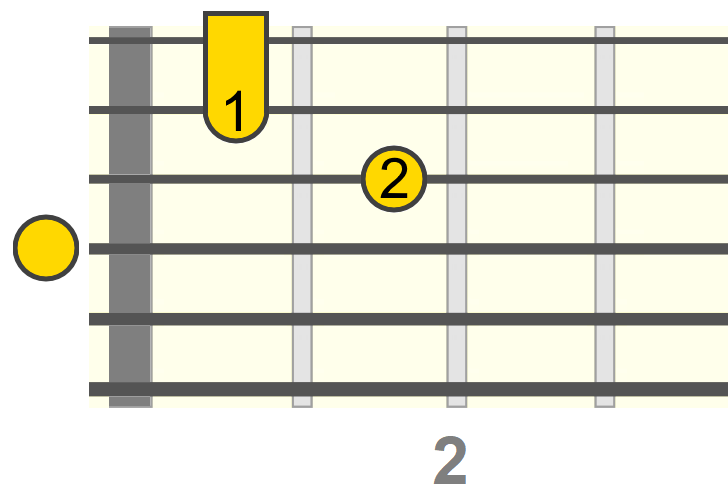
Bdim7

Am

Incidentally, any of these dim7 examples in a minor key could also naturally resolve to the relative major key (C major in this case).
So whether in a major or minor key, the dominant can be given more tension and variation by using these dim7 shapes in the appropriate positions.
The VI (Major Keys)
Sometimes referred to as the "V of ii", because of how it functionally leads to the ii (e.g. C - A7 - Dm) in a similar way the V leads to i.
The VI (6th degree) also carries the ♭9 tension, which we can similarly substitute with a dim7. The same positioning applies from earlier, treating the VI as if it's a dominant.
For example, in the key of C major, A7 would be our VI, which we could substitute with A♯dim7 (one fret higher)...
Cmaj7

A♯dim7
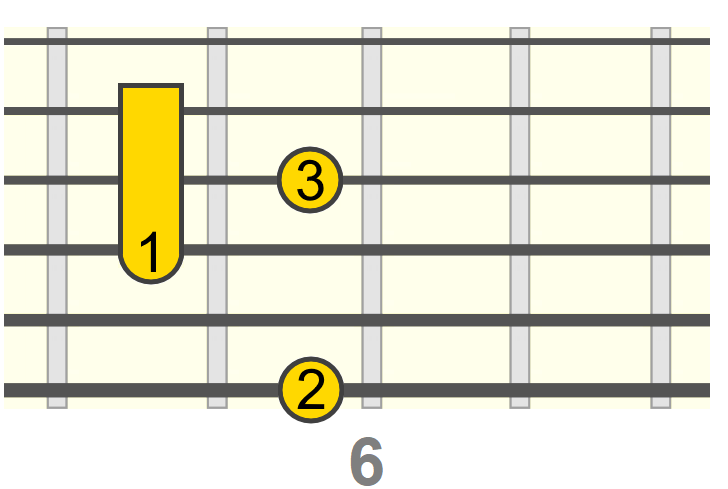
Dm7

G7sus4
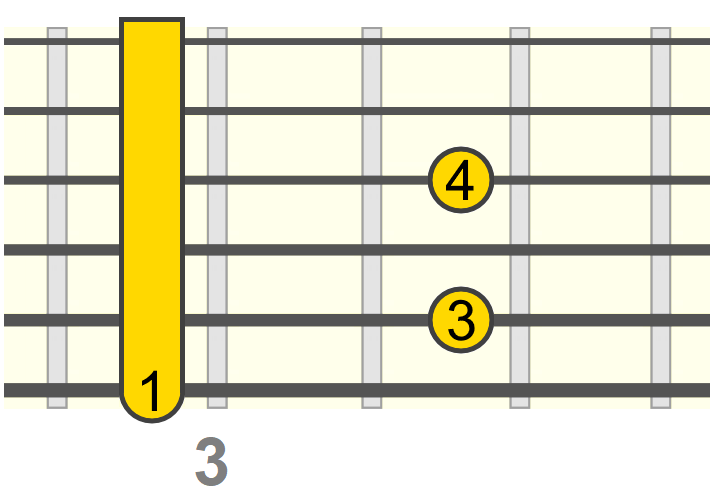
Another example. This time we interplay between the ii and VI substitute using related dim7 inversions in close proximity...
Dm7

Edim7
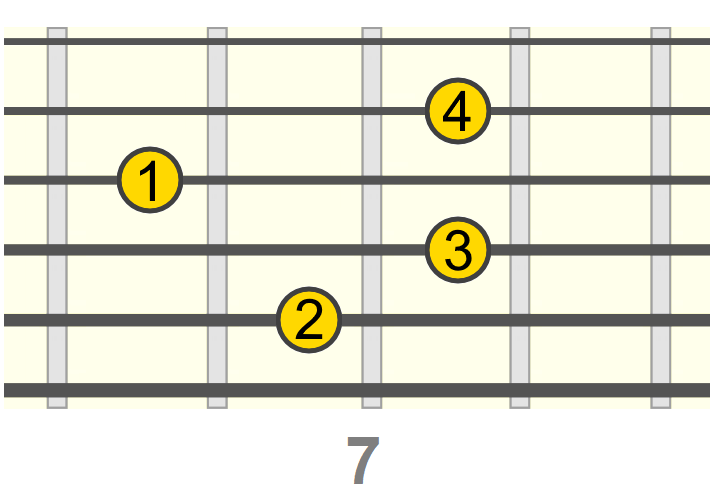
Dm7

C♯dim7

Dm7
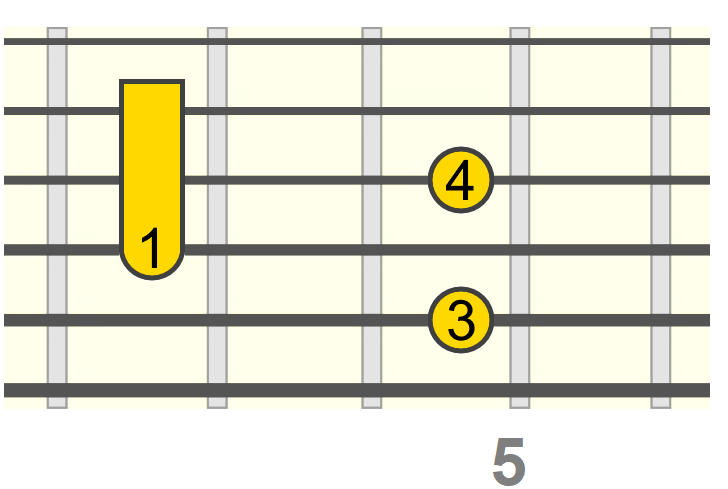
This in part demonstrates how we can use dim7 shapes to prolong our time away from the tonic.
The II (major keys)
The major (typically dominant 7th) II is a common non-diatonic chord which we can connect with a similarly functioning dim7.
First, here's the standard II (D9) being used in the key of C major...
Cmaj7

Fmaj7
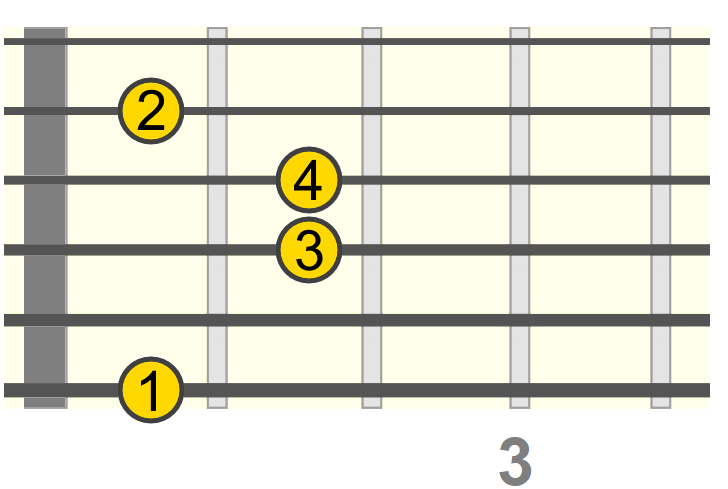
Am9
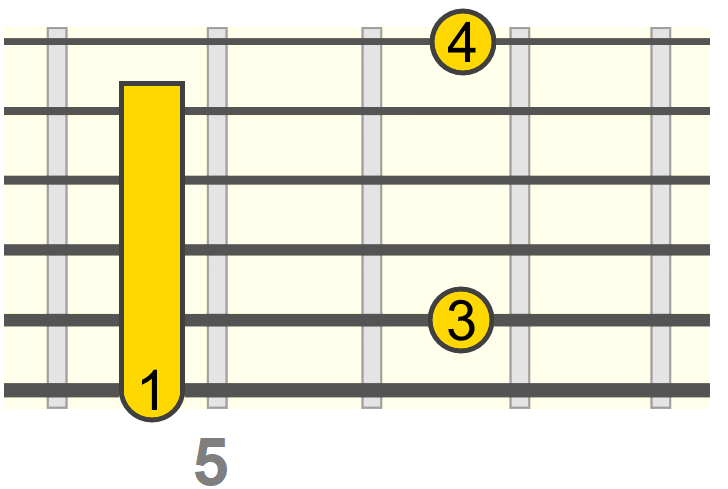
D9
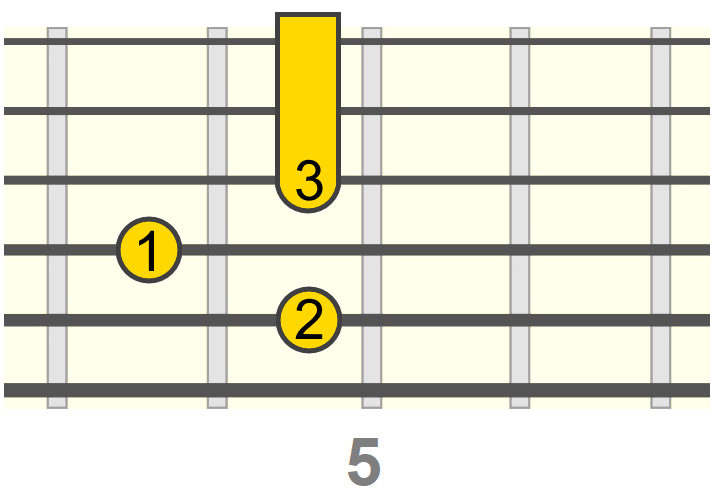
Kind of sounds like an unexpected detour within the progression. Now we're going to replace that II, similar to before, with a dim7 one fret up and complete the sequence from there...
D♯dim7
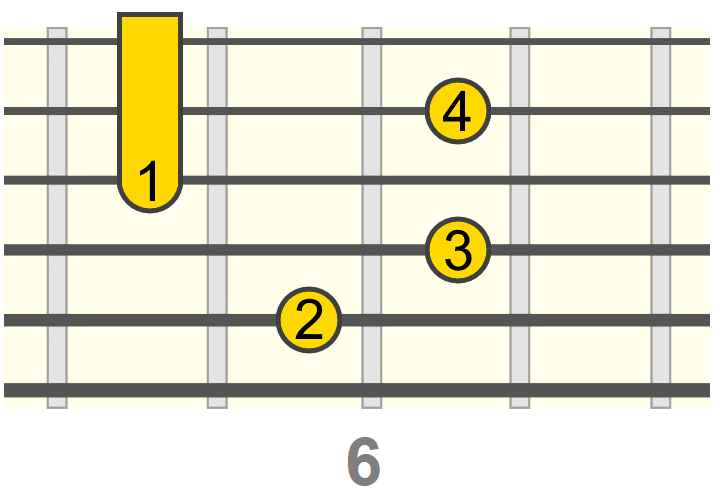
Dm9
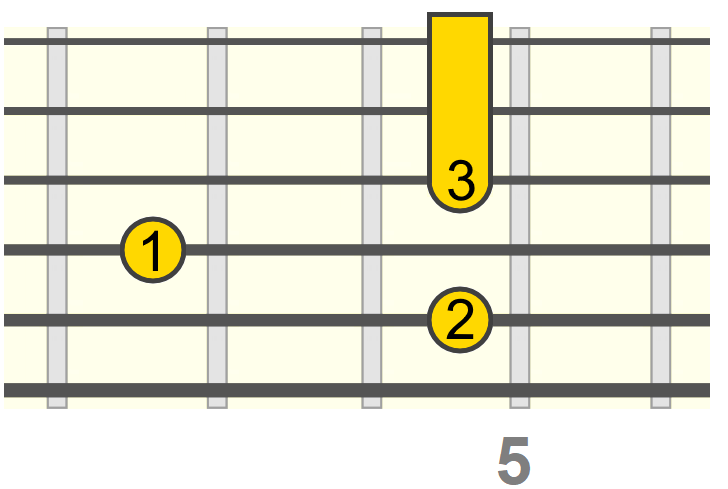
G13
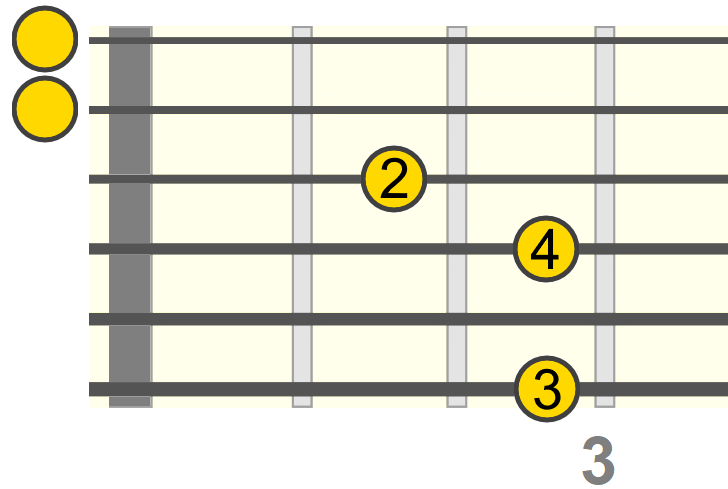
Cadd9
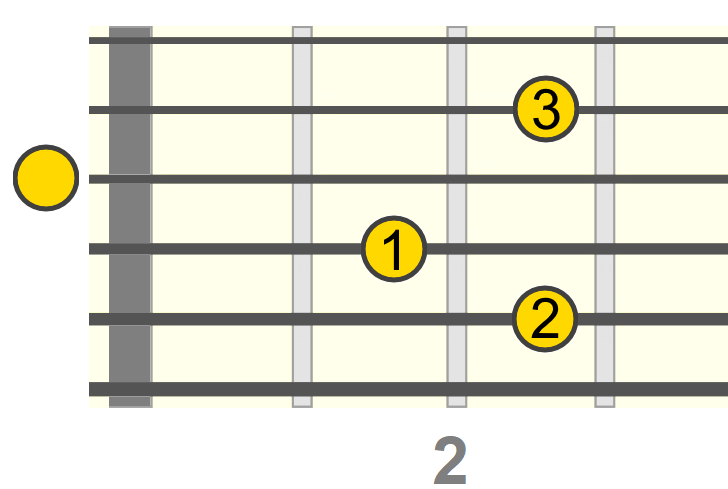
Just like before, we can use any of that dim7's inversions to similar effect. We may want to place the bass differently, which is what these inversions allow. In the below example we're using F♯dim7 in place of D♯dim7 (both inversions of each other).
Again, starting with Cmaj7 / Fmaj7 / Am9, the below completes the sequence in a different way...
F♯dim7
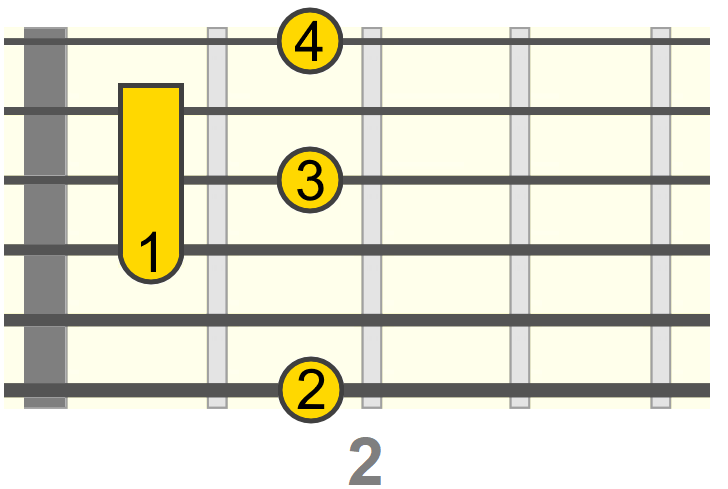
C/G
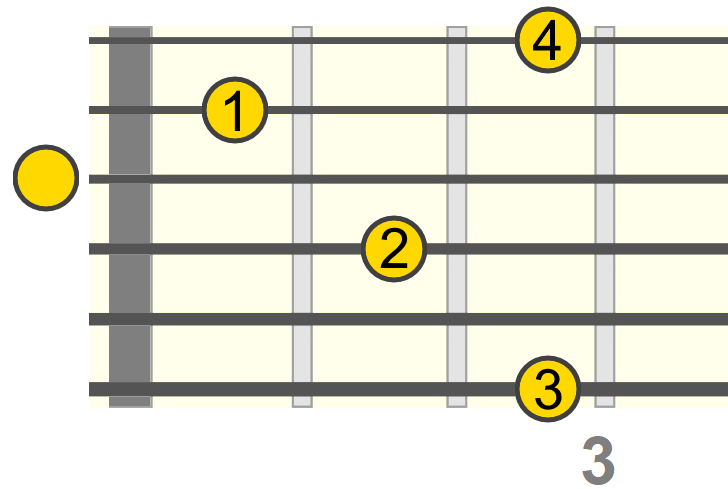
G13sus4
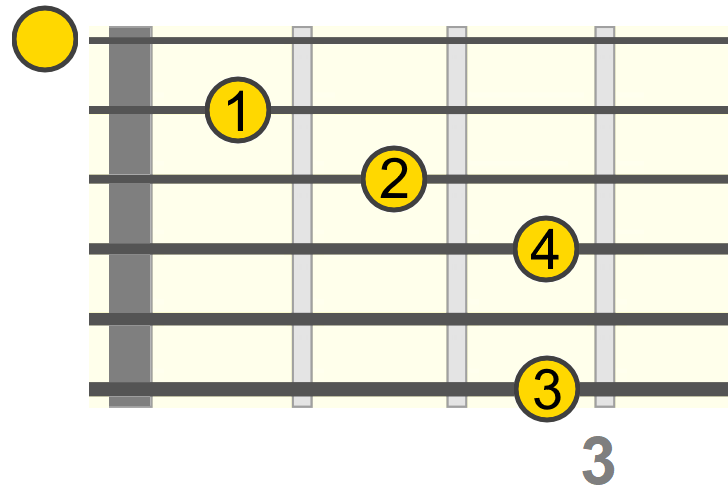
G♯dim7
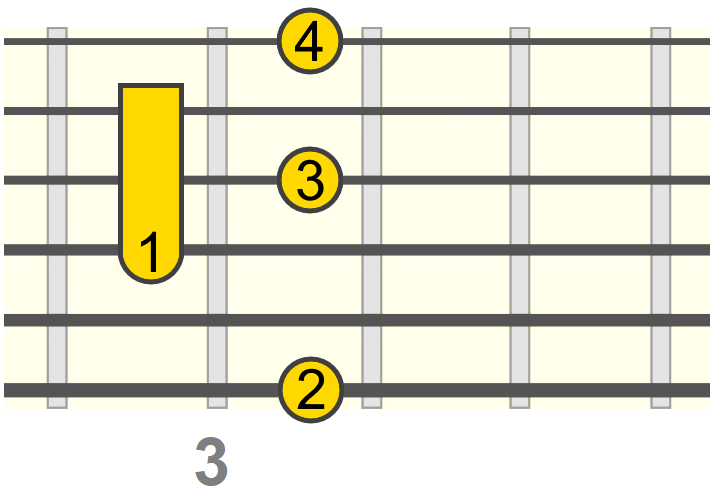
Am7
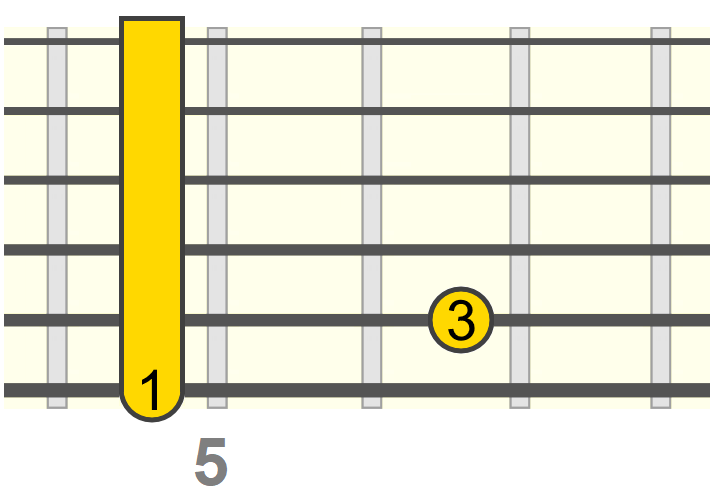
Note that I threw in an additional dim7 from earlier, as a lead up to Am7.
So when choosing which dim7 inversion/position to use, consider how you want the movement of bass to flow from one chord to the next.
There's also the top note to consider and how you want the leading melody of the chord sequence to flow, which determines the shapes/positions we choose.
In Summary
In the table below, we can see how these three main substitutions (V, VI and II) and their dim7 inversions form within the C major (and relative A minor) key...

Note that the V dim7 substitute in the A minor key (where E7 would be the V) is exactly the same as for the relative major key. For example, Bdim7 would act as the altered V in both C major and A minor keys. Funny how things work out sometimes!
As mentioned before, which dim7 inversion/position you choose mainly depends on where the bass and leading tone are moving from the previous to next chord.
In this way, dim7 chords are a useful device for creating a sense of melodic flow through chord changes, as they tend to sit between the diatonic chords in the key.
However you use them, I hope the "tried and tested" examples featured in this lesson have given you more confidence with both using and recognising dim7.
