
Connecting Scale/Neck Positions Using Slides
One useful function of slides is that they allow for a smoother, connected movement between different neck and scale positions. What's especially useful is we can use slides to get into position with a preferred finger, ready for the next sequence in a new neck position.
This ultimately allows for a more free flowing, fluid exploration of the neck, rather than being confined within a single neck area.
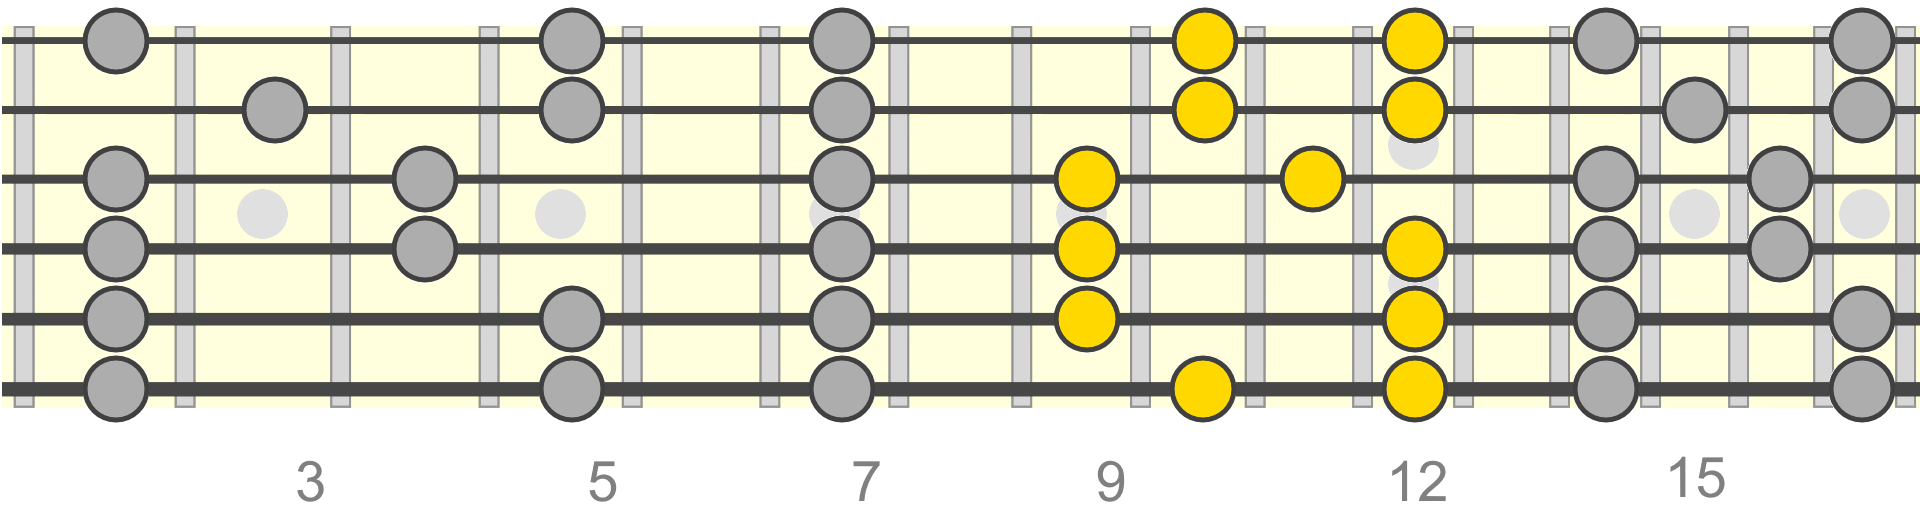
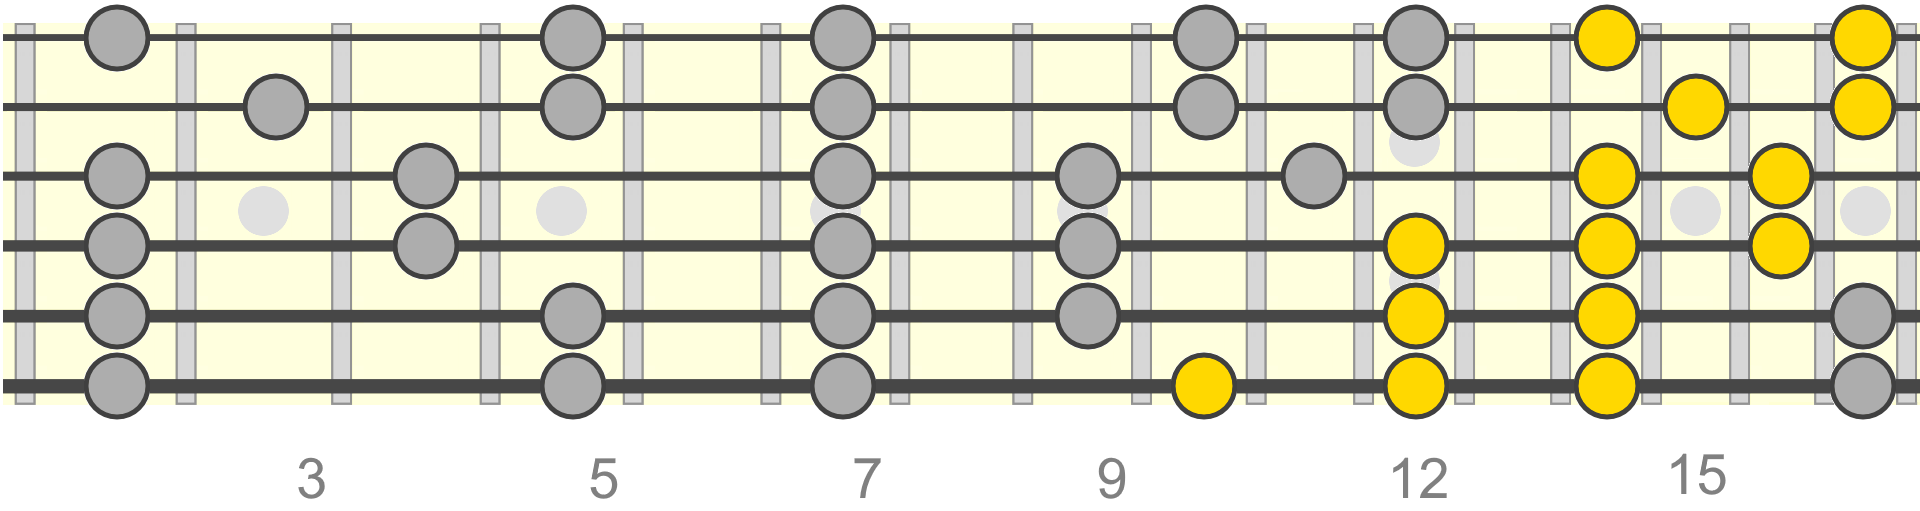
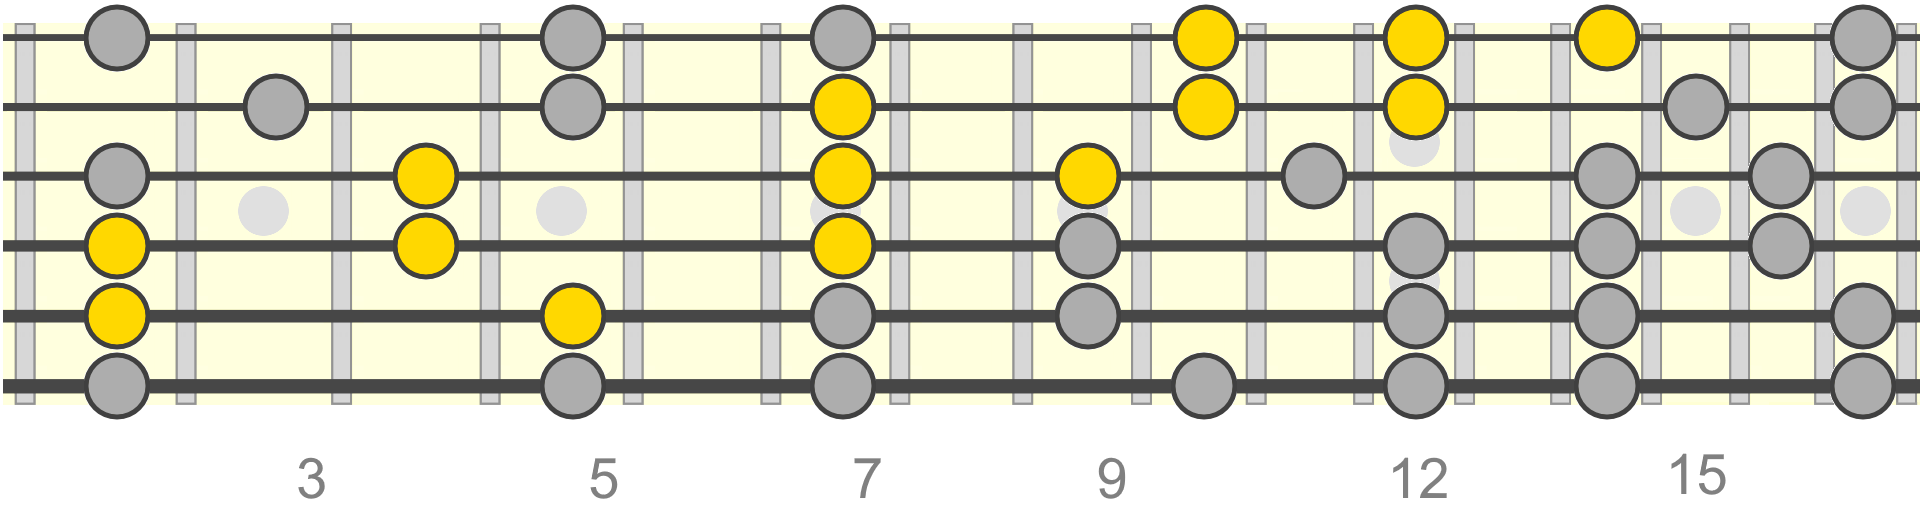
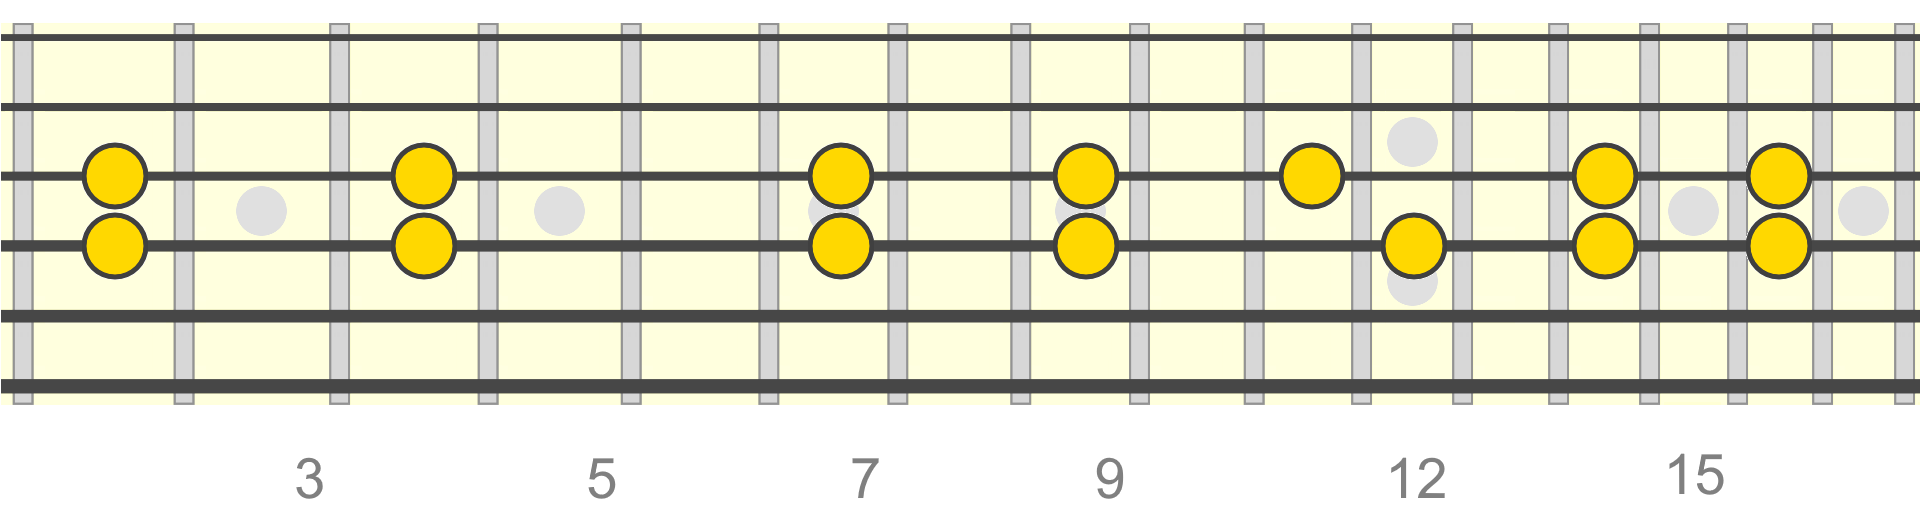
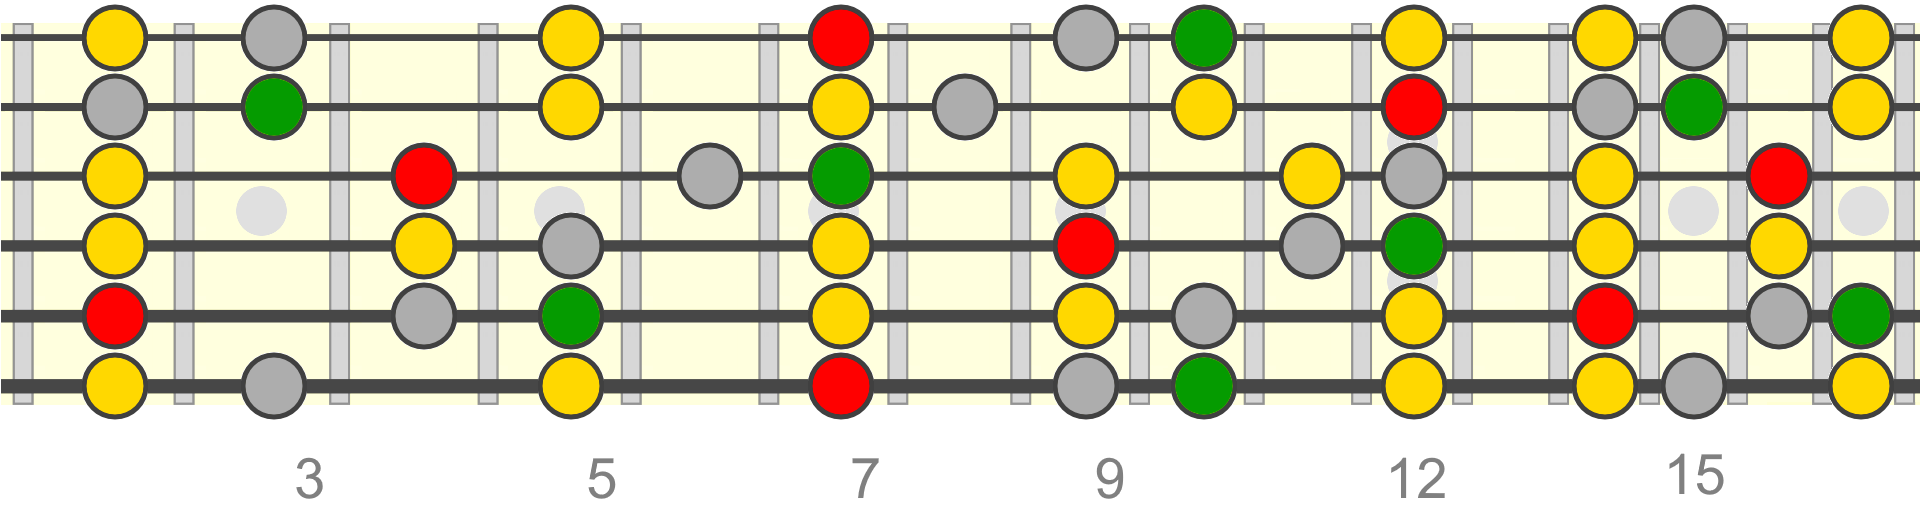
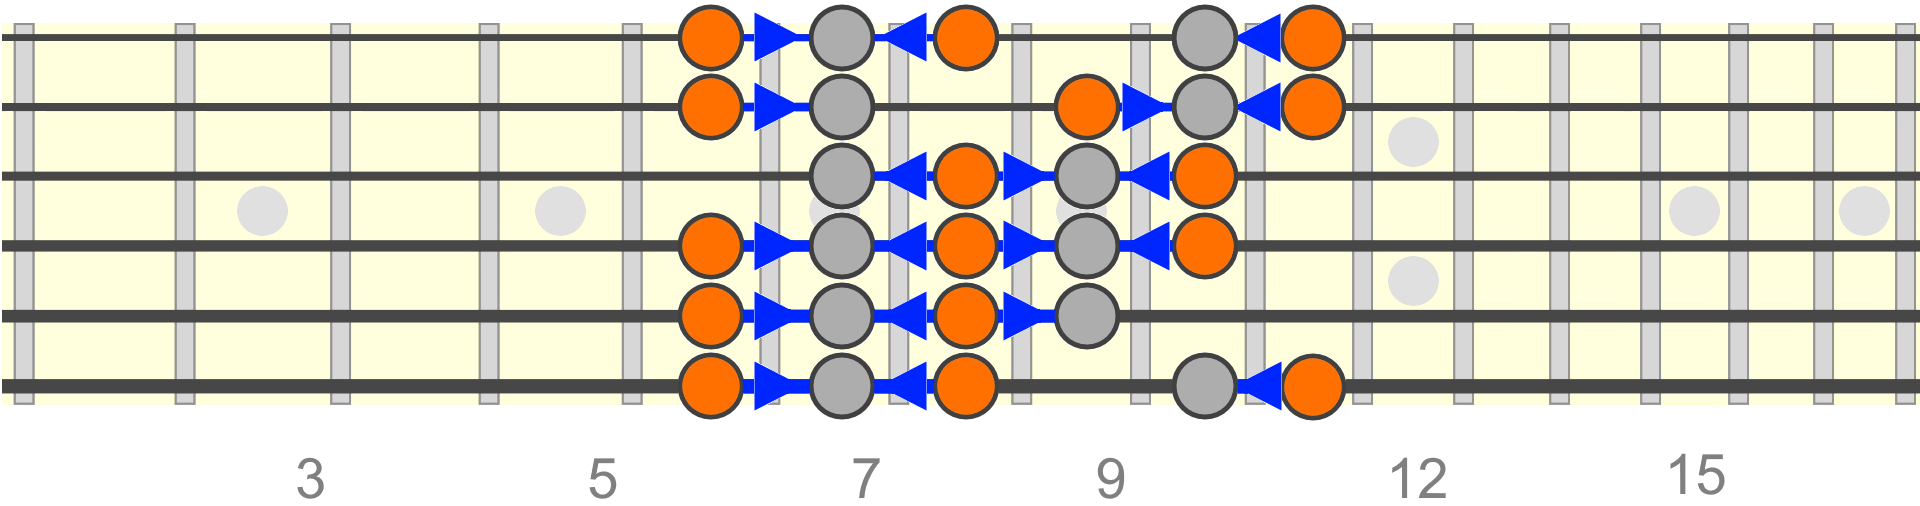
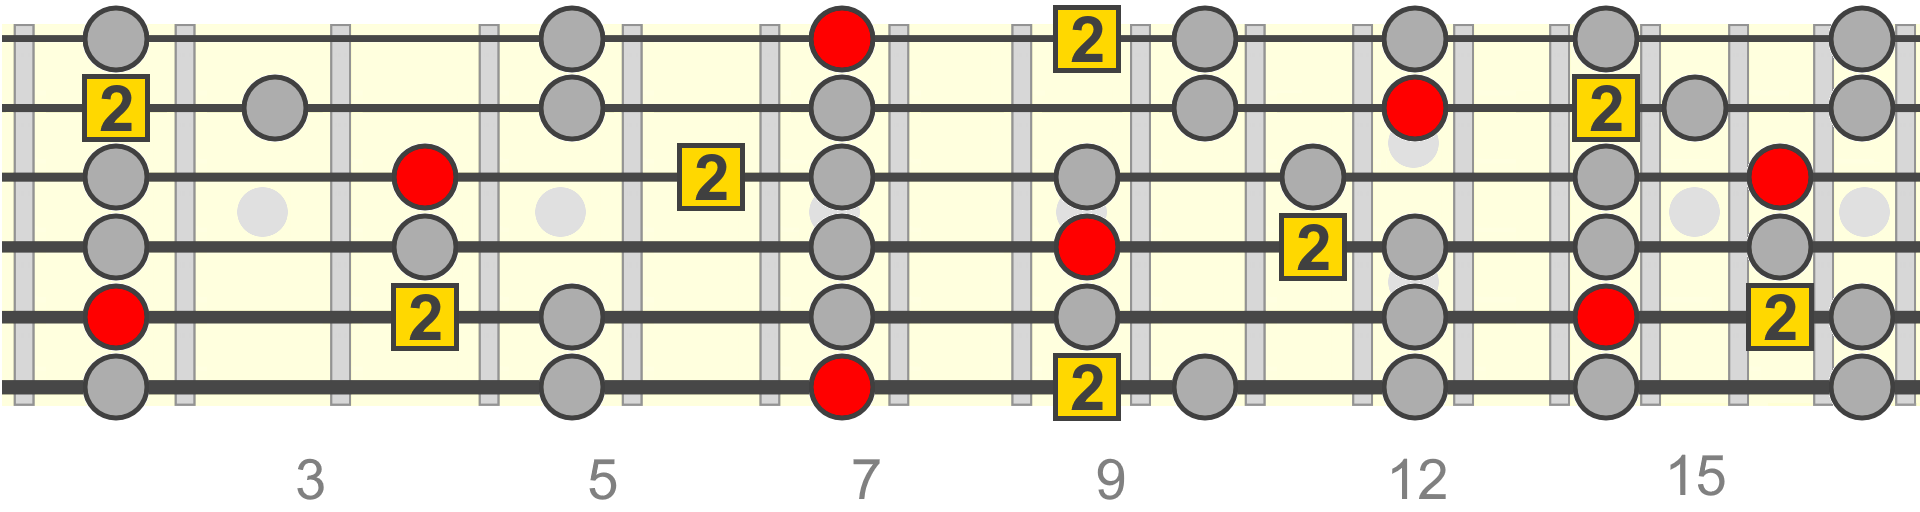
Here we have the B minor and relative D major pentatonic scale mapped out (both relative minor and major use the same pattern)...
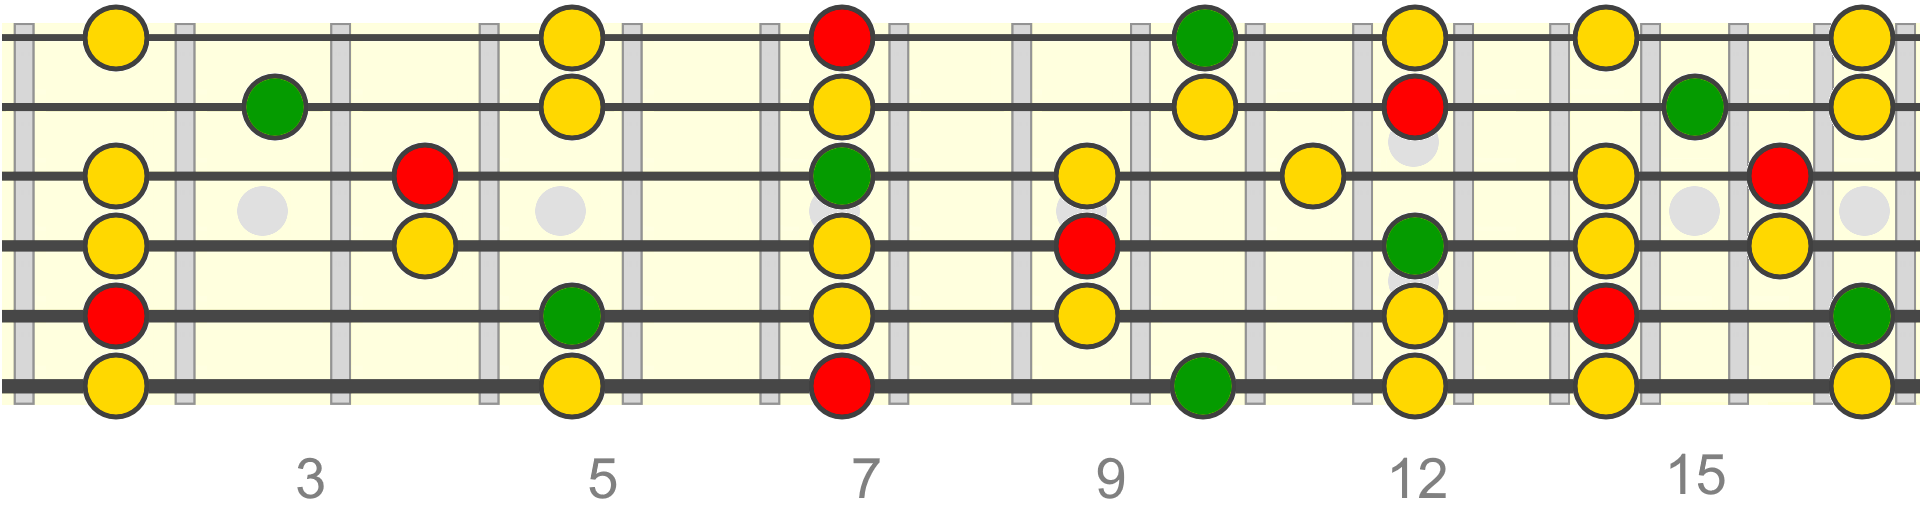
When learning this pattern (on any root position), we typically break it up into five overlapping positions or boxes...
The next step is to develop an ability to move between the positions, so we can connect different areas of the neck more freely and fluidly. Some examples below...
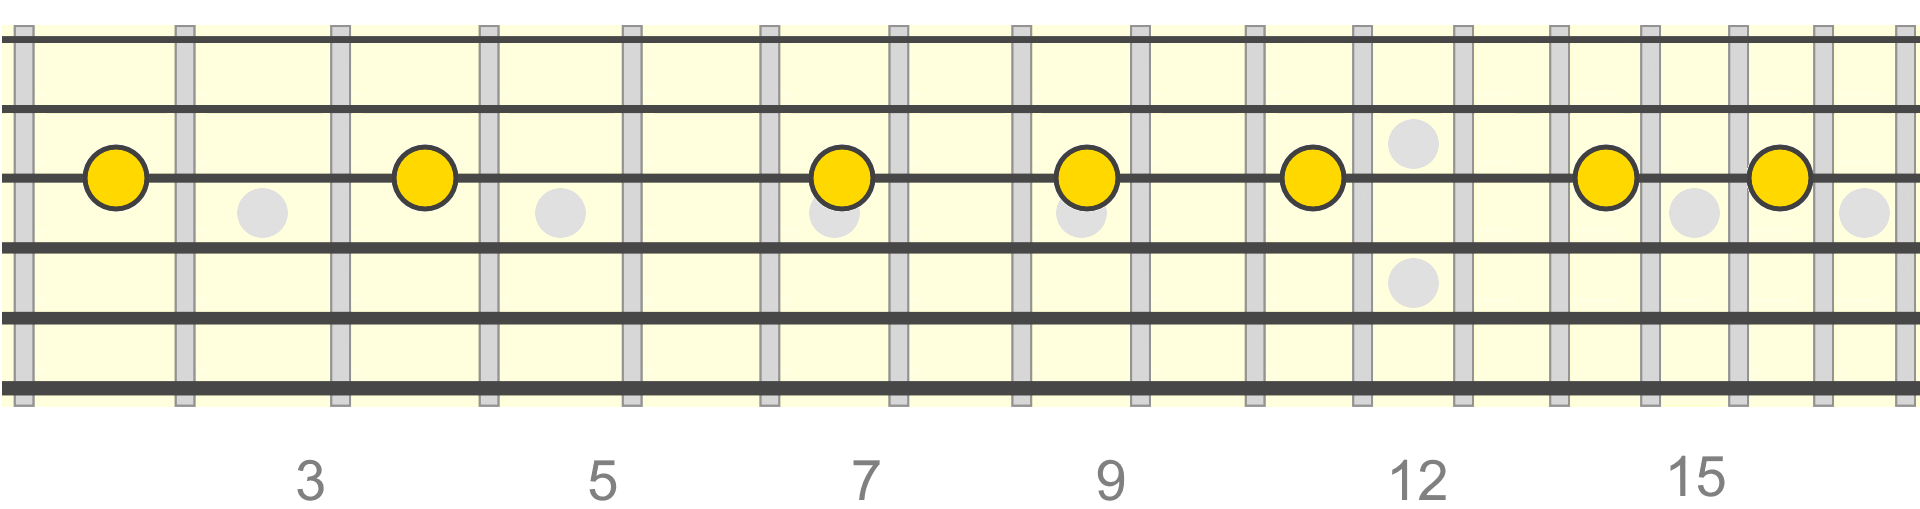
As we'll see, slides are one approach we can use for connecting these boxes/positions. The best place to begin with this is to isolate single strings within the neck-wide pattern. This will encourage us to explore the scale horizontally and involve techniques such as slides to get from one note/position to the next.
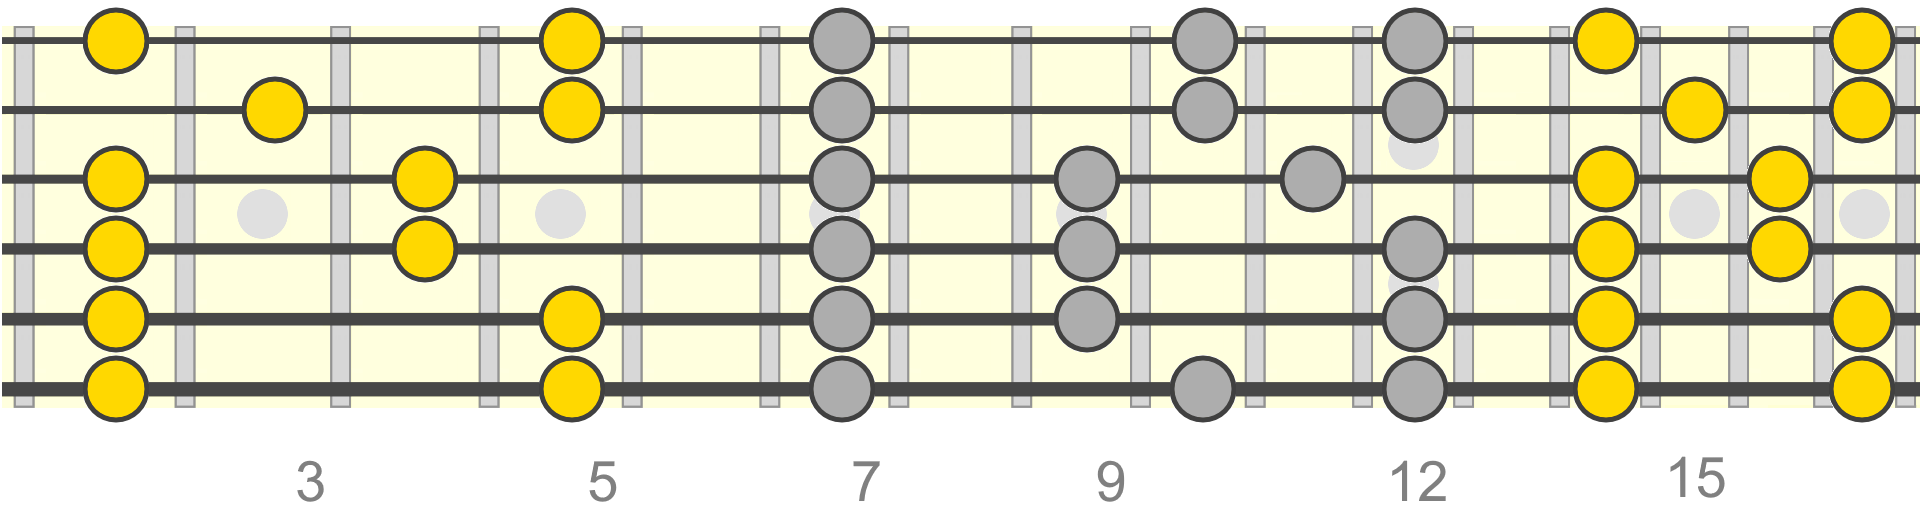
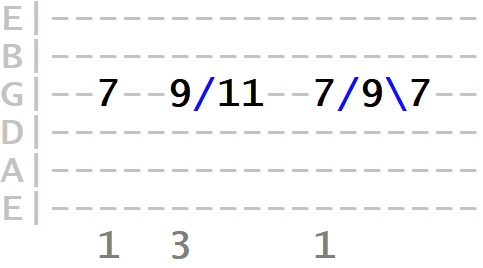
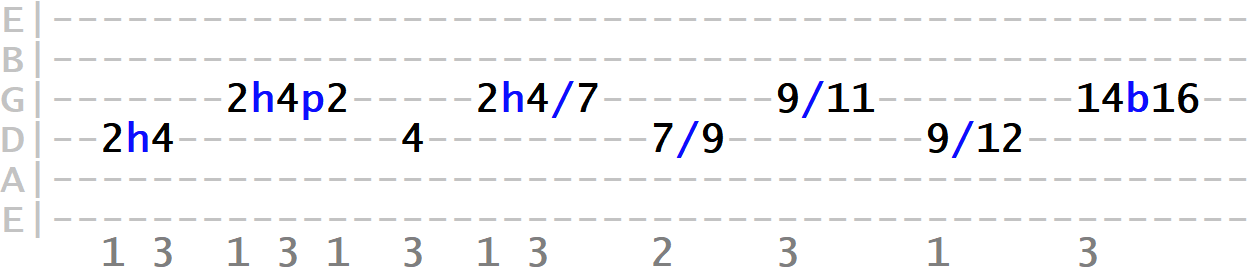
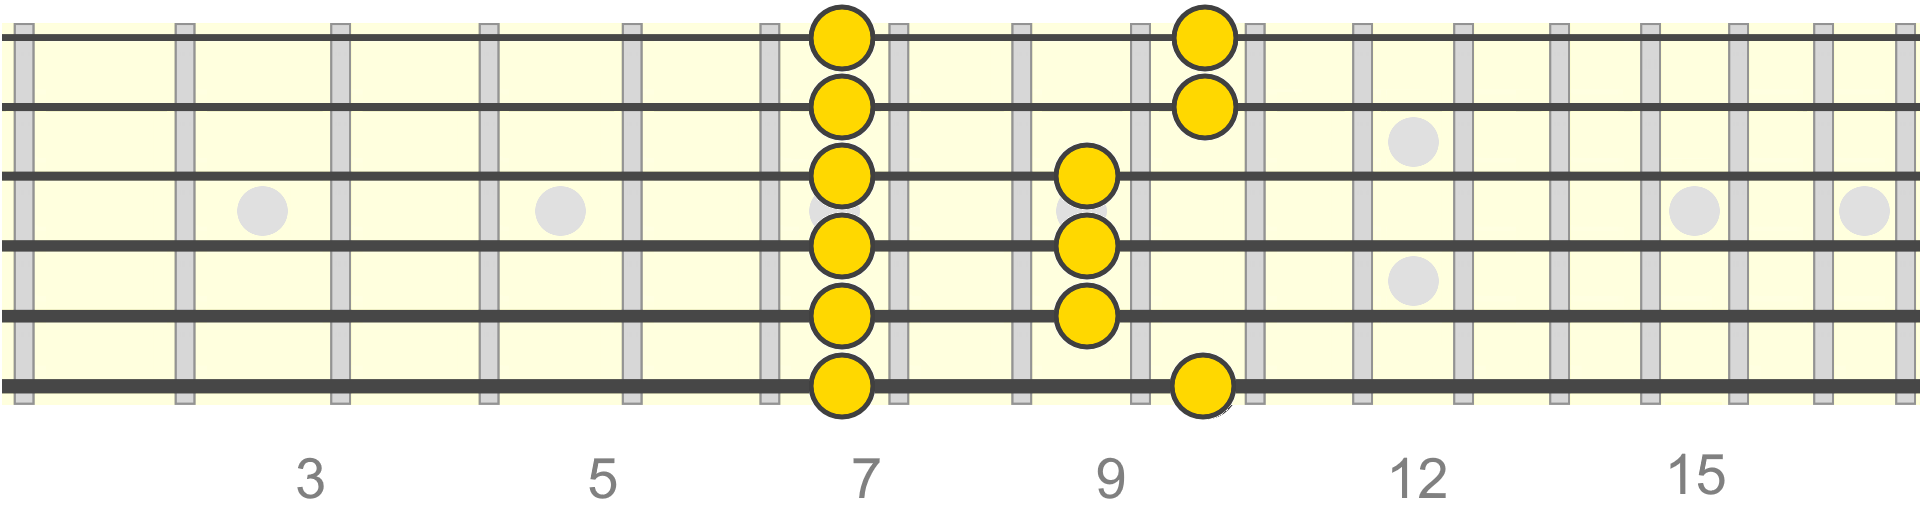
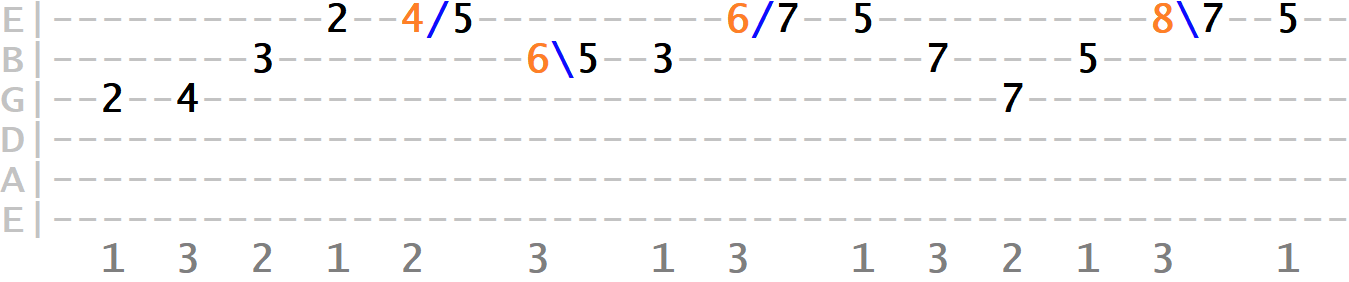
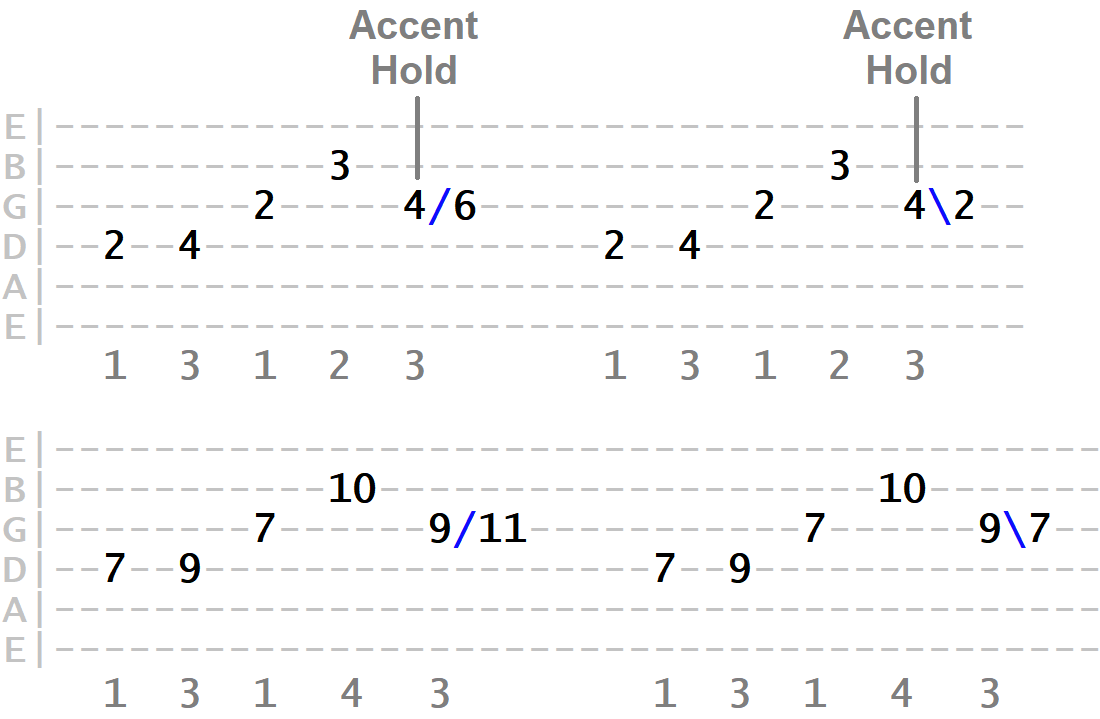
We'll start by isolating the 3rd string (though the same applies for any string in any order you choose)...
As well as the box patterns, we should learn how scales form across single strings like this and be comfortable forming simple phrases across one string.
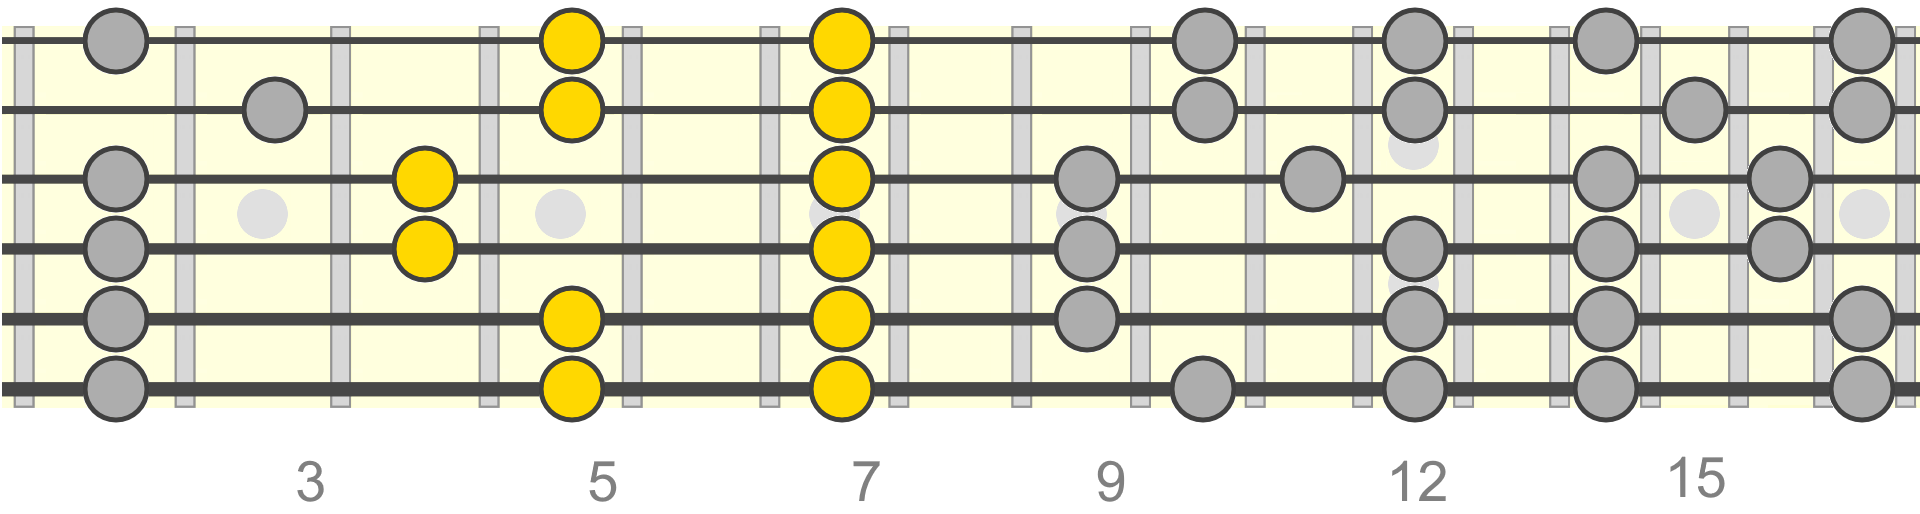
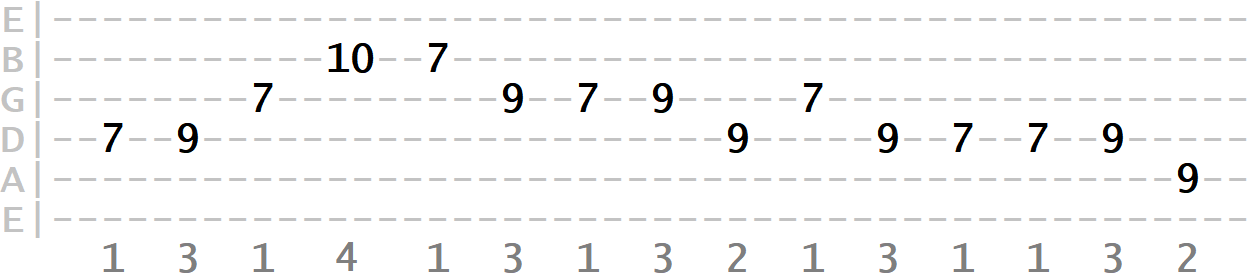
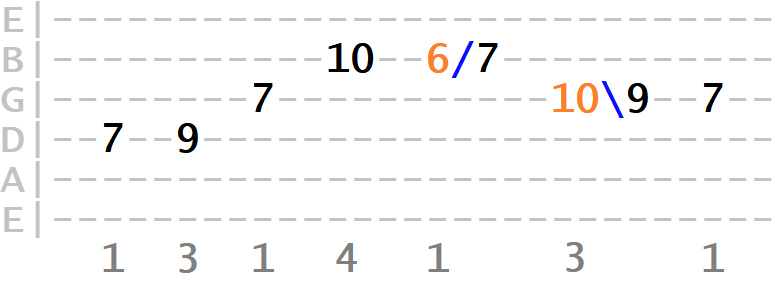
For example, taking the first three tones in the above sequence, here we're using a 3rd finger and 1st finger slide as part of a phrase (fingering beneath the tab)...
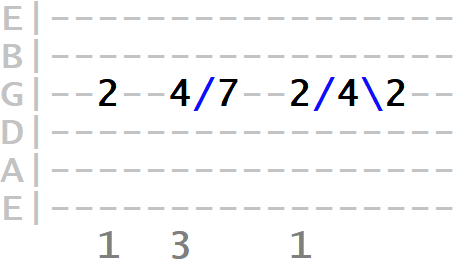
Tip: Be aware of how quickly we can choose to initiate a slide from its starting note. With the above example, the first slide (4 / 7) is delayed slightly, whereas the second slide (2 / 4) happens immediately, as soon as the starting note is picked. When we immediately slide away from a starting note, this is known as a grace note. More on these later.
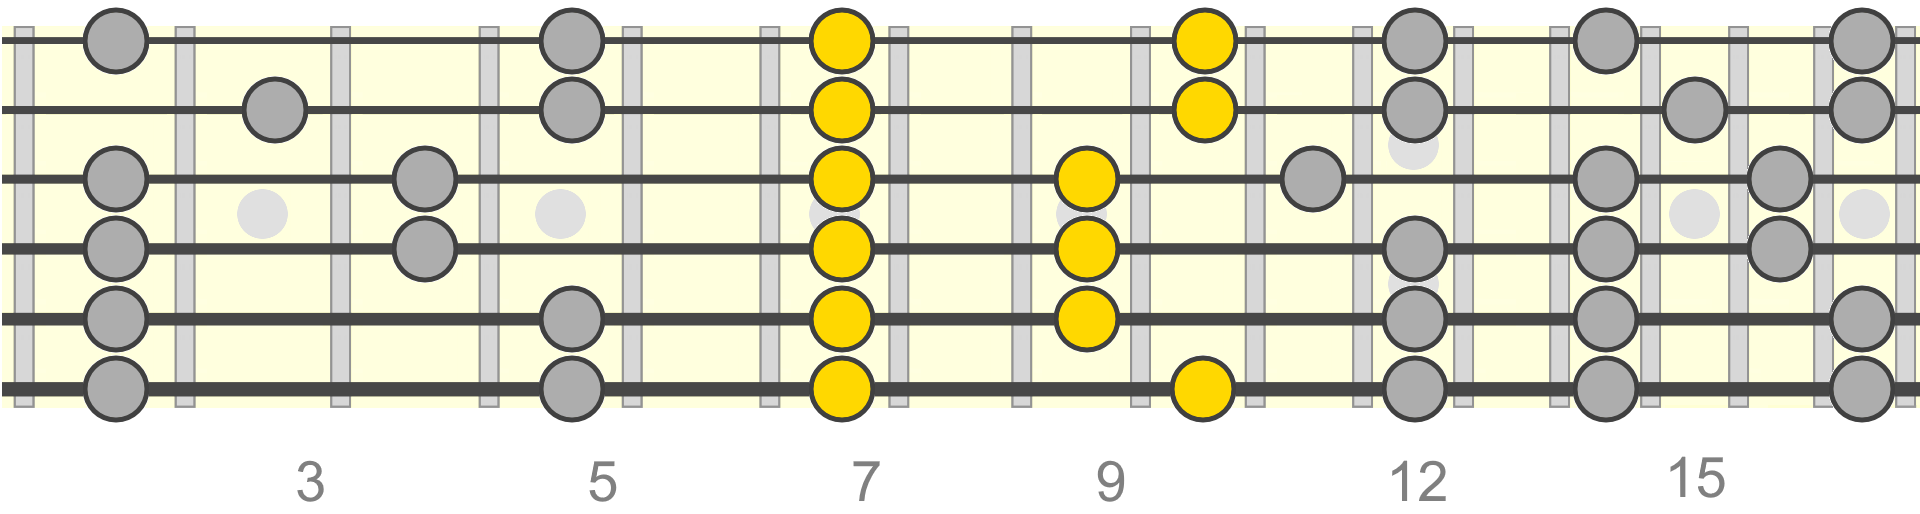
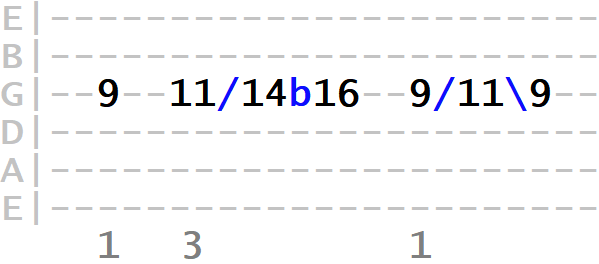
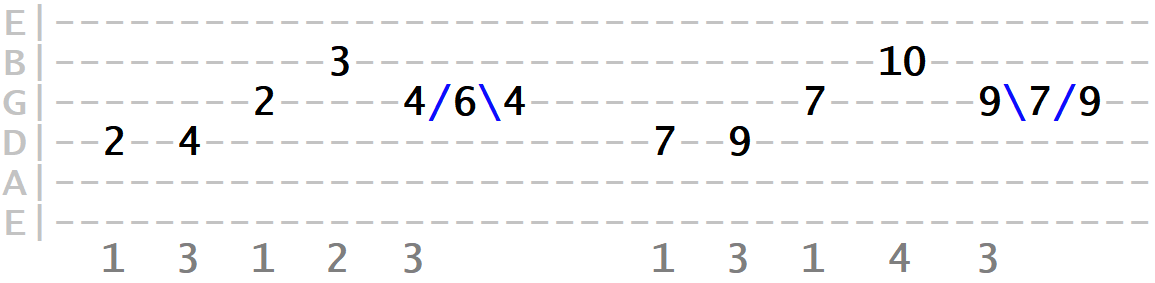
Similar thing moving up the neck, involving the middle three tones...
This time we slide into a whole step bend. Combining techniques like this is a great way to develop simple phrases into something more expressive. Remember, the same finger is used for both the slide and bend here...
Finally, descending back down the neck, involving a pull-off (p). Get comfortable with descending the same string using slides...
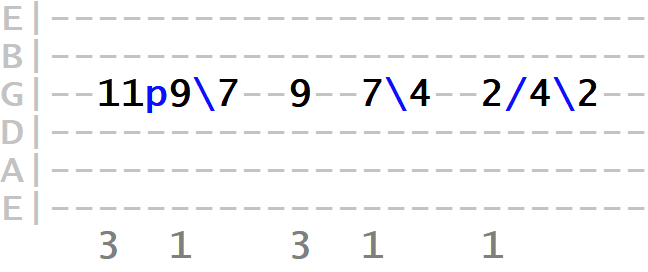
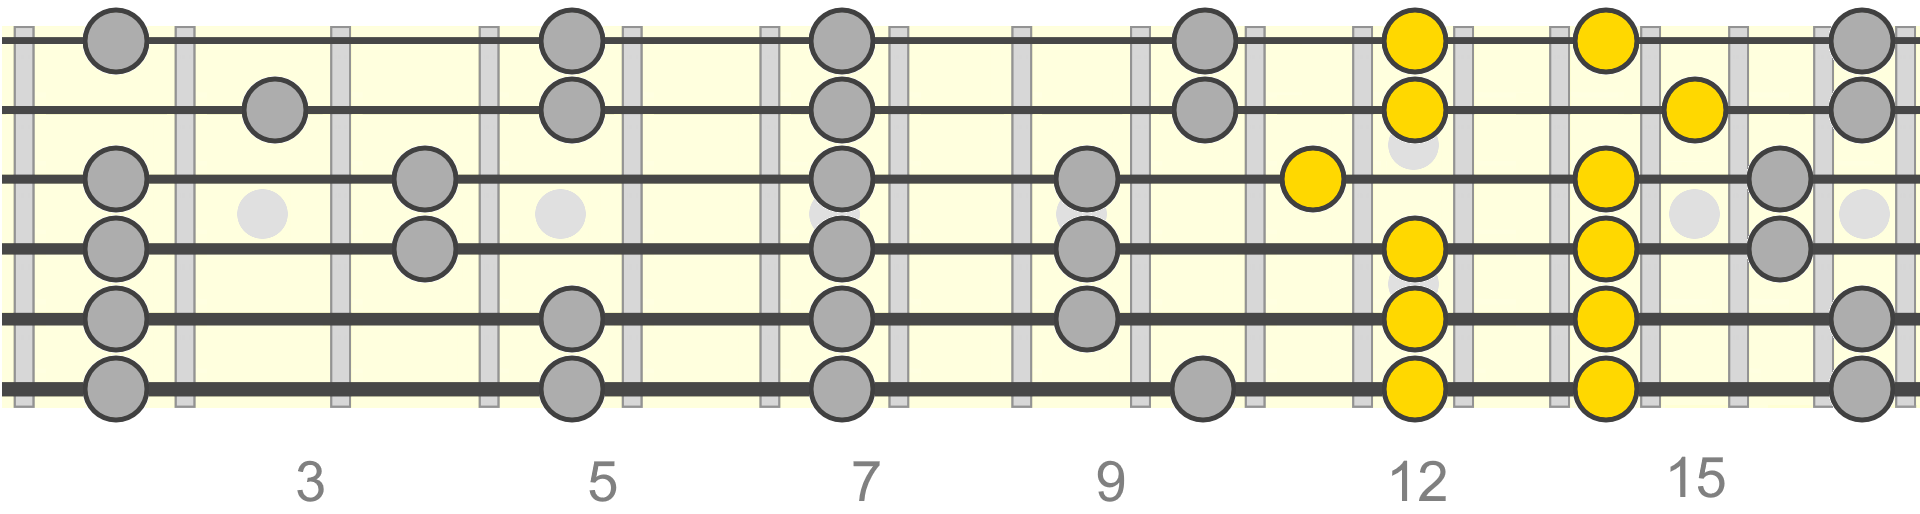
A similar thing on the 2nd string...

What this simple exercise does is not only get us physically comfortable with moving through different neck positions using slides. But it also trains us to visualise target notes and bend points, for example, across a more horizontal span of those positions.
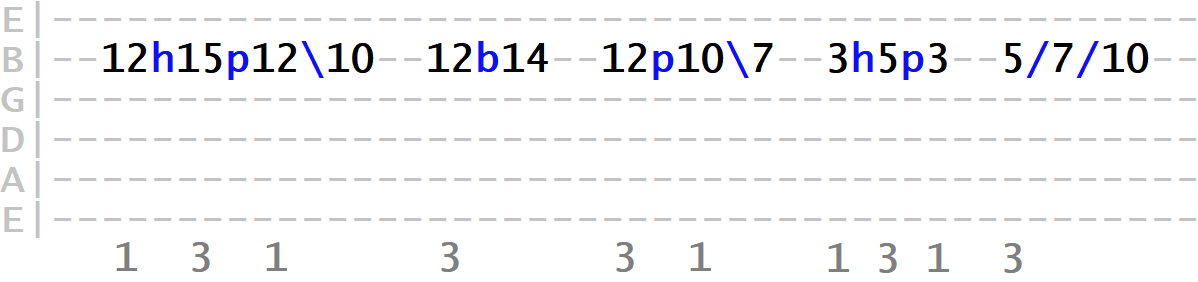
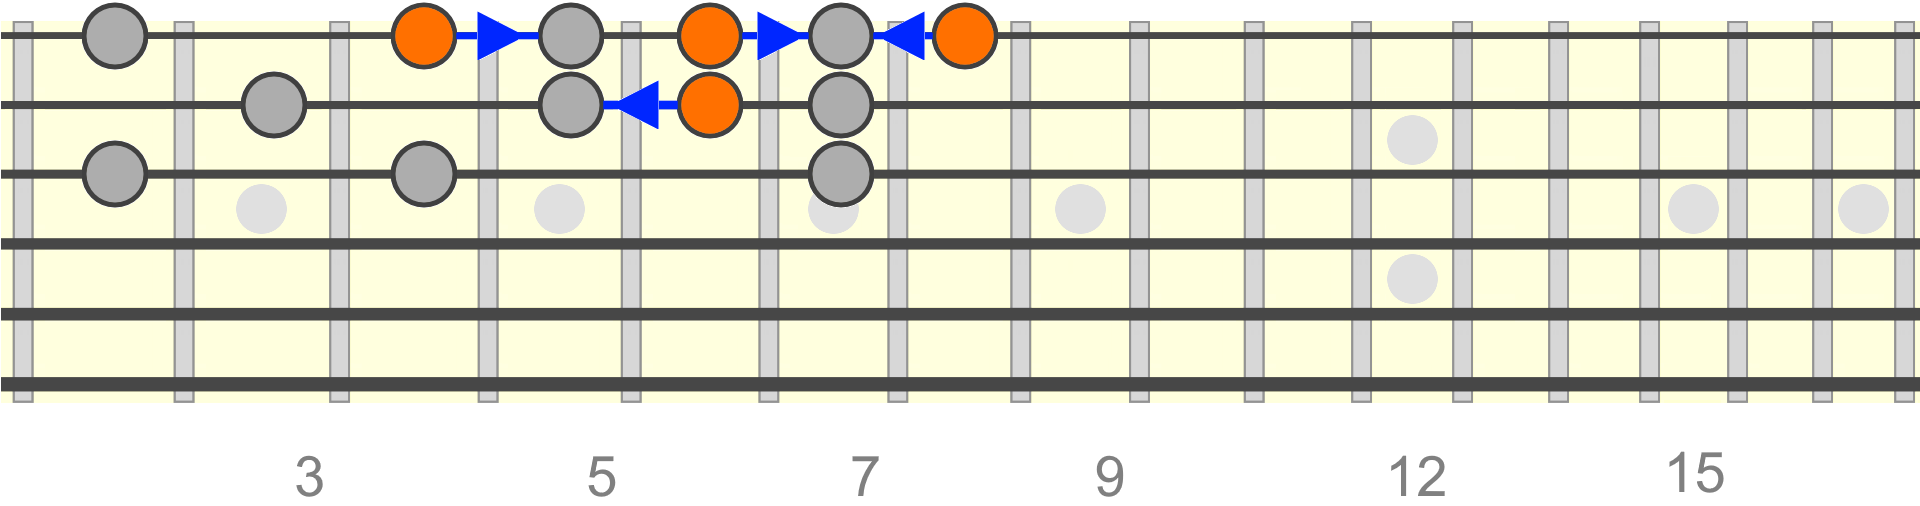
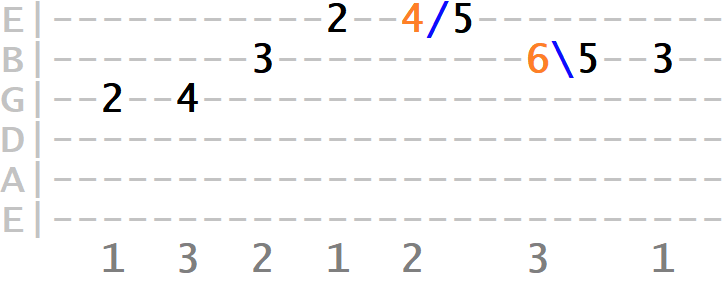
Next we can work on adjacent string pairings in a similar way. Starting with the 3rd and 4th strings, for example...
Now the 2nd and 3rd strings...
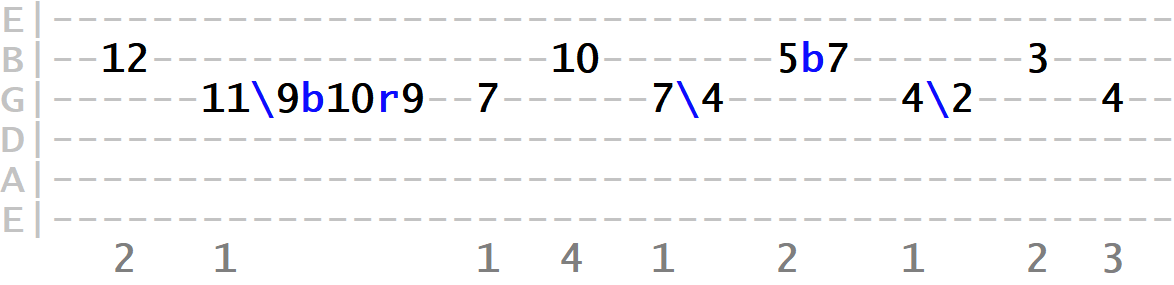
Continue adding strings to the sequence of positions, gradually combining vertical and horizontal movements in our phrases...

What we're doing with this process is allowing ourselves more space to feel our way across the neck, with slides being one effective means of getting from one tone and position to another.
Sliding Ornamentation & Grace Notes
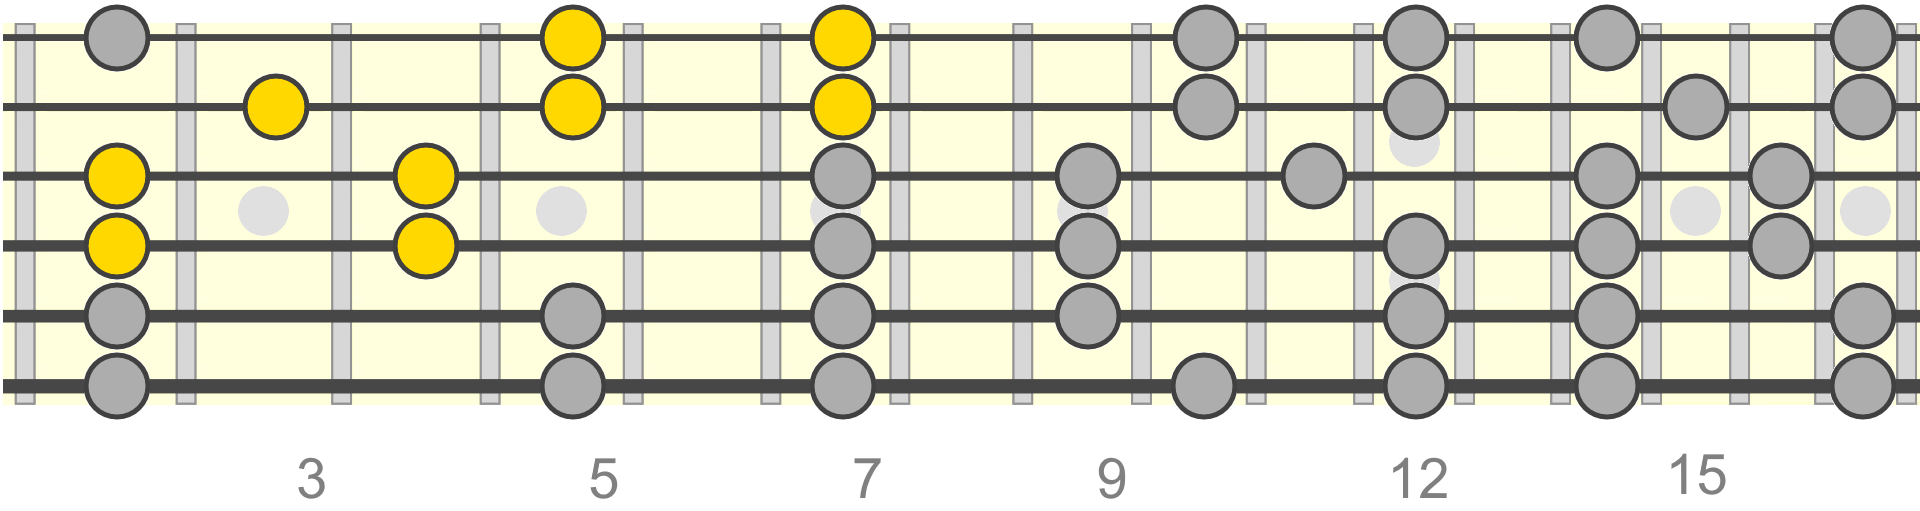
Of course, pentatonics can be seen as a kind of skeleton of the fuller seven-tone or heptatonic scales. For example, B natural minor or its relative D major in this case...
But we can in fact use any tone, either flat or sharp of a scale tone to quickly slide into an accent note, a type of ornamentation known as a grace note.
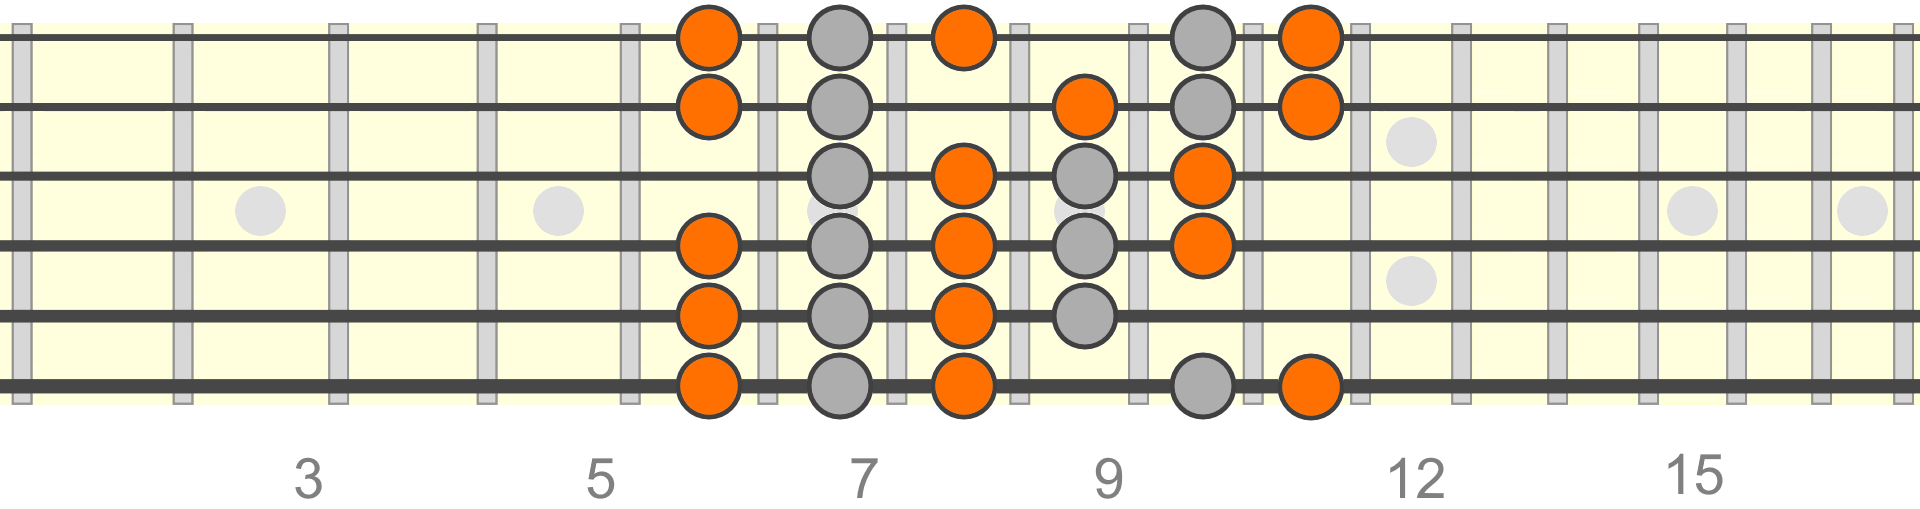
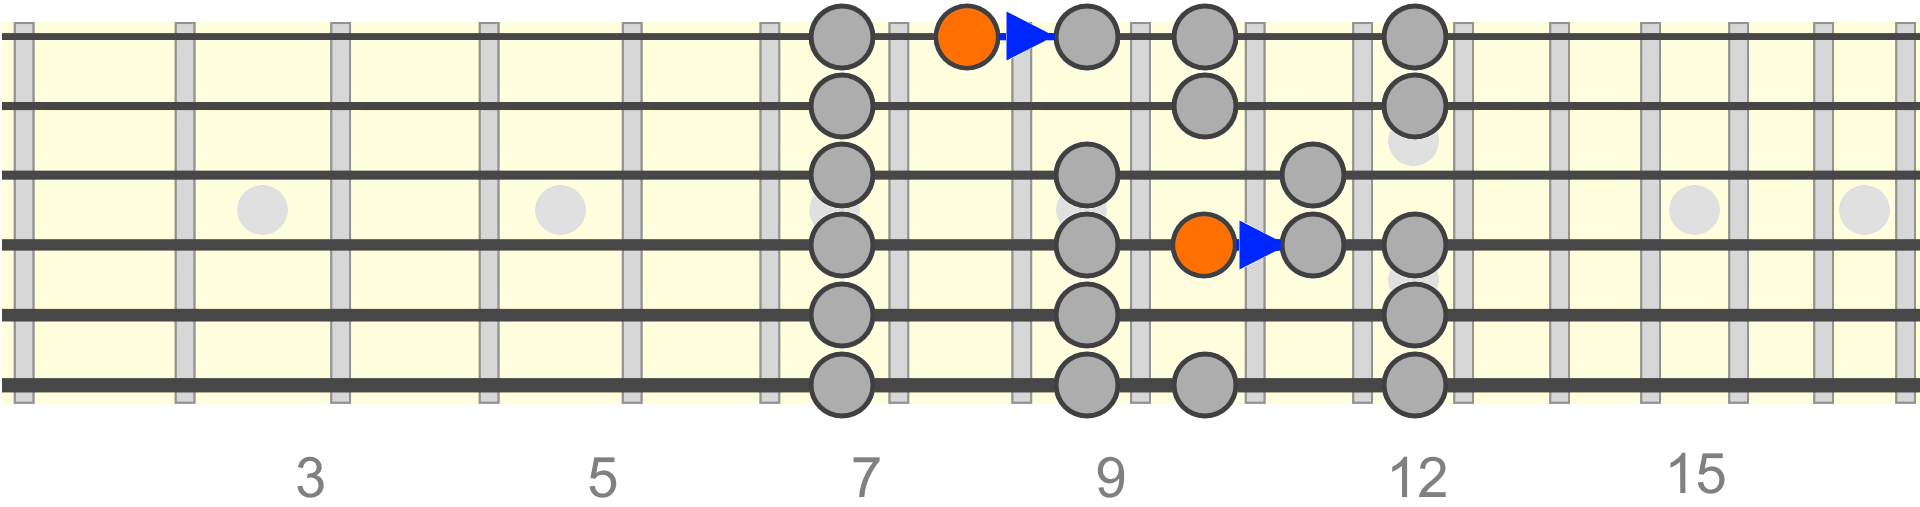
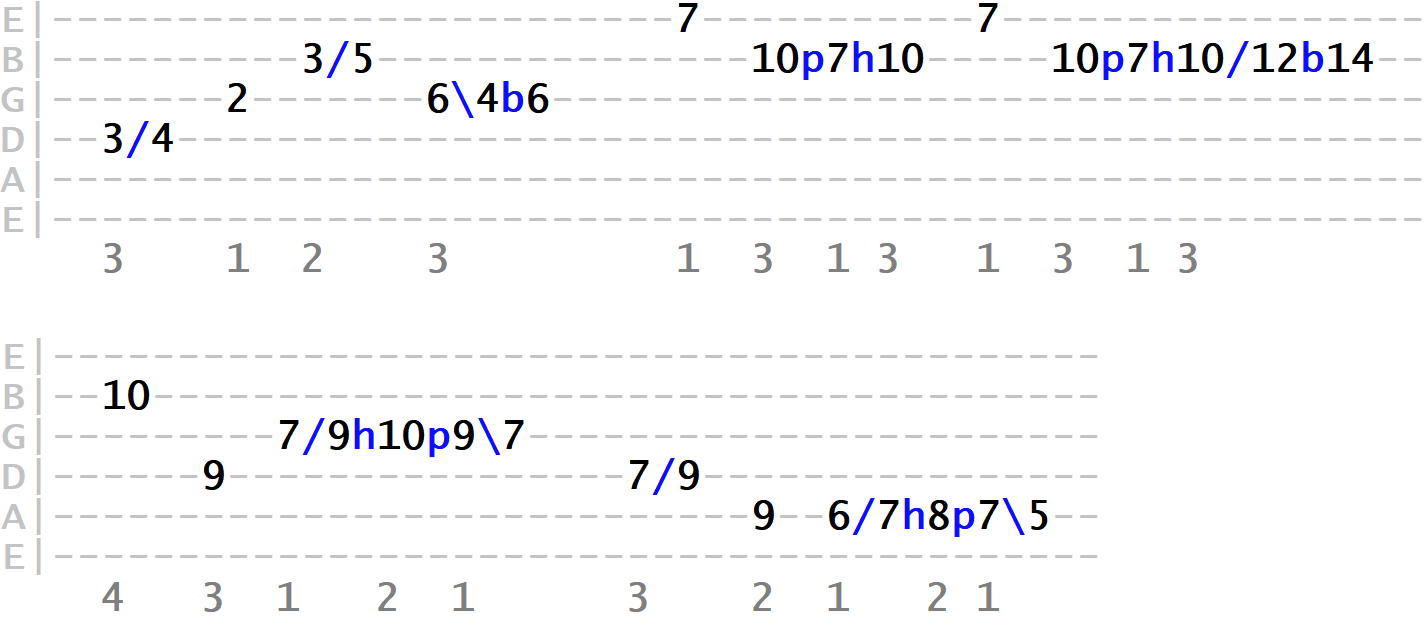
Here we've isolated a position, around which we could form simple phrases, such as the following...
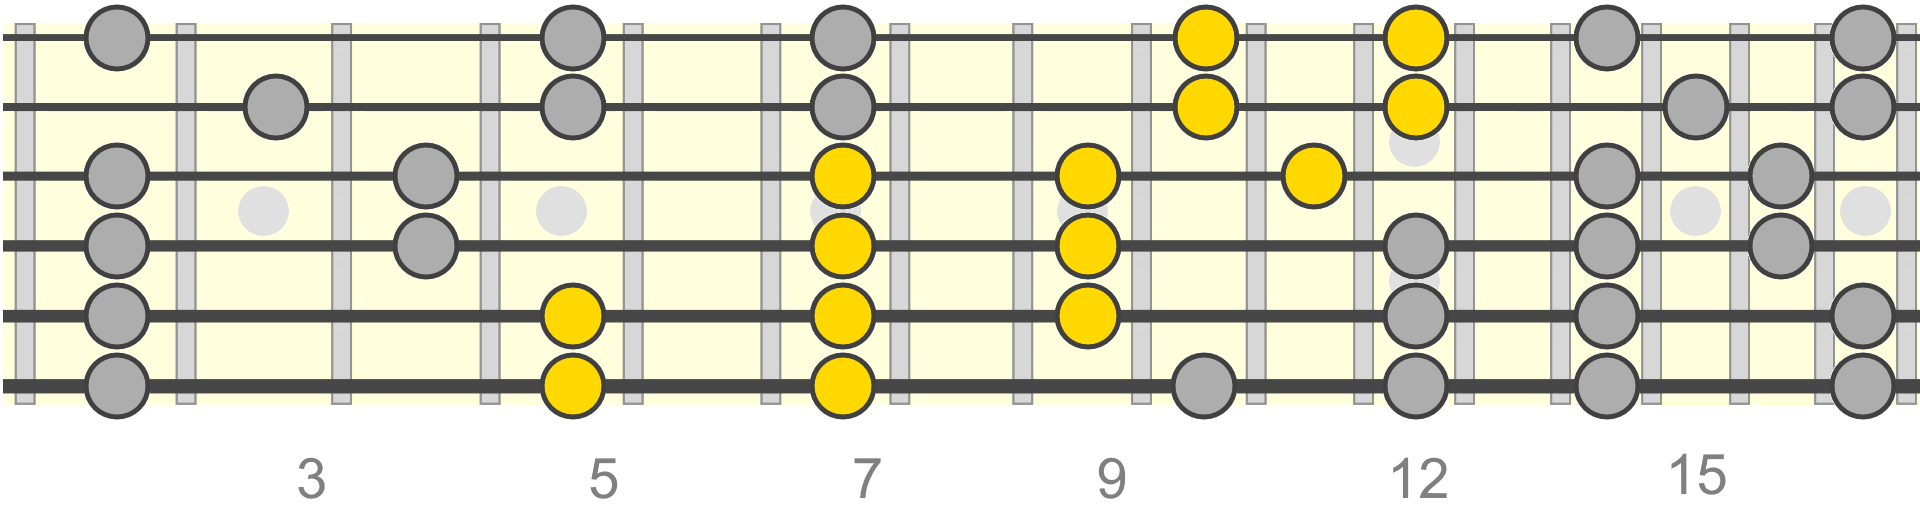
Let's now try adding in some sliding grace notes to give it some ornamentation. The tones in orange below are known as chromatic tones. That is, they lie outside of the implied key signature...
Another name for these tones is non-diatonic. We can use these tones as starting positions to create quick slides into the more restful diatonic tones...
For example, here we're embellishing the previous sequence with some of these chromatic grace notes. Here's a slow example of the sliding grace notes in action...
When up to speed, those grace notes get blended more with the overall sequence...

So there's a very subtle effect there, but by using those chromatic grace notes, instantly we've injected more life into what was dynamically a rather flat sequence and we can ultimately say more with less.
Become aware of how these chromatic tones exist within and around different positions. For example...
First a slow example. With the first chromatic slide, you'll notice I repeat it. So there's the usual quick slide into the target tone, immediately followed by a slide out then back again. This is known as "accent repeat", a common form of ornamentation...
Now the complete sequence, up to speed...
Now, there's a diatonic tone that isn't included in the pentatonic scale we've been using so far, that sounds particularly nice, both as a sliding target and as a grace note itself.
It can be thought of as the 2nd (2) in relation to the minor key tonic, or the major 7th (7) in relation to the major key tonic...
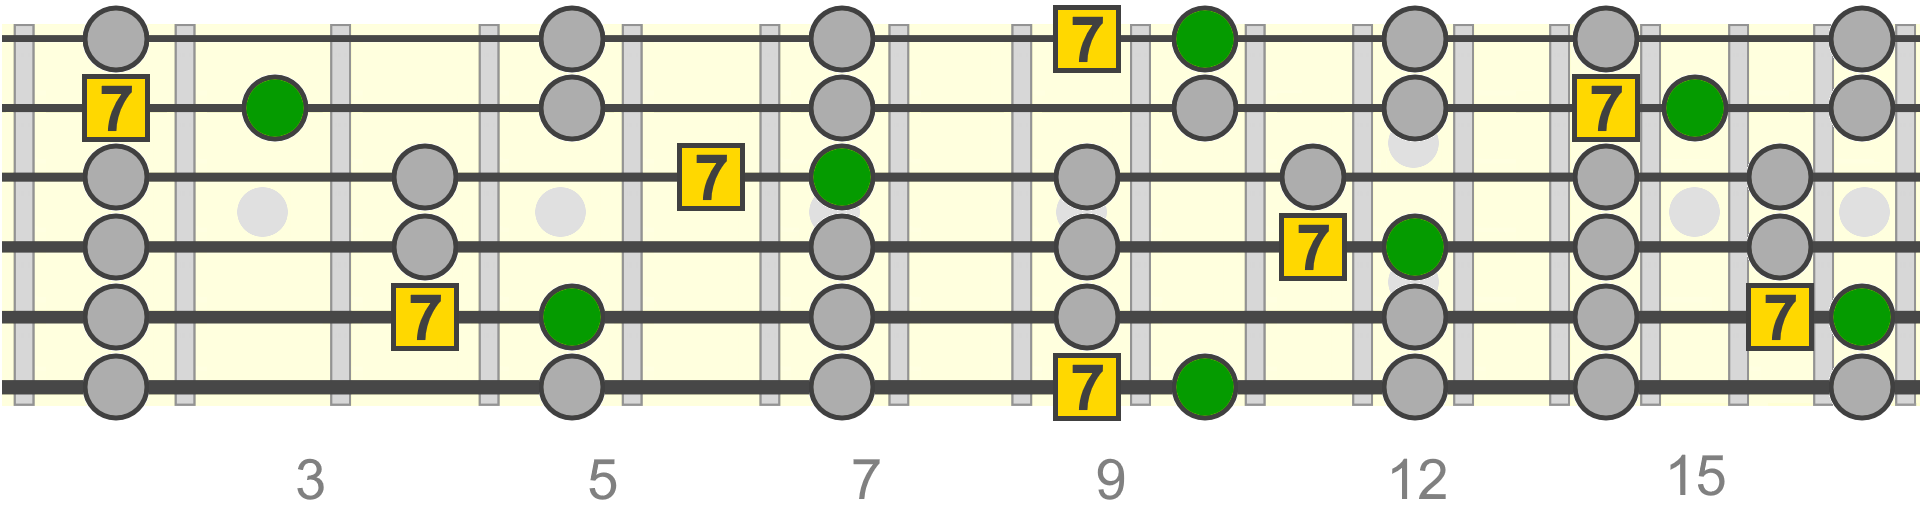
Now we've added this to the pattern, similar to before let's try using it as a target tone for a chromatic slide from just below it...

Tip: Remember that we can also use a pentatonic scale in a related position to the key's tonic. For example, in the relative keys of B minor and D major, we could also play F♯ minor pentatonic, which can also be seen as its relative A major pentatonic...
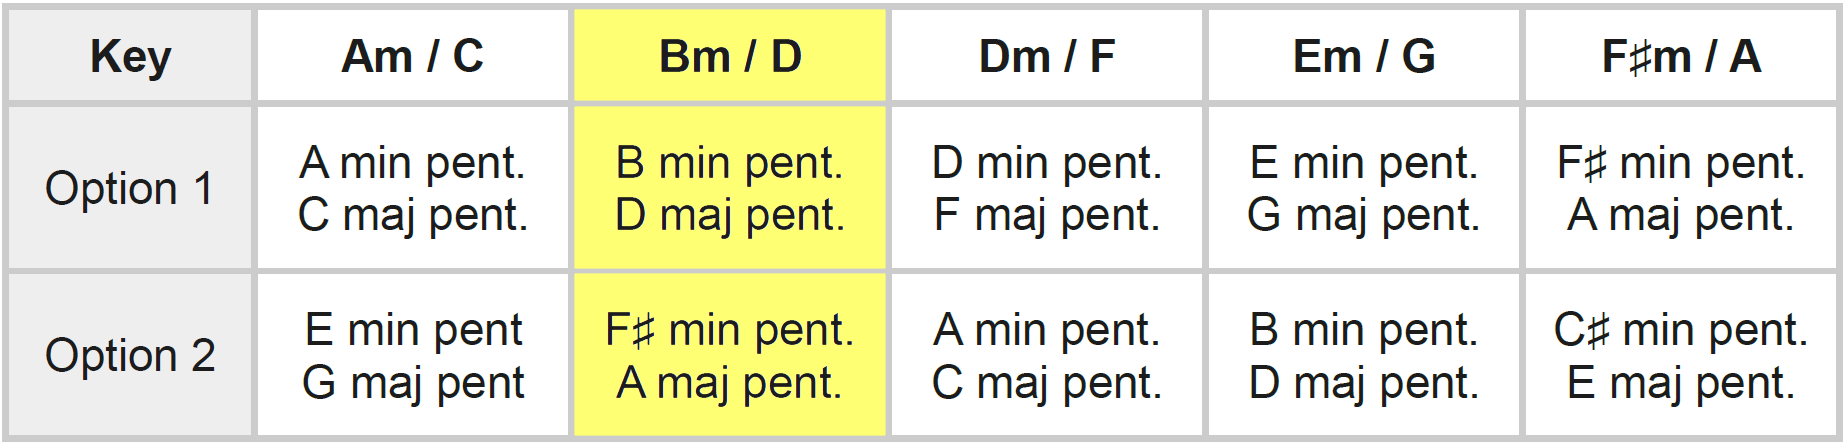
All we're doing is positioning the pentatonic scale on the 5th of the key's tonic, whether minor or major.
Whichever pentatonic scale we use, the sliding concepts we've looked at, including chromatic approach, can be applied in exactly the same way.
Another form of sliding ornamentation we can use involves holding a resting accent note as usual, but then quickly sliding up or down to an adjacent tone in the scale. Typically we'd lift off the fret as soon as the slide is complete...
Again, a very subtle embellishment, but a nice way of using the "slide out" technique to punctuate a phrase.
We can also do what is known as an accent repeat by sliding away from and immediately back to the accent note...
These kinds of ornamental slides get us closer to the qualities associated with vocal dynamics, thereby creating a more organic expression of our phrases.
Combining Slides With Other Techniques
Once you're confident with using slides in different playing situations, try combining them seamlessly with other techniques, such as string bending, hammer-ons and pull-offs...
We can build up our phrases in layers like this, starting with the basic note sequence and then adding in different ways of approaching, accenting and embellishing/ornamenting those notes.
Final Notes
Hopefully this series of lessons has made you more conscious of how different types of slide are available to us at any given moment, whether as a means of more freely and smoothly connecting scale/neck positions, or as a way of ornamenting and embellishing existing phrases to give them more expression and feeling.
Eventually, their use will become more intuitive than calculated. As always, thank you for your time!
