What Are 6ths?
A 6th is an interval - a specific musical distance between two notes. 6ths, like 3rds, sound particularly good because of how they harmonise with chords.
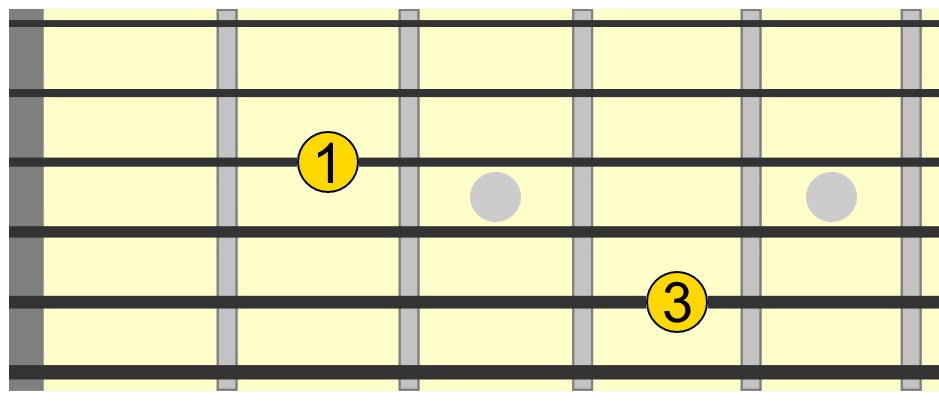
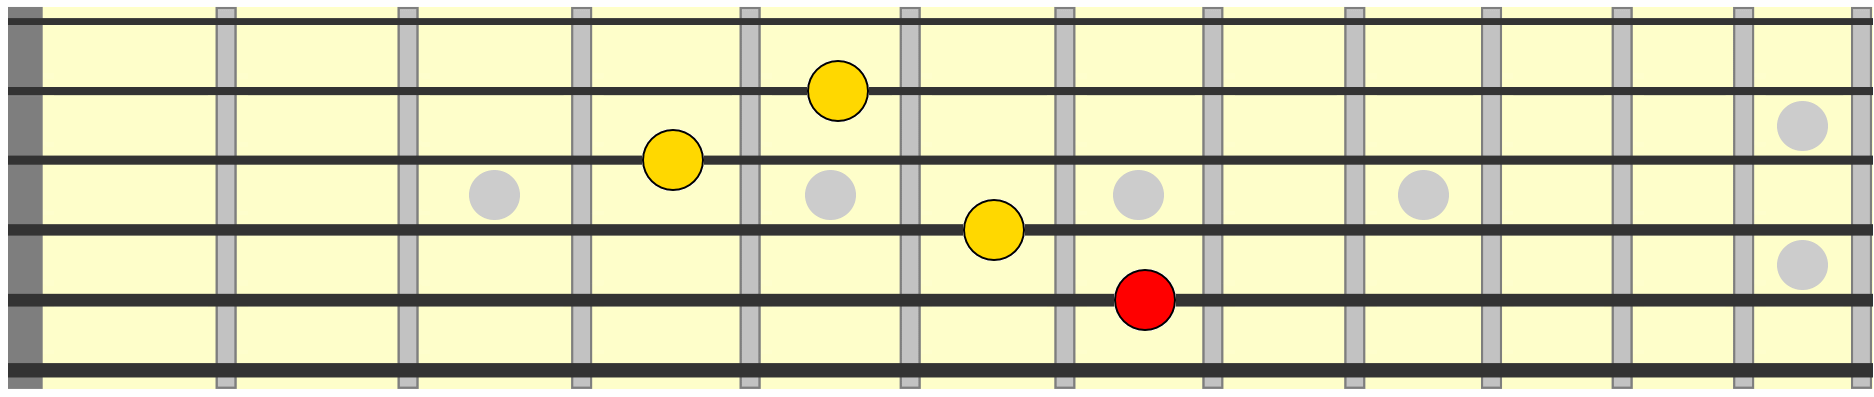
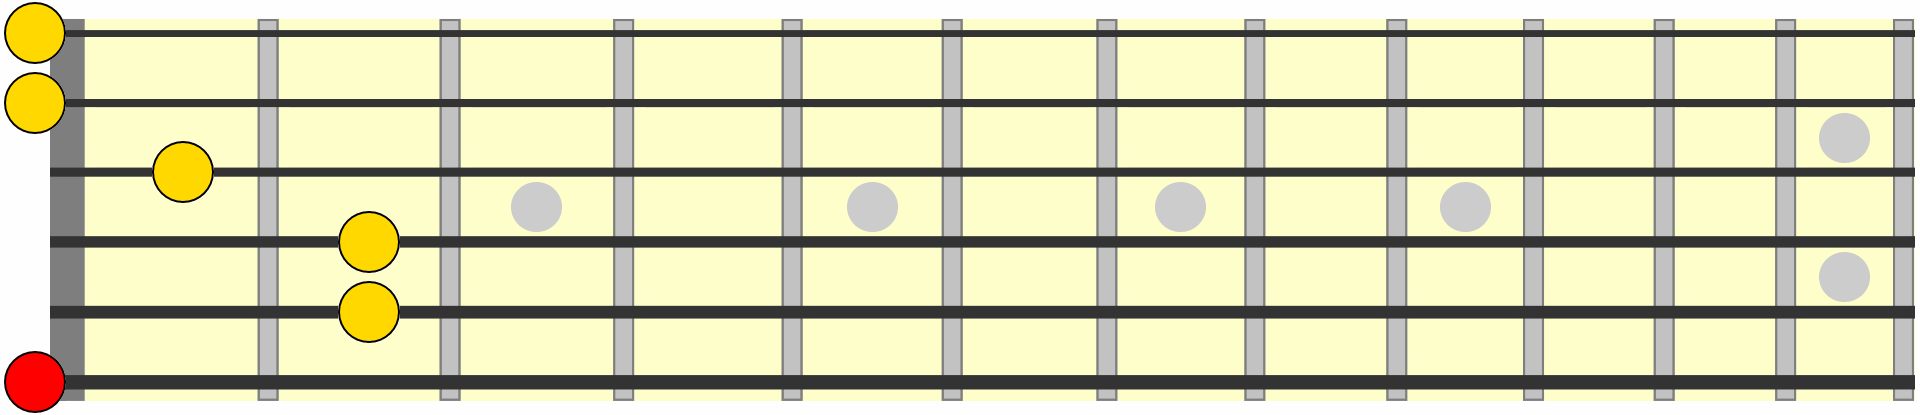
Let's first establish a starting point. Below I'm in the open E major position. If we isolate the notes on the 3rd and 5th strings, we can use this string pairing as our first sixth voicing...
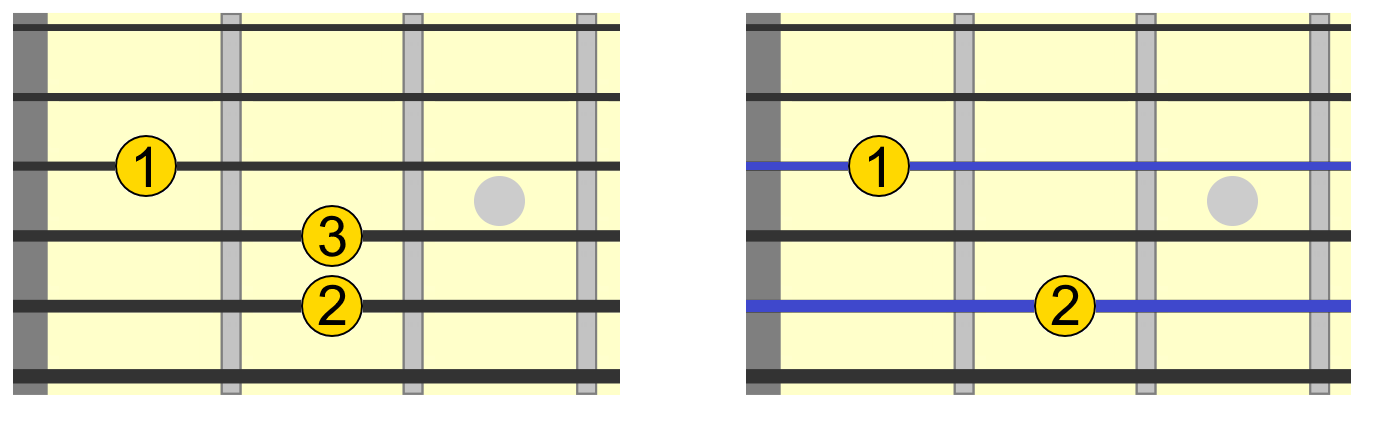
Why is it called a sixth? One way to understand it is if we play the E major scale from the tone on the 5th string to the tone on the 3rd string, they are separated by six tones...
So the two notes form what is known as a sixth interval, because they represent the distance between six scale degrees.
However, as we'll soon learn, we don't need to know scales to make effective use of these voicings.
3rd & 5th String Forms
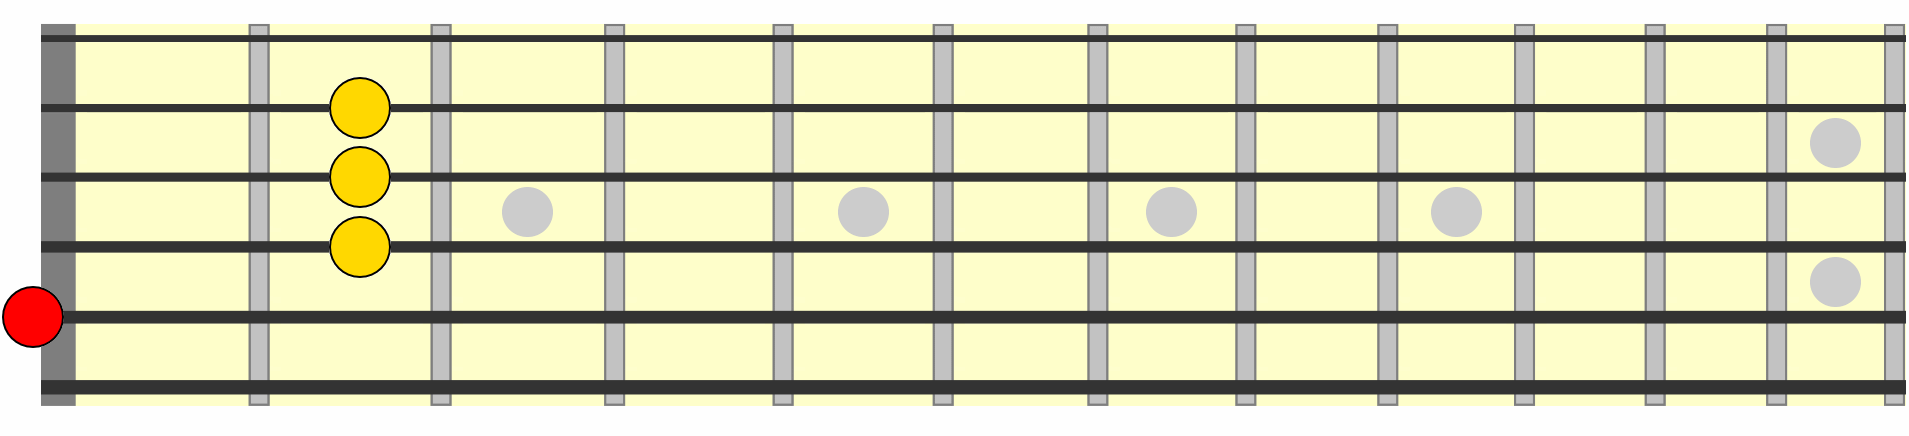
Simply think of this 5th to 3rd string formation (or "form") as something we can take up and down the neck, just like a chord shape. In the below example I'm playing over an E bass note and using that open E major position as a starting point...

Side note: You can of course take these forms beyond the 12th fret. As you may already know, frets 12 and onwards correspond to the octave of frets 1 to 11.
For example, a form played at the 14th fret will be the same as one played at the 2nd fret, just higher in pitch. So as you come up with sequences, see if you can repeat them beyond the 12th fret. A good way to test your octave positioning skills!
String Muting
We might want to strum the interval for more rhythmic attack. To get a clean voicing of this interval, you'll need to mute the strings around it as best you can.
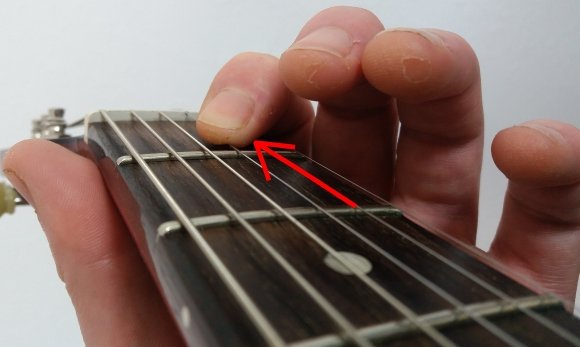
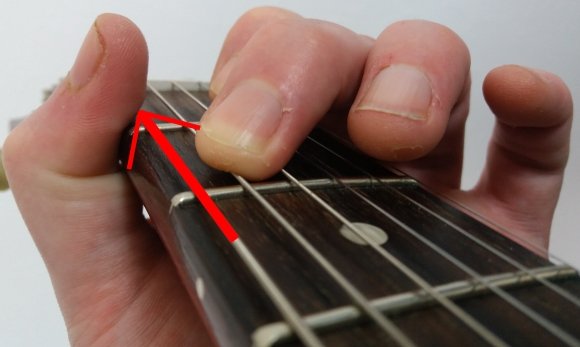
To mute the 2nd string, collapse back your index finger so it touches the 2nd string...
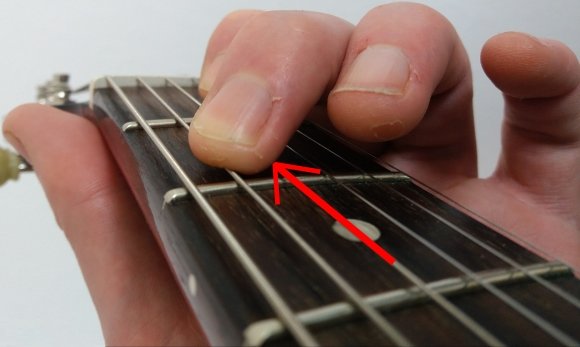
To mute the 4th string in between, collapse back your middle finger so it touches the 4th string...
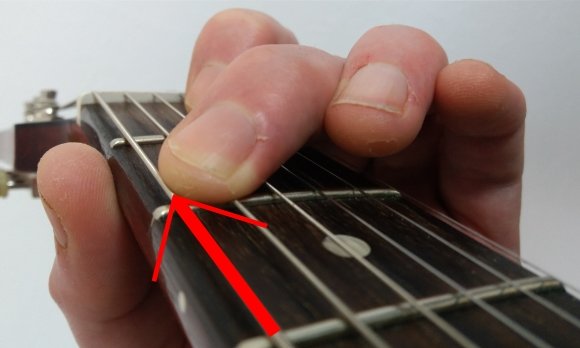
To mute the 6th string, there are two options...
You could wrap your thumb around the neck so it touches and mutes the string...
Or you could mute it with the tip of your second finger. This finger is also muting the 4th string...
This will take some time and practice, but it will allow you to strum the interval cleanly wherever you are on the neck.
We'll be using similar muting techniques on the other strings and in general you'll be using similar muting techniques with other areas of playing, so it's good to spend time on it!
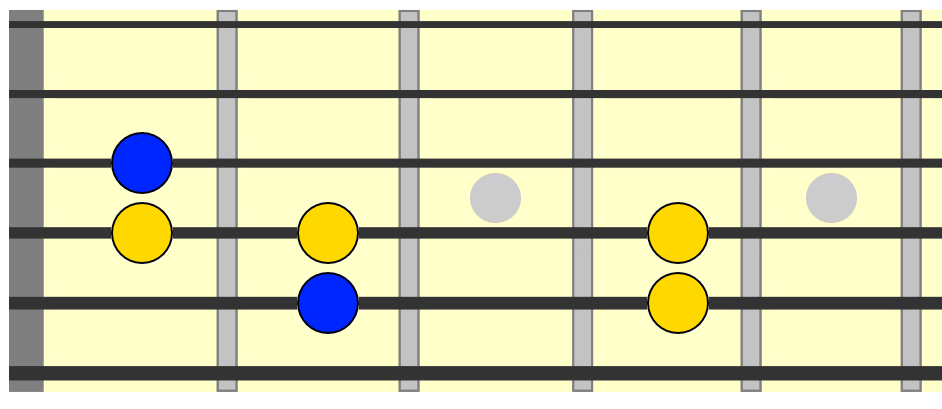
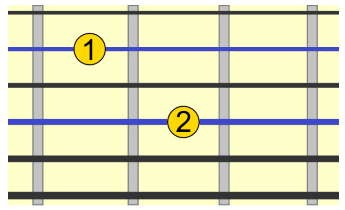
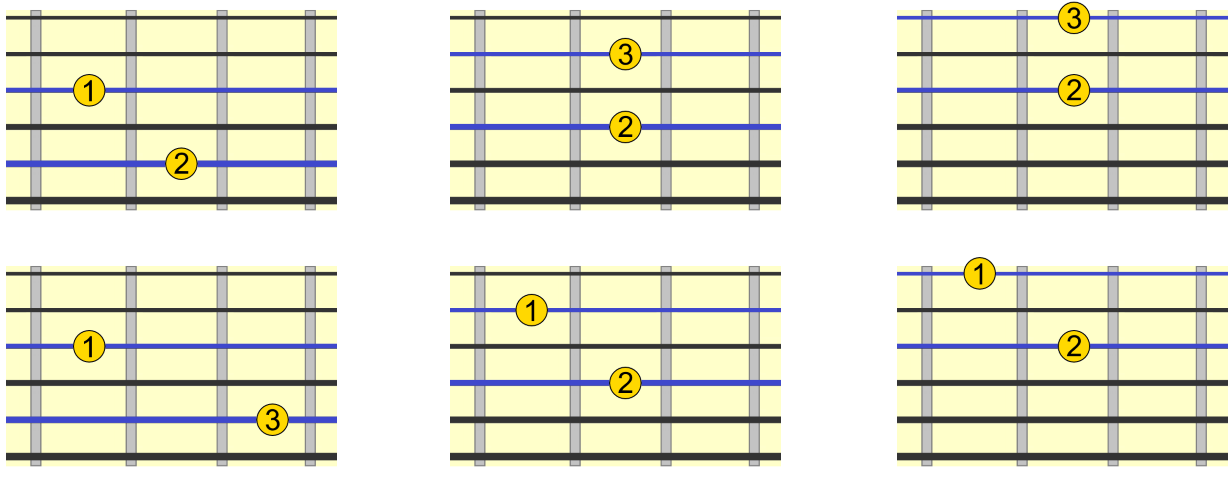
Now, each string pairing we're going to look at has two forms. We've already established our first form on the 3rd and 5th strings.
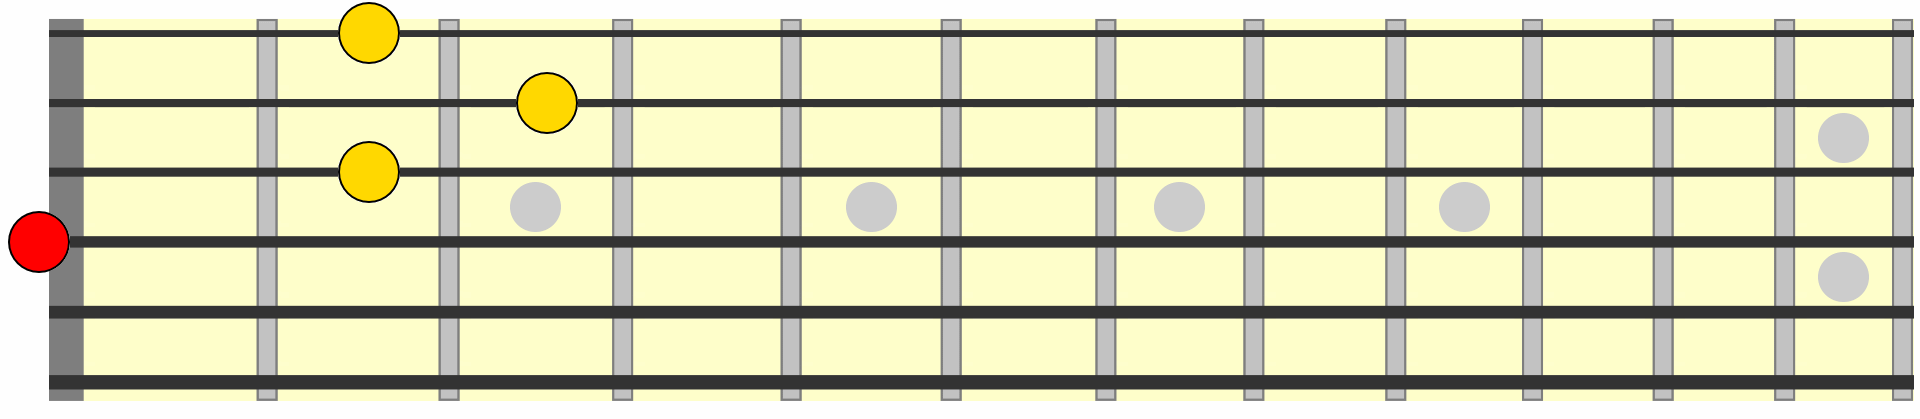
Here's the other...
The same process applies for muting adjacent strings. In this form, our ring and index finger are collapsed back, and the low E is muted either by our thumb or ring finger tip.

We can also take this form across the neck, although like with the first form, you'll find it sounds better at some frets than others, depending on the chord or bass you're playing over.
Here I'm playing over an E bass note again, but we'll look at applying these forms to other notes and chords later...

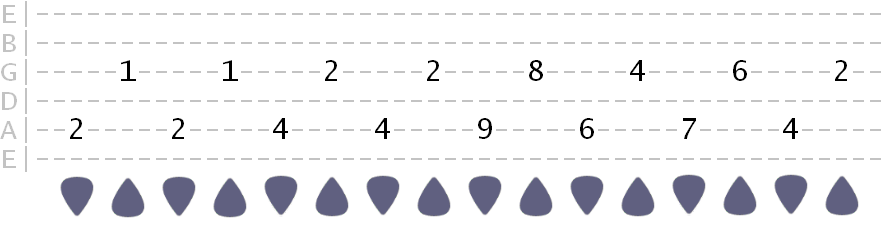
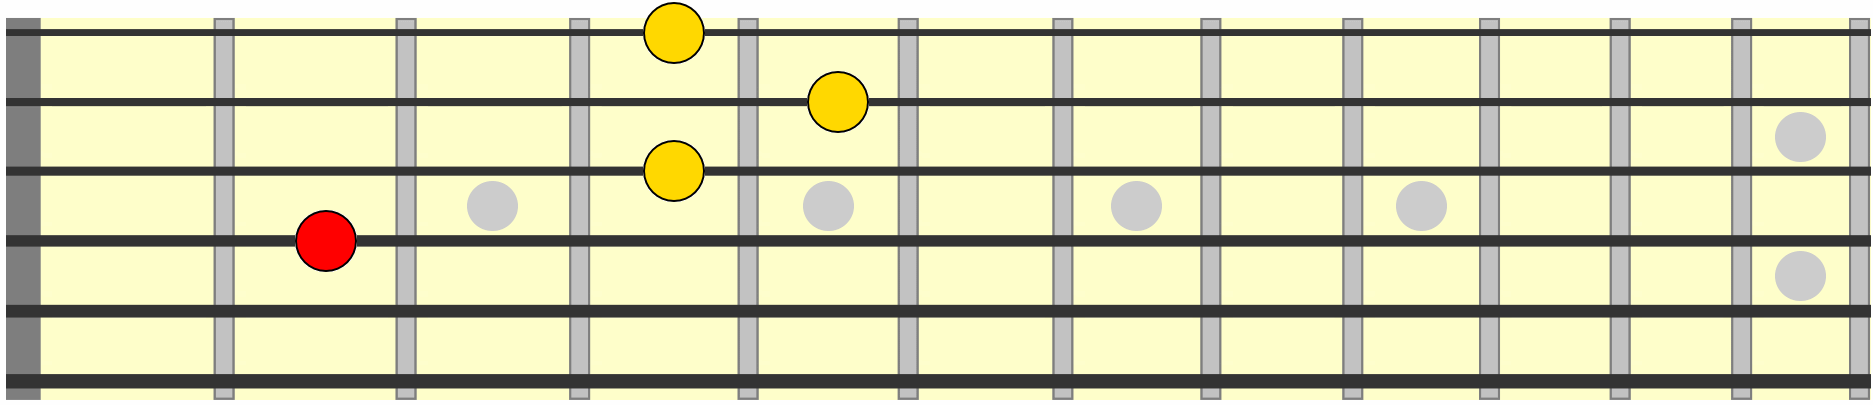
Now we have our two forms for this string pairing, we can try combining them in a sequence.

This is where knowledge of scales can help, but it's not necessary. For example, we could sequence the two shapes based on the E major scale...

Each position represents a degree of the scale played in sixths.
Or we could improvise something that doesn't conform to one specific scale...
Picking & String Skipping
You can also use these forms to practice a simple string skipping technique.
Simply use alternate picking. Pick down on the 5th string and then up on the 3rd string, so you're picking in the direction of travel, making sure not to hit the 4th string in between...
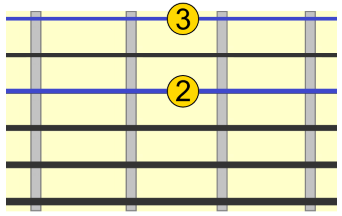
2nd & 4th String Forms
Now let's move to our next string pairing, on the 4th and 2nd strings, where we can build two additional 6th forms.
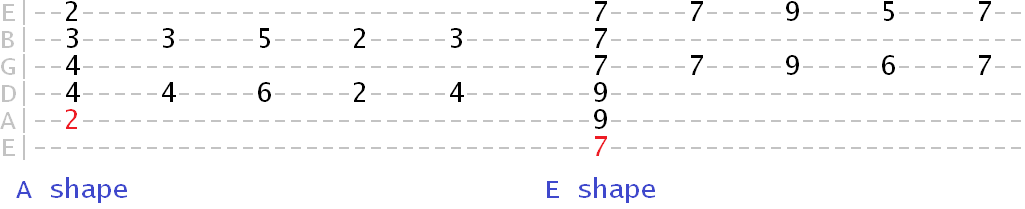
Since we're in E major for this example, we could visualise a starting point around an A form chord at the 7th fret...
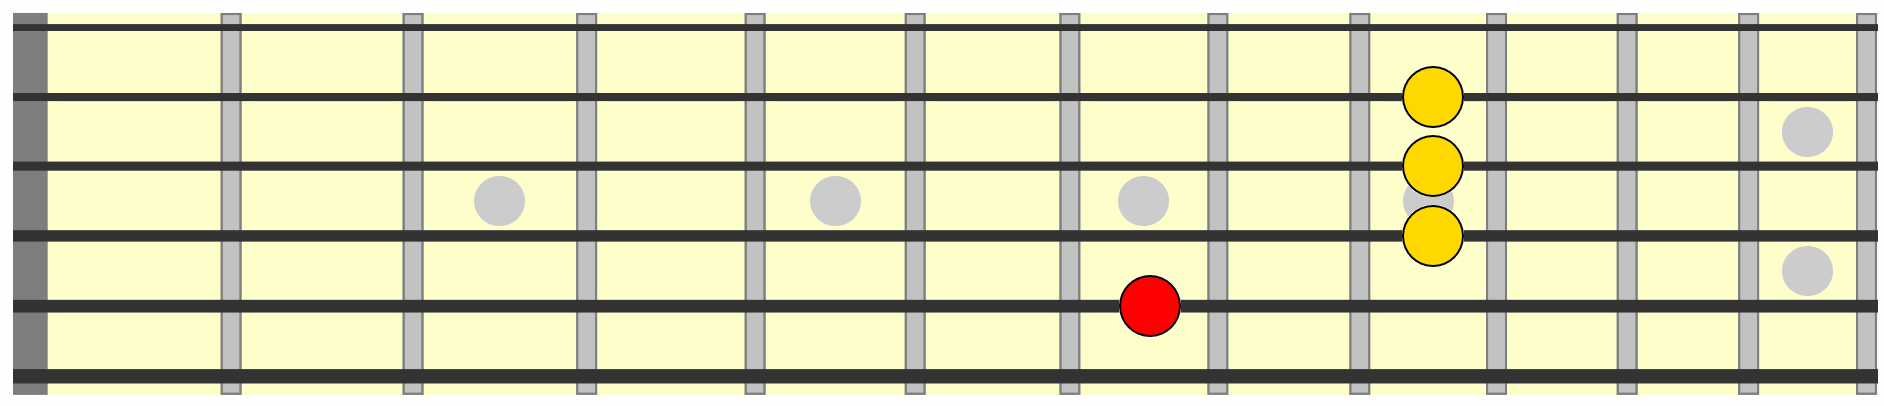
So those blue dots represent our first form for this string pairing...
Again, practice collapsing back fingers to touch and mute adjacent strings.
On to our second formation on this string pairing. Again, for E major, I could visualise a starting point around this C shape chord form...
Like before, let's try combining the two forms across this string pairing and see what we come up with...

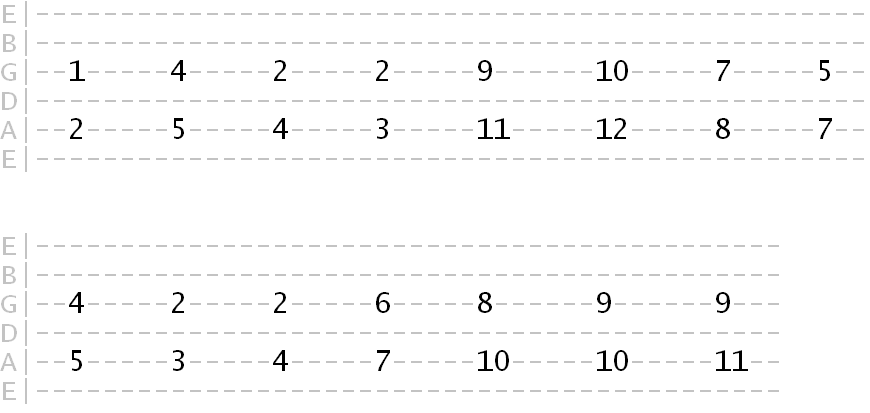
We now have two string pairings, giving us a number of positions to harmonise in 6ths.
For example, here I'm playing the same movement around E major in different positions...

1st & 3rd String Forms
On to our final string pairing, on the 1st and 3rd strings.
Since we're in E major for this example, we can again use that as a starting point. Here I'm visualising the first form around a D shape on the 2nd fret. You could also see this as built around a C shape...
So if you've learned the neck using the CAGED method, extracting 6ths from these positions is another way of using it.
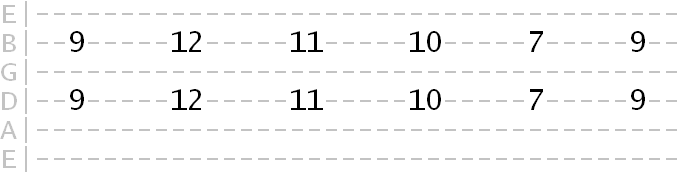
And the second form on these strings...
We can use the top part of the E shape for this one. In E major, we'd play this in the open position...
Again, let's try combining the two forms in a harmonised sequence...

Applying These Forms To ANY Chord
What we now have are 3 string pairings, each with two forms we can use to play across the neck in 6ths...
Now, we can apply these forms to any chord we want to play around.
For example, in A major, I might visualise reference points based on shapes for that chord (e.g. the CAGED or barre chord shapes you may have learned).
The animation below cycles through all these 6th form positions being "extracted" from their relative chord shape...
What about D major?
And these 6th forms we've learned also work for targeting minor chords. Take B minor as an example...
So all we're doing is extracting the 6th forms we've learned from relative chord shapes, which you may have already learned through the CAGED method (or learning barre chords), to get our bearings.
This doesn't mean we literally have to begin our 6th movements on those chord positions. But having those reference points will give you a center around which to build your movements.
Chord Backing Tracks
At first you'll want to practice these 6th movements over single chords.
Below are several chord backing tracks. No chord changes. Use them to practice different 6th movements...
Major Chords
A Major
C Major
D Major
E Major
G Major
Minor Chords
A minor
C minor
D minor
E minor
G minor
