


5 Basic Guitar Chords - Looking Over the Shoulder
Welcome to the basic guitar chords series. These should be some of your first chord lessons, as they lay the foundations you will later build on as your chord playing develops.We're going to be looking at open guitar chords, sometimes referred to as open position chords.
Why open? Well, when we play a string open, it means we don't fret/finger it and just play it as it is. Open position chords use both fretted strings and open strings. As a result, they have a vibrant, full, ringing sound, which is why you'll probably be drawn to these chords for your entire guitar playing life. Some of the most loved music out there exclusively uses the simple chords you're about to learn.First, a short introduction, then you'll have the chance to learn the chords as you see and hear them.
Note: Make sure you know how to finger chords correctly!
The series at a glance...
 Major Chords (see below)
Basic guitar chords introduction - major & minor
You've probably heard the terms major and minor being thrown around by musicians when talking about chords. The difference between major and minor chords will become crystal clear once you learn both types. You'll be able to hear how different chords offer different emotions for your music.
The general consensus regarding major and minor, however, is major = happy sounding chords and minor = sad sounding chords. Now, that's a hugely oversimplified generalisation, but at this stage that's the main distinction you'll hear.
So, first in this basic guitar chords series, I'm going to show you the major open chords, then we'll look at the miserable minor chords, and more variations...
One more thing before we start - have you tuned up?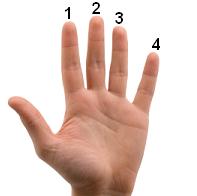 The
5 major open position chords
The
5 major open position chords
When looking at how these chords are fingered, it's best to think of them as shapes. Your fingers will create a specific shape on the fretboard as they form the chord.
Try to memorize the shapes as you play them.
Click the photos/diagrams to hear the chord played one string at a time and then strummed.
E major open position chord
|
|
|
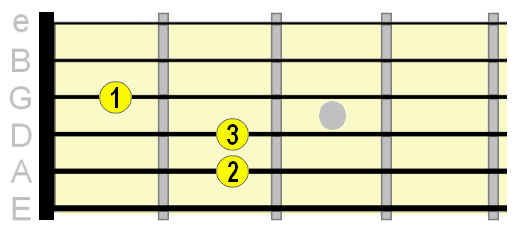
A major open position chord
|
|
|

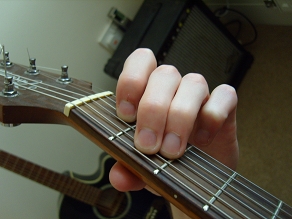
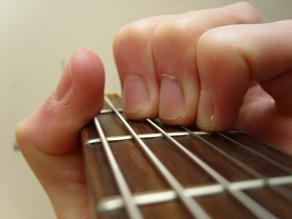
Don't worry if at first your fingers seem a little crowded. This won't bother you for long! Just line them up as snugly as you can, with the 4th finger closest to the fret wire, and make sure each string sounds cleanly.
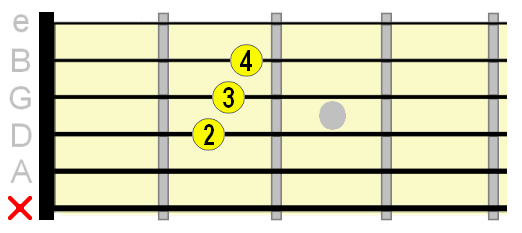
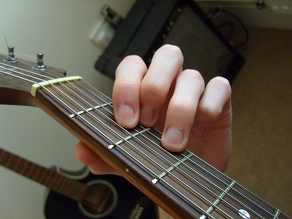
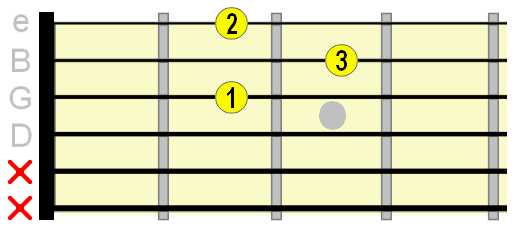
D major open position chord
|
|
|
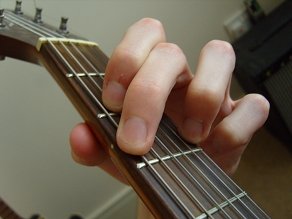
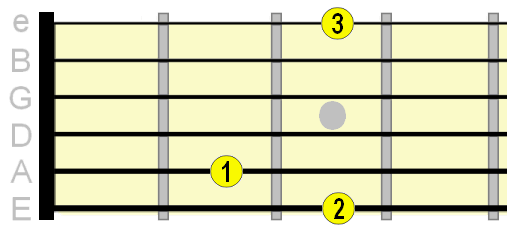
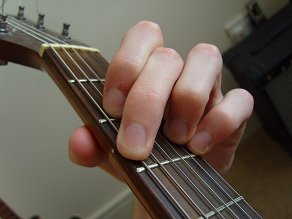
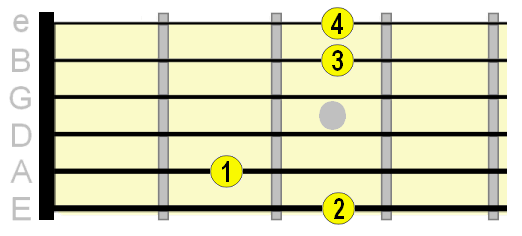
G major open position chord
There are a couple of ways to finger this chord. Learn both, as each offers its own voicing...
Option 1
|
|
|
Option 2
|
|
|
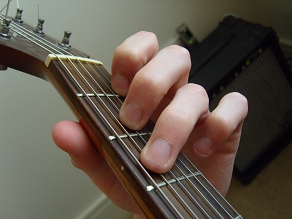
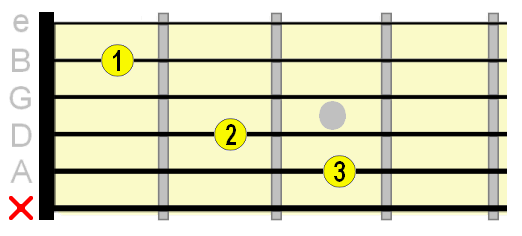
C major open position chord
This is one beginner guitarists tend to have the most trouble with. Keep changing between this chord and other open chords in this lesson to develop that "muscle memory" in your fingers - again, the awkward fingering won't trouble you for long if you keep practicing it.
|
|
|
A tip for muting the low E string
You'll notice that with the A, C and D chords the low E string is not played. At first, it can be difficult to avoid playing it when strumming up and down. Here's a technique I use to effectively mute that low E string when needed...
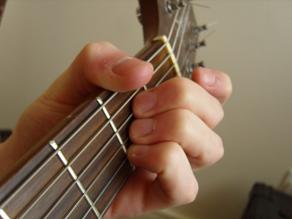
Now, I understand this is a bit more difficult for those of us with smaller hands, but if you can't physically use this method, keep practicing avoiding those unwanted strings, simply by not picking/strumming them and you'll eventually do it without thinking.
Changing between chords
At first, it might seem like your fingers just don't want to co-operate! That's perfectly normal, and all it boils down to is getting your fingers physically used to it. We call that "muscle memory" and once it sets in, changing between chords becomes something you can do in your sleep.
Here's a great video on making smooth chord changes using some of the chords learned on this page.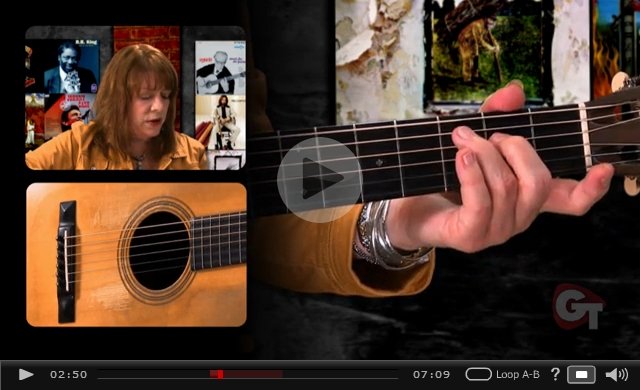
You can find more chord changing exercises here.
Was this lesson helpful? Please Like, Tweet or +1 it, thanks!
| |
Tweet |
^ Back to Top


