


Guitar Pull Off Basics
This lesson we'll be introduced to the guitar pull off technique and then we'll move on to some all important finger exercises to get all our fingers involved.But first...
What are pull offs?
The inverse of hammer ons, they're a pick-free way of sounding a particular note/string. You basically lift off the fretted string as usual, but pull away with your finger so the string gets lightly plucked. Therefore, it's like your fret hand is doing the picking. You'll see this in action in the videos in a minute...
Pull offs add texture to your solos and allow you to create descending runs and phrases quickly and smoothly, often called "rolls" or "slurs", without the percussive effect of the pick separating the notes.
Let's get straight into some
videos and basic
exercises now...
Basic guitar pull off exercises
The pull off is like the opposite of the hammer on. So, we start on the fretted string/note and use the pull off technique to make a quick, smooth descent down the fretboard, to a lower note we're playing. A finger should already be fretted in place ready to "catch" the pull off...
We need to get all our fingers involved in the different interval movements we'll likely come across when playing scales.
 A
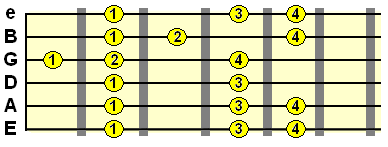
good place to begin is with the below minor pentatonic scale box
pattern,
which you can position at any fret, but in this example,
we're at the
5th fret on the low E string (which makes it the A minor pentatonic
scale)...
A
good place to begin is with the below minor pentatonic scale box
pattern,
which you can position at any fret, but in this example,
we're at the
5th fret on the low E string (which makes it the A minor pentatonic
scale)...
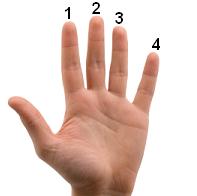
Fret your index/1st finger on the high e string, in the position above. With your index finger still fretted, fret your 4th finger in its designated position on that same string. It's important to have that index finger ready to "catch" the pull off you'll make with your 4th finger.
When you're in position, pick the string as usual and, about a second later, pull your 4th finger away so you're lightly plucking the string. Watch the video below to see how it's done...
Now, there's a fine balance to attain here - you need to pull away enough so the string will be plucked and resonate, but not so much that you bend the string out of pitch. This will come with time and practise!So don't just lift off the string, as the resonance of the following note will be too weak. Rather, pull off! That's why it's called what it is!
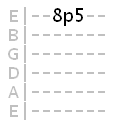
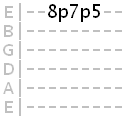
Here's how we would tab the above sequence, with the "p" symbol telling us to play the two notes either side using a pull off...
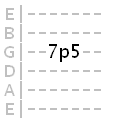
OK, now let's try exactly the same thing, but on the G string of that pentatonic pattern from above.
So, like before, first fret your index finger "base". Then we're going to pull off our 3rd finger a whole step higher...
When pulling off under gain/distortion, how a lot of lead guitar solos are played, the resonance of the pulled-off note will be a lot stronger and your pull off action can be more subtle. However, it's good to learn the technique playing clean first so you don't cut any corners.
So, there are two commonly used pull off intervals we've covered above.
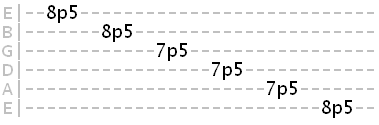
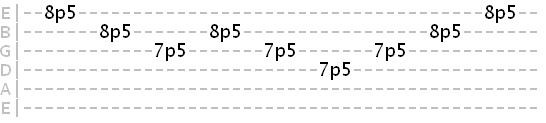
Now try working the pull off action from the high E to low E string, in the full pentatonic scale from above...
Tip: You should start slow with any technique and gradually build up speed with a metronome!
Try to keep the timing smooth and constant, no matter what speed you play it. Just let the pull offs flow or "roll" into each other. At first, you'll experience unwanted noise from other strings, but as your pull offs become more accurate, you'll minimise this noise. Each note needs to sound cleanly and clearly!
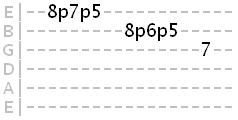
The next logical step is to move up and down the scale pattern. Try and come up with your own little pentatonic pull off sequences. For example:
Using more than one pull off per string
Once we're comfortable with the basic technique, we can move onto larger phrases, using more than one pull off per string to create a kind of rolling, slurred effect.
So, exactly the same pull off technique as before, but you're going to follow the first pull off immediately with another. This is where you can draw from scale patterns with more than two notes per string. For example, the natural minor scale in its first position box form (also the 6th degree pattern of the major scale)...
Starting on the high E string...
And now a roll down the top two strings, 3 notes per string...
When speeded up, this is known as legato playing - a straight slur of notes with no breaks (more on this type of playing another time!)...
Try the tab exercises below. The first string of pull-offs (represented by the "p" in tabs) is broken up by 2 "resting notes".
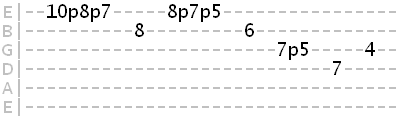
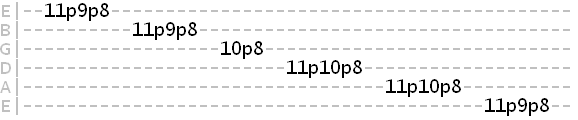
The next involves a straight run of pull-offs from high E to low E. Remember, we're picking the first note on each string and pulling off two consecutive notes (with the exception of the G string which is one pull off).
Tip: Start slow with any technique and gradually build up speed with a metronome!
Hopefully, after following and practising the exercises in this lesson you should now be pretty confident with the physical side of the pull off technique.
| |
Tweet |
Sign up to the newsletter for updates and grab your free Uncommon Chords book
Related Lessons
Hammer Ons and Pull Offs Together


