


Open Minor Guitar Chords
In the first basic guitar chords lesson, we looked at major open position chords as the first milestone of our chord knowledge. Now we're going to look at open minor guitar chords, which are built around the same basic positions from part 1 - E, A, D, C and G. Free chord
cheat sheet Free chord
cheat sheetLearn how guitar chords work together in any key... Click here to start now |
Minor chords - an introduction
In part 1, I mentioned how major and minor chords are most broadly differentiated. Major chords sound bright, happy, warm... minor chords sound ominous, sad, cold, dark etc. But did you know that the only difference between major and minor chords is just one single note?
As you'll see in a minute, we only change one note in the major chord to turn it into a minor chord, yet the difference in sound is huge (as you'll hear).
See, there is only one single note responsible for making the chord major or minor, and it's worth understanding which note that is. In music theory, it's known as the "3rd", but the important thing at this stage is that you can hear what makes a major chord major and a minor chord minor. Based on your knowledge of the major chords from part 1, see if you can identify which note we are changing, and where we move it to create the minor equivalent...The
5 open minor guitar chords
Many guitar chord lessons you'll see in books and online will only show you the most common minor chord shapes - E, A and D. This is because C and G minor open shapes are not as commonly used. However, I would still advise learning them, because it's good to keep your playing options open. You never know when you'll "need" them!
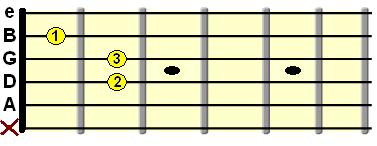
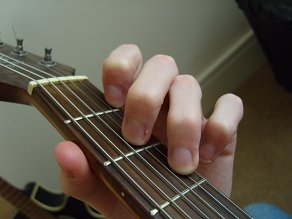
Click the photos/diagrams to hear the chord.
E minor guitar chord
Some people prefer to use their 1st and 2nd fingers for this one.
|
|
|
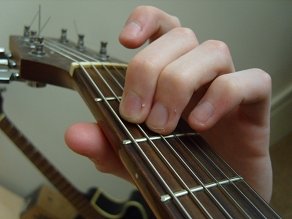

A minor guitar chord
|
|
|

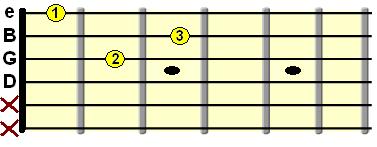
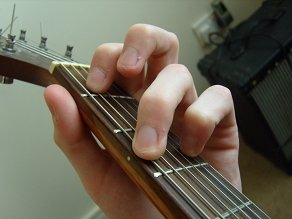
D minor guitar chord
|
|
|
G minor guitar chord
This one offers a deeper minor voicing.
|
|
|
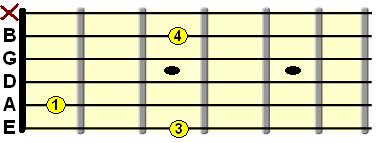
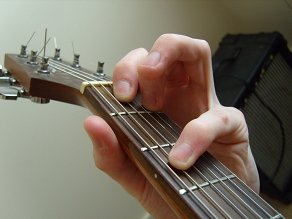
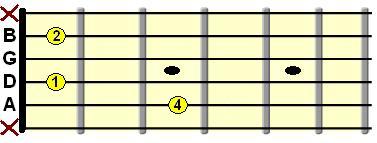
C minor guitar chord
Obviously you don't need to raise your 3rd finger like I do in the pic. That was just so you could see the fingering clearly. If your hands are big enough, you may be able to use 3rd finger in place of 4th. Don't worry if no matter how much you try you just can't finger this one - it's not essential to learn, but it's just another chord to add to the library.
|
|
|
Practice changing between open chords
Now we have effectively doubled our library of chords to include both major and minor, we can really start to create more meaningful music. Mixing minor and major chords in your songs adds depth to the music.
This is also a good opportunity to get physically confident with changing between major and minor shapes. Before you play over the jam track below, use a metronome to gradually build up your speed with changing chords. Make sure the changes are smooth and clean before you speed up a notch.
When you're ready, try the exercise below. Just like in the first lesson, you don't need to think about strumming patterns, just focus on the chord changes in time with the rhythm.
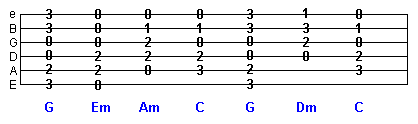
Guitar Example - Download Jam Track
Also, as always with these lessons, try making your own sequence from the guitar chords we've learned.
The more you practice changing between chords, the sooner you will be ready to move on to using more advanced chord fingerings. However, don't feel like you're in a rush. Take your time, there is no exam deadline for this! It's important to make sure you're 100% confident with fingering these chords before you move on.
Keep playing around with the major and minor open chords you've learned. The sooner you start to create your own music, from your own ideas, the more you will begin to understand music and how chords work, naturally.
| |
Tweet |
Sign up to the newsletter for updates and grab your free Uncommon Chords book
Related
Open 7th Guitar ChordsMore Beginner Guitar Lessons
Learn Guitar Chords


