


Guitar Chord Basics - How to Finger Chords
Before you go on to learn your first chords, there are some guitar chord basics to cover first.This lesson covers the physical aspects of using your fingers on the guitar fretboard to create chords, often referred to as fingering. It's important to position your hand and fingers correctly so the chords ring cleanly and vibrantly.
Unfortunately, too many beginners struggle with chords simply because they're not positioning their fingers correctly. That won't be you!
What is a chord?
A chord is 3 or more notes played together. On guitar, each string adds a new note to the chord.
Your fingers press strings at particular fret spaces to create the notes needed for the chord you're playing. Guitarists often think of this formation of fingers on the fretboard as chord shapes. Soon, you'll know several chord shapes and the type of sound they create.
And that's really all there is to it! Of course, you can create both simple or complex chords on the fretboard. Some chords use just 3 strings, others use all 6 strings. As time goes on, you'll learn which chords best fit the sound you're trying to get across in your music.
For now though, let's learn how to apply our fingers on the fretboard correctly.Fingering guitar chord basics
As we're learning how to apply our fingers on the fretboard correctly, I'll show you two simple chords to start with, but bear in mind there's a separate series of lessons where you can learn many more chords, which I'll link to at the end of this lesson.
Take a
look at this first chord...
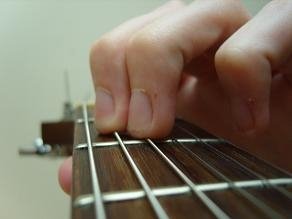
E major guitar chord basics
The E major chord uses 3 of your fingers, but uses all 6 strings. The strings that aren't fingered are played as they are - open. The open string notes are part of the chord, in other words.
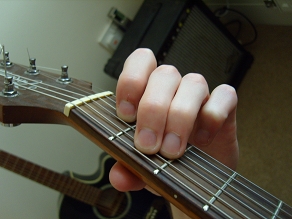
Some key points to note:
- Use the finger tips to apply the strings.
- Position the finger tips snug against the fret wire (or as close as you can), but not actually on the fret wire itself.
- Ensure your finger tips are angled vertically down (again, as much as you can) on the strings. This ensures you don't accidentally touch any adjacent strings.
- Don't press the strings too hard (known as over-fretting). The lower (fatter) strings will need a little more pressure than the higher (thinner) strings. You only need to fret the strings with enough pressure that the notes sound cleanly and resonantly.
Once you're comfortable, try picking each string
from low to high E.
Does each string sound cleanly? Is there any buzzing or obstruction in
the sound? It's likely there will be at first, so all you need to do is
adjust and try again until every string sounds cleanly.
This requires some patience at first, but stick with it, you will get
there! Repeatedly lifting off and re-fretting the chord is a good initial exercise.
Pain and Calluses
At first, fingering chords may be painful, as you're exerting pressure on your finger tips. After a short time, you'll develop a hard skin on your finger tips known as calluses which is your body's natural way of dealing with this consistent pressure. Just be patient, persevere and practice the chords you learn in the coming lessons daily if you can. Any pain will soon vanish!Muscle Memory
Muscle memory is when your fingers get used to
being in a certain
position. The idea is, if you practice the E major chord above with enough regularity,
the muscle memory will set in and you'll be able to form your fingers
to that shape almost instantly, without thinking or adjusting. In the
later chord lessons, there'll be jam tracks to help you practice
changing between chords, which really helps develop this muscle memory.
Ok, let's just try one more chord for now...
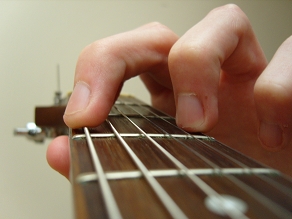
G major guitar chord basics
G major is another chord which uses all 6 strings, but only 3 of your fingers are needed on the fretboard.
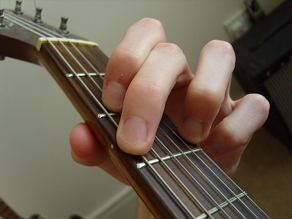
So, same points as before - finger tips angled almost vertically down (rather than collapsing back too much), positioned towards the fret wire. Make sure all strings/notes ring out cleanly without any obstructions.
Was
this
lesson helpful?
Please let others know, cheers...
| |
Tweet |
Related


